


64
English
65
Setup Menu Options (continued)
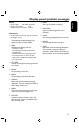
PREFERENCES settings (underlined options are the factory default settings)
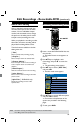
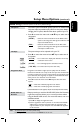
Some DVDs may have a parental level assigned to the complete
disc or to certain scenes on the disc. This feature lets you set a
playback limitation level.
The rating levels range from 1 to 8 and are country dependent.
You can prohibit the playing of certain discs that are not
suitable for your children, or have certain discs played with
alternative scenes.
l
Press to access this menu and use keys to select one of
the options.
{ 1. Kid Safe } ~ { 2. G } – Childsafe; acceptable for viewers of all
ages.
{ 3. PG } – Parental Guidance suggested.
{ 4. PG13 } – Unsuitable for children under age 13.
{ 5. PG R } ~ { 6. R } – Restricted; recommended that parents
restrict children under 17 from viewing or allow to
view only when supervized by a parent or adult
guardian.
{ 7. NC 17 } – No children under age 17; not recommended viewing
for children under age 17.
{ 8. Adult } – Mature material; should be viewed only by adults due
to graphic sexual material, violence or language.
{ Off } – Parental Control is not active.
DVDs that are rated higher than the level you have selected will not
play unless you enter your four-digit pin code.
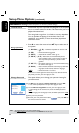
This option allows you to change your password setting for
parental control.
A
Use
keys to highlight { Change Password } and press OK.
You will be prompted to enter your four-digit pin code.
B
Use the Numeric keypad 0-9 to enter your four-digit pin code.
When doing this for the rst time, enter the default password
‘3308’.
If you forget your four-digit pin code, the default password is 3308.
C
Enter your new password.
D
Re-enter your new password and select
OK
OK
, then press OK on
the remote control to conrm.
TIPS: The underlined option is the factory default setting.
Press
to go back to previous menu item. Press SETUP to exit the menu.
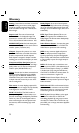
AUDIO settings (underlined options are the factory default settings)
Setup Menu Options (continued)
l
Press to access this menu and use keys to select one of
the options.
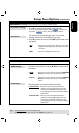
{ RAW } – Select this if you have used the recorder’s COAXIAL
OUT jack to connect to a multichannel receiver.
{ LPCM } – Select this if you have used the recorder’s COAXIAL
OUT jack to connect to a stereo or audio/video
system.
This setting allows you to select between two levels:
{ LPCM 48 kHz} – Select this if the connected audio device is
capable of processing digital signal input with
sampling rates of 48 kHz. In addition, the disc
you are playing back must be recorded in 48kHz
LPCM format.
{ LPCM 96 kHz} – Select this if the connected audio device is
capable of processing digital signal input with
sampling rates of 96 kHz.In addition, the disc
you are playing back must be recorded in 96kHz
LPCM format.
SPDIF Output
LPCM Output
PREFERENCES settings (underlined options are the factory default settings)
l
Press to reset the menu settings of this recorder.
A warning message will appear. Select
OK
OK
in the menu to
proceed or
OK
CANCEL
to abort, then press OK to conrm.
The screen saver prevents damage to the TV screen by
avoiding exposure to a static image for too long.
l
Press to access this menu and use keys to select one of
the options.
{ On } – Select this if you wish to turn off the TV screen, after
playback had been stopped or paused for more than
15 minutes.
{ Off } – Select this to disable the screen saver.
Reset Menu settings
Screensaver
TIPS: The underlined option is the factory default setting.
Press
to go back to previous menu item. Press SETUP to exit the menu.