


Directions for Use
EN 6 FHP PDP3.
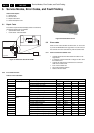
3. Directions for Use
Not applicable.
4. Mechanical Instructions
Notes:
• Figures below can deviate from the actual situation, due to
different set executions.
• For more detailed instructions regarding the (dis)assembly
of the TV chassis that hold these PDPs, read the
corresponding TV Service Manual.
4.1 Board Swap Instructions
4.1.1 General
Before dismounting panels read notes below!
Caution when removing circuit board!
When removing the circuit board after the main power is turned
on/off, wait for at least one minute before starting to remove the
circuit board.
If the circuit board removal is started immediately after turning
off the main power, it can result in electric shock or damage to
the circuit due to residual electric charge.
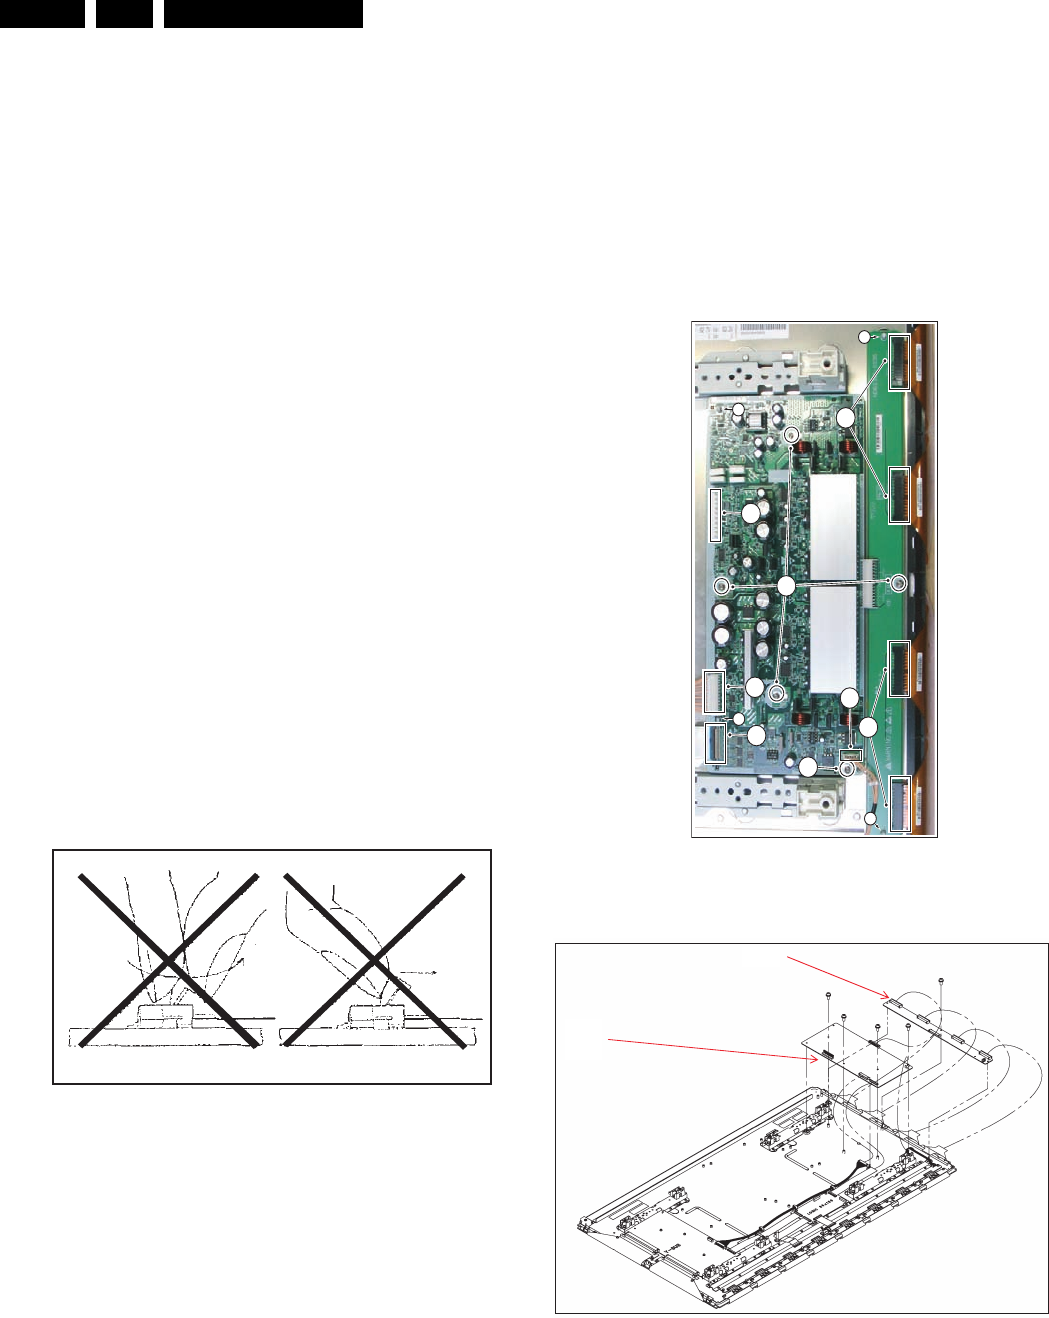
Caution on handling the FPC connector!
To release the black lock lever of the connector, flip it up gently
in the middle with the nail of the thumb or forefinger, from the
side with the cable.
Never pinch the lock lever with fingers or tools. Doing so might
damage the lock lever.
Figure 4-1 Handling the FPC connector
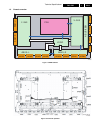
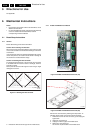
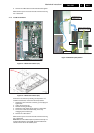
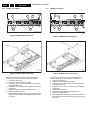
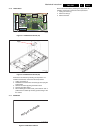
4.1.2 X-SUS and X-BUS Circuit Boards
Figure 4-2 X-BUS and X-SUS board removal (1/2)
Figure 4-3 X-BUS and X-SUS board removal (2/2)
Remove the circuit boards by following the steps below. To
install the circuit boards, reverse the removal procedure.
1. Release the lock of the FPC connector [1] and unplug the
signal cable.
2. Unplug the connectors [2].
3. Unplug the 4 XFPC’s [3] on the X-BUS board.
4. Remove the fixing screws [4].
5. Release the white stand-offs [5] from the X-SUS board, and from the top and bottom of the X-BUS board.
E_14580_025.eps
071005
G_16400_007.eps
300706
4
5
5
2
5
2
1
2
3
3
4
5
X-BUS
X-SUS
G_16400_008.eps
180706