


11Installation
Caption Service
Closed Captioning allows you to read the voice content of
television programs on the TV screen. Designed to help the
hearing impaired, this feature uses on-screen ‘text boxes’
to show dialogue and conversations while the TV program
is in progress. Captions will appear on the screen during
captioned broadcasts.
Note:The captions do not always use correct spelling and
grammar.
Not all TV programs and product commercials are made for
broadcast with Closed Caption information included. Refer to
your area’s TV program listings for the TV channels and times of
Closed Caption shows.The captioned programs are usually
noted in the TV listings with service marks such as ‘CC’.
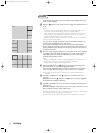
& Select Caption Service with the cursor down.
é Press the cursor right.
“ Select the desired Caption Service
• CC 1, 2, 3 or 4
Dialogue (and descriptions) for the action on the
captioned TV program shows on screen.
Usually CC 1 is the most used. CC 2 may be used for
alternate languages if they are being transmitted.
•
T 1, 2, 3 or 4
Often used for channel guide, schedules, bulletin board
information for Closed Caption programs, news, weather
informations or stock market reports.
Not all Caption Services are necessarily being used by a TV
channel during the transmission of a Closed Caption program.
‘ See Closed Captions in the TV-Features menu, p. 14, to turn
the
Caption Service On or Off.
Note:This television receiver provides display of television Closed
Captioning conforming with the EIA-608 standard and in
accordance with Sections 15.119 of the FCC rules.
OSD (On Screen Display)
& Select OSD with the cursor down.
é Press the cursor right to select Normal or Minimum.
Normal to activate the continuous display of the channel
number and extended display of TV channel and channel
information on screen.
Minimum to activate the display of reduced channel
information.
See Use of the Remote Control, p. 6, Display information.
Time zone
This function allows you to select your local time zone.
Broadcasted time information will correct the clock display
for your local time.
& Select Time zone with the cursor right.
é Select your local time zone.
Daylight saving
Daylight saving time is automatically set by specially
broadcasted signals.This menu item allows you to disable
the automatic setting of daylight saving time.This is useful if
you live in an area or state where daylight saving is not
applied, but you receive channels from other areas where
daylight saving signals are broadcasted.
& Select Daylight saving with the cursor right.
é Select Automatic for automatic clock correction for
daylight saving time, based on specially broadcasted signals.
“ Select Off to disable automatic clock correction based on
the specially broadcasted signals.
Center mode
When you have connected a multi channel audio receiver
to the receiver box (see Connect peripheral equipment, p.
30) and you have selected
Center mode Yes, the
loudspeakers of the monitor will act as center speaker,
making a separate center speaker unnecessary.
Set/Change pin
The Set/Change pin menu item allows you to create or
change a Personal Identification Number (PIN).
& Select Set/Change pin with the cursor down.
é If no PIN exists yet, the menu item is set to Set pin. Follow
the instructions on screen.
If a PIN has previously been entered, the menu item is set
to
Change pin. Follow the instructions on screen.
All number combinations from 0000 to 9999 are valid
numbers.
“ The General menu reappears with a message confirming
that the PIN has been created.
Important:You have forgotten your PIN !
& Select Set/Change pin in the General menu.
é Press OK.
“ Press the cursor right.
‘ Enter the overriding pin 0-7-1-1.
( Press the cursor again and enter a new personal 4-digit pin.
The previous pin is erased and the new pin is stored.
Source
This menu allows you to select the accessory device you
connected to one of the AV inputs.
& Select Source with the cursor right.
é Press the cursor down to select one of the AV inputs.
“ Press the cursor right to enter the list of types of
accessory devices attached to the selected input.
‘ Select the accessory device with the cursor up/down.
Once you have selected the source, e.g.VCR, this source
will automatically be selected when your remote control is
in VCR mode, see p. 5, and you press the
SOURCE SELECT
button on the remote control.
1009.4 gb 08-07-2002 11:06 Pagina 11