


31
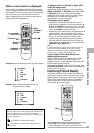
7 Use the cursor buttons (5/∞) to select a new
setting and press ENTER to set the new
setting in memory. Press RETURN or the
cursor button (2) to exit the options without
making any changes.
8 Press RETURN or the cursor button (2) to go
back to the main menu bar to select another
menu.
9 Press SETUP to close the Setup screen.
The Setup screen closes.
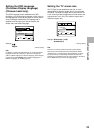
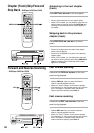
How to interpret the setting indicator colors in
the Setup screen menus
When setting up the system, or when making
adjustments, it is convenient to know what settings are
applicable to the different disc formats. When the
settings appear for each menu option, the currently
selected setting appears with the setting indicator
highlighted in one of three colors: blue, green or yellow.
These colors correspond to what formats the menu
option effects as shown in the table below.
Notes
• If a setting applicable only to DVDs is changed while a Super
VCD/Video CD or CD is loaded, a blue DVD icon appears in the
upper right hand corner of the screen to indicate that the
setting is not applicable to the currently loaded disc. The
setting will be effective the next time a DVD is loaded.
• The blue indicator is shown for the [TV Screen], but the aspect
can be switched for Super VCD.
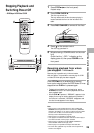
IMPORTANT
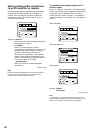
Changing the Setup Screen to
“Expert” Menu Mode
The Setup screen menus are divided into two levels,
“Basic” and “Expert”, to make this unit more
convenient to operate for different levels of users. The
“Basic” menu mode contains functions that may be
considered necessary for the basic operations of this
player and helpful on-screen information identified by the
mark. The “Expert” menu mode adds to the “Basic”
menu mode additional functions of the player that can
be adjusted to further personalize performance of the
player. In this manual, functions that are contained in the
“Expert ” menu mode are identified by the icon.
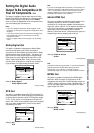
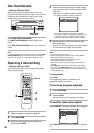
Make changes to the [Setup Menu Mode] setting in the
Setup screen General menu.
Settings: Expert
Settings: Basic*
Note * Factory setting
On-screen information only appears in the “Basic” menu mode.
ADJUSTING AUDIO AND VIDEO SETTINGS
Expert
Parental Lock – Level 8
Setup Navigator
Setup Menu Mode
Audio1 GeneralLanguageVideo2
Move
Exit
Expert
Basic
SETUP
Detailed setup mode
Color of indicator Disc format(s)
Blue DVD only
All compatible formats
DVD/Super VCD/Video CD
Green
Yellow
i
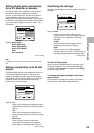
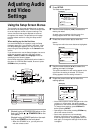
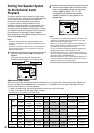
Setting Analog Audio
Connections to an AV Amplifier
or Receiver
This player is capable of both 2 channel stereo and 5.1
multichannel surround sound audio output. Use this
setting to select which analog outputs are connected to
an AV component.
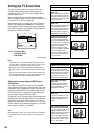
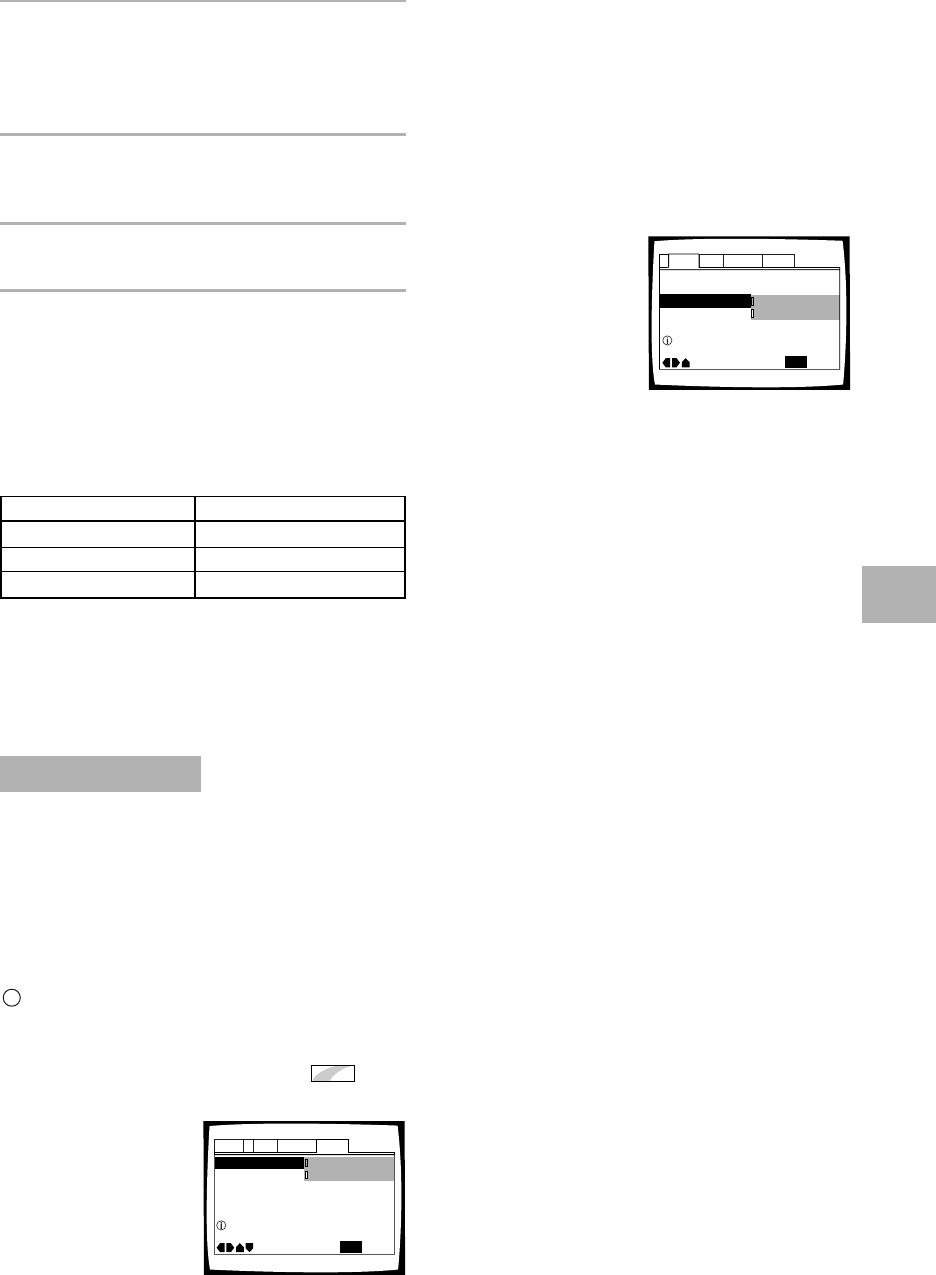
Make adjustments in the [Audio Out] setting in the
Setup screen Audio 2 menu.
Settings: 2 Channel*
5.1 Channel
* Factory setting
Notes
• This setting can also be changed by using 5.1 CH MODE on
the front panel. However, this button does not work when the
GUI indicator is lit.
• When “5.1 channel” is selected, the front right (R) and front
left (L) audio channels output from the AUDIO OUT (2 CH)
jacks.
• If the center or surround components are not recorded on the
disc, there will be no output from the CENTER or SURROUND
output jacks. This is not a malfunction. Speaker channels can
be verified in the program format indicators in the display.
• When “5.1 Channel” is selected at this setting and “Dolby
Digital 3 PCM” is selected in the [Dolby Digital Out] setting in
the Setup screen Audio 1 menu, there is no audio output from
the digital output jacks.
• When 5.1-channel mode is used, MIC vocals are output from
the center speakers, and downmixed disc audio and echo are
output from the front left and right speakers in Karaoke mode.
There is no audio output from the subwoofer or surround left
and right speakers.
Audio DRC – Off
Surround –
Audio2 GeneralLanguageVideo1
Move
Exit
Audio Out
Speaker Setting
5.1 Channel
2 Channel
Off
SETUP
Setting up audio output