


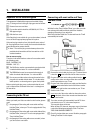


Recording without automatic switch-off
a Insert a cassette.
b Use the P ; or P = button to select the programme
number (programme name) from which you wish to
record.
DWhen the function ’Direct record’ is switched on, select
the programme number on the TV set. With the video
recorder switched on, press the RECORD/OTRn button.
DWhen a TV channel transmits a channel name, it will
show in the display.
DProgramme numbers ’E1’ and ’E2’ are provided for
recording from external sources (via scart sockets
AV1 EXT1 and AV2 EXT2 ). Programme number ’E3’ is pro-
vided for recording from the front sockets VIDEO and
L-AUDIO-R .
DProgramme number ’AUX’ is provided for audio record-
ings via sockets AUX IN L R .
c Press the RECORD/OTR n button.
d Stop recording with the STOP h button.
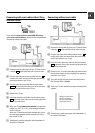
Recording with automatic switch-off (OTR
One-Touch-Recording)
a Insert a cassette.
b Use the P ; or P = button to select the programme
number (programme name) from which you wish to
record.
c Press the RECORD/OTR n button.
d Press the RECORD/OTR n button repeatedly to obtain the
required end time or length of the recording.
DTo cancel this entry, press the CLEAR (CL) button.
Erase protection
So that you don’t accidentally delete an important recording,
remove the special tab (erase protection) on the narrow side
of the cassette with a screwdriver or slide the special tab to
the left. Later, if you no longer want the cassette to be erase
protected, you can seal the gap again with adhesive tape or
slide the special tab to the right.
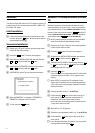
Auto-assembling
You can use the auto-assembling function to join individual
recordings without any major picture disturbance between the
recordings.
a During playback, search for the correct position on the
tape.
b Stop playback by pressing the STOP h button. ’PAUSE’
appears on the TV screen.
c Now start recording as usual by pressing the
RECORD/OTRn button.
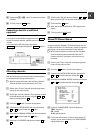
Selecting the recording speed (SP/LP)
You can reduce the recording speed by half. This makes it
possible to record, for example, 8 hours instead of 4 hours on
an ’E240’ (4 hour) cassette.
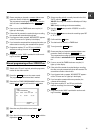
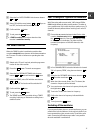
a Switch on the TV set. If required, select the programme
number for the video recorder.
b Press the MENU button. The main menu appears.
c Select the line ’RECORD FUNCTIONS’ with the menu
buttons P = or P ; , and confirm with the P button.
d Select the line ’RECORD SETTINGS’ with the menu
buttons P = or P ; , and confirm with the P button.
e Select the line ’RECORD SPEED’ with the menu buttons
P = or P ; .
f Select the required recording speed with the menu
buttons Q or P .
D’LP’: Long Play = half recording speed (double recording
time).
’SP’: Standard Play = normal recording speed.
DThe picture quality will be adversely affected when
recording at half recording speed (’LP’).
DFor playback, the correct recording speed will automati-
cally be selected.
g Confirm with the OK button.
h To end, press the MENU button.
3. MANUAL RECORDING
10