


Audio dubbing
This function enables you to replace (dub) the sound track of
an existing recording with another sound track. To do this,
connect an audio source (e.g.: a CD-player) to the
L-AUDIO-R (programme number ’E3’) socket.
a Switch on the TV set. If required, select the programme
number for the video recorder.
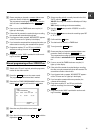
b Press the MENU button. The main menu appears.
c Select the line ’RECORD FUNCTIONS’ with the menu
buttons P = or P ; and confirm with the P button.
d Select the line ’AUDIO DUBBING’ with the menu buttons
P = or P ; and confirm with the P button.
e Select the programme number for the audio source (e.g.:
’E3’). Switch on the external audio source.
f During playback, locate the position on the tape at which
the audio dubbing is to end.
g Press the STILL R button. ’STILL’ appears on the TV
screen.
h Press the CLEAR (CL) button. ’0:00:00’ appears on the TV
screen.
i Locate the position at which the audio dubbing is to start.
j Press the STILL R button. ’STILL’ appears on the TV
screen.
k Press the STOP h button.
l Press the RECORD/OTR n button. The video recorder will
start to record the sound transmitted from the audio
source. The normal (linear) sound track is re-recorded,
the stereo sound will remain.
The audio recording stops automatically when the
counter reaches ’0:00:00’.
m To end audio dubbing,press the MENU button.
DTo play back the audio dubbing, read the section ’Sound
track selection’ in chapter 5, ’ADDITIONAL FUNCTIONS’.
Selecting the sound track
You can select the required sound track. This is of particular
interest when the audio transmissions are multilingual.
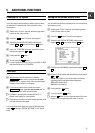
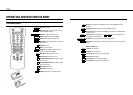
a Press the SELECT button. The current setting will appear
on the TV screen.
b By pressing the SELECT button several times you can
select from the four possibilities displayed (’STEREO’,
’RIGHT’, ’LEFT’, ’MONO’).
DDuring playback you can select a fifth possibility: the
’MIXED’ mode. In this mode you can playback the mono
sound of the normal (linear) audio track together with the
sound of the stereo audio track.
DIf there is no stereo sound recorded on the cassette, the
video recorder automatically switches to mono sound.
Synchronous editing (synchro-edit)
You can synchronously copy between this video recorder and
an appropriately equiped camera recorder. Both units are
started at the same time with the help of a synchronous
impulse and an adjustable start delay (=preroll time).
Adjusting the video recorder to the camera
recorder.
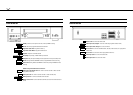
a Connect the two units with a synchro-edit cable (socket
SYNCHRO EDIT on the left front of the video recorder).
Connect the video/audio source to the input sockets
L-AUDIO-R and VIDEO (programme number ’E3’) of the
video recorder.
Please also observe the instruction manual of the camera
recorder.
b Switch on the TV set. If required, select the programme
number for the video recorder.
c Press the MENU button. The main menu appears.
d Select the line ’RECORD FUNCTIONS’ with the menu
buttons P = or P ; and confirm with the menu button
P .
e Select the line ’CAMERA LINK’ with the menu buttons
P = or P ; .
19