


f Switch the camera recorder to ’still picture’ (playback-
pause).
g Confirm with the menu button P . The video recorder
now controls the connected camera recorder type.
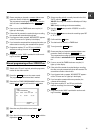
h The following message appears on the TV screen:
’VCR CONTROL DETECTED’ when the video recorder
controls the camera recorder or ’CAMERA CONTROL
DETECTED’ when the camera recorder controls the video
recorder.
Starting synchro-edit
a Switch on the TV set. If required, select the programme
number for the video recorder.
b Press the MENU button. The main menu appears.
c Select the line ’RECORD FUNCTIONS’ with the menu
buttons P = or P ; and confirm with the P button.
d Select the line ’SYNCHRO EDIT’ with the menu buttons
P = or P ; and confirm with the P button.
e The OSD corresponding to the connected camera re-
corder type appears on the TV screen.
f Search the beginning of the recording on the video
recorder.
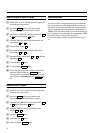
g Press the STILL R button. ’STILL’ appears on the TV
screen.
h Use the SELECT button to select the OSD for the camera
recorder.
i Search the beginning of the recording on the camera
recorder.
Switch the camera recorder to ’still picture’ (playback-
Pause).
The way copying is started depends on the camera recorder
type used:
Variant 1 when the video recorder controls the camera
recorder, or
Variant 2 when the camera recorder controls the video
recorder.
Variant 1, the video recorder is to control
the camera recorder
a Start copying with the RECORD/OTR n button on the video
recorder.
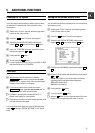
The camera recorder starts ’PLAYBACK’ and at the same
time the video recorder starts ’RECORDING’.
b Stop copying with the STOP h button on the video re-
corder.
c End copying with the MENU button.
Variant 2, the camera recorder is to control
the video recorder
a Start copying with the corresponding button on the
camera recorder.
The camera recorder starts ’PLAYBACK’ and at the same
time the video recorder starts ’RECORDING’.
b Stop copying with the PAUSE or STILL button on the
camera recorder.
c End copying with the MENU button.
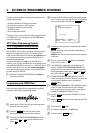
Setting the ’preroll time’
When the beginning of the recording is missing, the ’preroll
time’ was too long. Select a shorter ’preroll time’.
If recording started too early, the ’preroll time’ was too short.
Select a longer ’preroll time’. You can select a ’preroll time’
between 1:00 and 5:00 seconds.
a Press the MENU button.
b Select the line ’RECORD FUNCTIONS’ with the menu
buttons P = or P ; and confirm with the menu button
P .
c Select the line ’RECORD SETTINGS’ with the menu
buttons P = or P ; and confirm with the menu button
P .
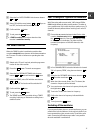
d In line ’PREROLL TIME’, adjust the ’preroll time’ with the
menu buttons P or Q .
DYou can also directly enter the ’preroll time’ with the digit
buttons 0-9 .
DWith the CLEAR (CL) button you can reset the ’preroll time’
to that of the identified camera recorder type.
e Confirm with the OK buton.
f To end, press the MENU button.
20