


Planar PD520 Owner’s Operating Manual 37
PREL
I
MINA
R
Y
PC Signal: The RGB input supports both DTV and VESA (computer) resolutions
and signal timings. If the RGB source is a computer, select PC. If it is a DTV
set-top box or other equipment with an RGB output, select Video.
Film Mode: To smooth out moving images from interlaced, standard-definition
(SD) sources, select
Film Mode and set it to Automatic.
In most cases, the PD520 detects the proper “pull-down” rate and vertical
frequency. However, if your source is jittery and/or tearing you may wish to
specify the pull-down rate (2:2 or 3:2) to ensure stable processing for that
source.
Auto Backlight: Select Auto Backlight from the Setup menu and set it to On to
have the PD520 adjust the Backlight setting automatically, according to the
ambient light level in the viewing area.
OSD Timer: Use the or button to set the OSD Timer. This timer controls how
long the menus remain on-screen after selecting them. Select from 0 to 60
seconds, in 10-second increments. When you set the OSD to 0, the menus
remain on-screen until you hide them by pressing EXIT.
Auto Off: Set Auto Off to 30, 60 or 120 minutes to have the PD520 go into standby
mode when no source signal is present for the selected amount of time.
When Auto Off is set to zero (0) minutes (disabled), the PD520 remains in normal
operating mode, regardless of the presence or absence of an input sync signal.
HDMI CSC (Color Space Control): If the color space of the incoming signal on
the HDMI1 or HDMI2 inputs is known, select
HDMI CSC from the Setup menu and
set it to RGB or Component.
In most situations, the Auto setting works well.
LED: Select LED from the Setup menu to change the behavior of the front-panel
status indicator LED (see Figure 2-1) during standby mode.
When set to ON, the LED lights red to indicate that the PD520 is in standby
mode. When set to OFF, the LED is off when the PD520 is in standby mode.
Installer Use the Installer menu to perform advanced picture quality adjustments.
Image Adjust: The controls in this menu are identical to those in the main Image
Adjust menu.
•Brightness: Refer to Brightness on page 29.
• Contrast: Refer to Contrast on page 30.
•Color: Refer to Color Saturation on page 31.
•Tint: Refer to Tint on page 31.
•Sharpness: Refer to Sharpness on page 32.
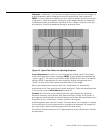
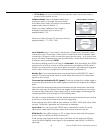
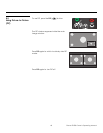
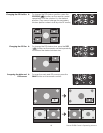
• ADC Phase Adj.: This control works similarly to the Phase adjustment for RGB
signals (refer to
Phase on page 35). Use it to improve the apparent sharpness
of 720p and lower-resolution Component, S-Video or Composite sources. For
best results, adjust ADC Phase while displaying a “Sharpness” pattern (
Figure
4-5).
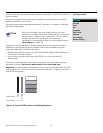
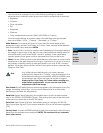
Installer
Image Adjust
White Balance
Blue Enable
Baud Rate
Serial Link
Factory Reset