


Chapter 4 75
Using the TV’s Menu System
Lamp Power
8
Digital Channel Info
7
Menu Language
6
Translucency
5
Color Scheme
4
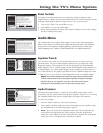
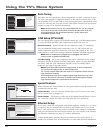
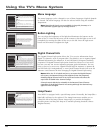
Record Output
3
Screen Format
2
Closed Captioning
1
Go Back
0
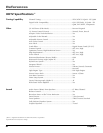
Main Menu Preferences
Press or to point to an option, then press OK to
select it. Press to return to the menu.
You can record analog and digital programs by connecting
the RECORD OUTPUT jacks to a video recorder. All signal
sources can be recorded except for Input 5 (DVI-HDTV) and
some component video formats.
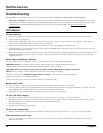
16:9 images can be recorded in one of two ways. "Cropped"
records the center of a 16:9 image and is best for playback
on a standard 4:3 TV. "Anamorphic" squeezes a 16:9 image
into a 4:3 area; during playback on this wide-screen 16:9 TV,
apply the "Stretch" format to recreate a 16:9 "wide" image.
Anamorphic Mode Recording
Cropped Recording (Center Cut)
Lamp Power
8
Digital Channel Info
7
Menu Language
6
Translucency
5
Record OutputColor Scheme
4
Record Output
3
Screen Format
2
Closed Captioning
1
Go Back
0
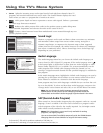
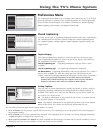
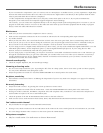
Main Menu Preferences
Press or to point to an option, then press OK to
select it. Press to return to the menu.
You can select from one of four colors for the menu system
and the channel banner. The color of GUIDE Plus+ is not affected
by the selection in this screen.
Plum
Rasberry
Emerald
Sky Blue
Stretch The image of a 4:3 video signal is stretched horizontally by approximately 33% while
the vertical size stays the same.
Zoom The image of a 4:3 video signal increases by approximately 33% and the vertical size
increases by approximately 33%.
Notes: There is no ability provided to change the screen format for a 16:9 video signal
since it fills up the entire area of the TV’s screen.
The FORMAT button on the remote gives you access to change the format with a one-
button press rather than navigating through the menu system.
Normal and Stretch do not affect Record Output; Zoom may alter the original video.
Some programs are copy protected and cannot be recorded. If the REC icon in the banner is
dim, a recording cannot be made because of copy protection limits. If REC icon is bright,
the program can be recorded.
The format of some video cannot be changed even though it appears to be a 4:3 aspect-
ratio picture.
Use the FORMAT button to view screen formats (Zoom, Stretch) other than those with side
panels. Some video formats may not be able to be changed with the FORMAT button.
Tip
Pressing FREEZE button also freezes RECORD
OUTPUT, but not 1394 output.
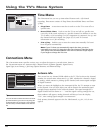
Record Output
16:9 signals can be recorded in one of two ways: Cropped Recording (Center
Cut) and Anamorphic Mode Recording. Cropped Recording records the center of
a 16:9 signal and the Anamorphic Mode Recording compresses the 16:9 signal
into a 4:3 area.
Notes: To make the “cleanest” recording, avoid using PIP, the GUIDE
Plus+ system, freeze function, browser, or zoom screen format. Doing so
will have unwanted effects on the recorded video.
The TV does not need to be on to make a recording as long as the
recording being made was set up in the GUIDE Plus+ system. When the TV
is off, the Record Output may show the TV tuning channels in a data
acquisition activity. This is normal.
If an unusual pattern appears when you connect your VCR input to the
RECORD OUTPUT, playing a tape or switching to the VCR’s tuner removes
the pattern.
Color Scheme
Select from among four colors (Sky Blue, Emerald, Raspberry, and Plum) to
change the color of the menu system and banner.
Note: The guide and browser colors are unaffected.
Translucency
You can change the translucency (see-through) level of the menu screens.
Adjust the slider by using the left and right arrow buttons.
Notes: This does not apply to GUIDE Plus+ system and browser.
Some video formats do not support the display of translucency on-screen
displays.
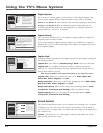
Lamp Power
8
Digital Channel Info
7
Menu Language
6
Translucency
5
Color Scheme
4
Record Output
3
Screen Format
2
Closed Captioning
1
Go Back
0
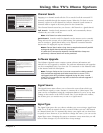
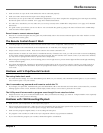
Main Menu Preferences
Pressorto move the indicator to the desired
translucency level for the on-screen menus.
The translucency level you set is applied to the on-screen
menu system and channel banner for all inputs and
antennas. An exception is Input 5 (DVI-HDTV) and some
component video formats where translucency is set to
opaque and cannot be changed.
The translucency level you set does not affect GUIDE Plus+.