Using the Playback Features
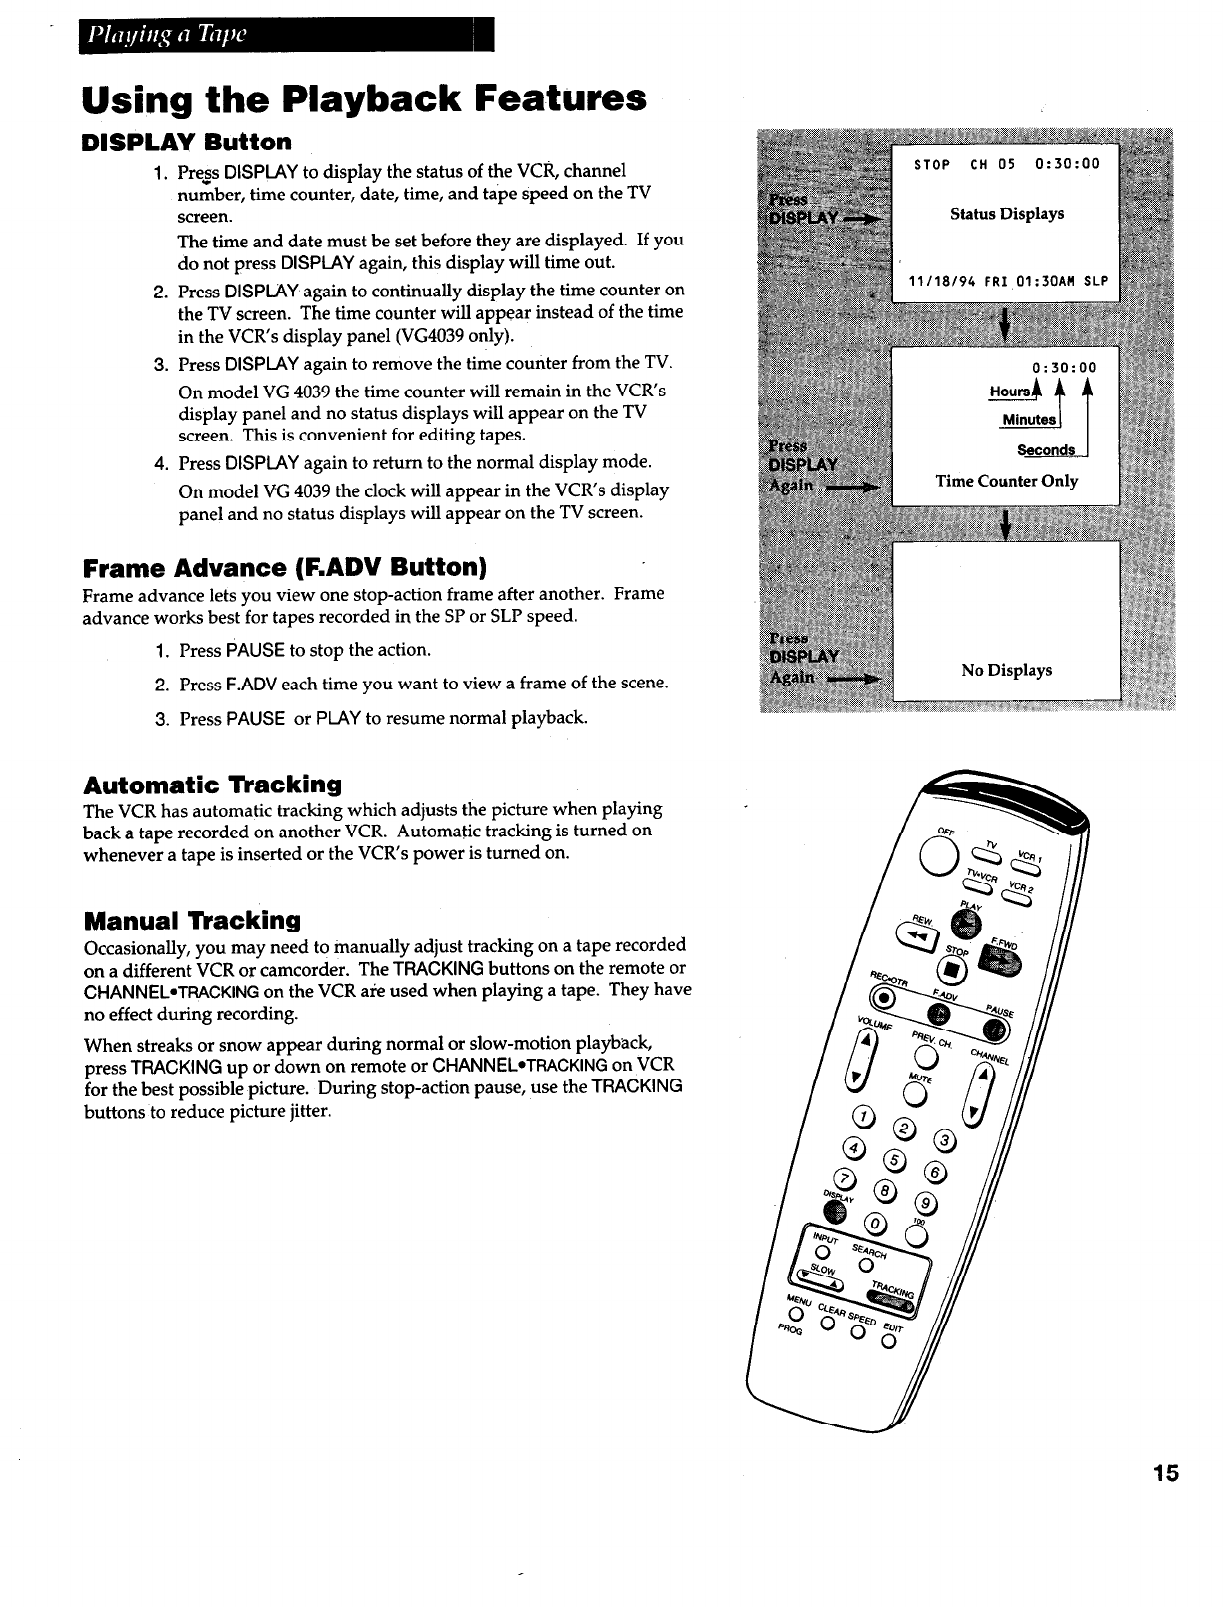
DISPLAY Button
1.
Press
DISPLAY
to display the status of the VCR, channel
number, time counter, date, time, and tape speed on the TV
screen.
The time and date must be set before they are displayed. If you
do not press
DISPLAY
again, this display will time out.
2. Press
DISPLAY
again to continually display the time counter on
the TV screen. The time counter will appear instead of the time
in the VCR’s display panel (VG4039 only).
3. Press
DISPIAY
again to remove the time counter from the TV.
On model VG 4039 the time counter will remain in the VCR’s
display panel and no status displays will appear on the TV
screen. This is convenient for editing tapes.
4.
Press
DISPLAY
again to return to the normal display mode.
On model VG 4039 the clock will appear in the VCR’s display
panel and no status displays will appear on the TV screen.
Frame Advance (F.ADV Button)
Frame advance lets you view one stop-action frame after another. Frame
advance works best for tapes recorded in the SP or SLP speed.
1.
Press
PAUSE
to stop the action.
2.
Press
F.ADV
each time you want to view a frame of the scene.
3.
Press
PAUSE
or
PLAY
to resume normal playback.
Automatic Tracking
The VCR has automatic tracking which adjusts the picture when playing
back a tape recorded on another VCR. Automatic tracking is turned on
whenever a tape is inserted or the VCR’s power is turned on.
Manual Tracking
Occasionally, you may need to manually adjust tracking on a tape recorded
on a different VCR or camcorder. The
TRACKING
buttons on the remote or
CHANNEL*TWCKING
on the VCR are used when playing a tape. They have
no effect during recording.
When streaks or snow appear during normal or slow-motion playback,
press
TRACKING
up or down on remote or
CHANNEL*TRACKING
on VCR
for the best possible picture. During stop-action pause, use the
TRACKING
buttons to reduce picture jitter.
11/18/9i,
FPT lll:Zl-lAM SLP
. - - . - - - -
1
Time Counter Only
No Displays
15


