


Operation
42 Runco VX-2ix Owner’s Operating Manual
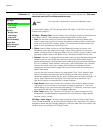
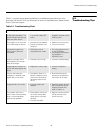
HD Format: If the characteristics of the incoming signal on the HD1 or HD2 inputs are
known, select HD Format from the Service menu and set them as described below. Doing
so can reduce the time it takes the VX-2ix to switch from HD to 480i signals or vice versa.
This is generally not necessary unless the VX-2ix – for whatever reason – has difficulty
determining the color space (RGB or YUV), bandwidth or resolution of the incoming HD
signal. In most situations, the Auto settings work well.
• HD/RGB 1 and HD/RGB 2 (Color Space): Select Auto, RGB or YUV.
• ADC Bandwidth: Select Auto, 75 MHz, 150 MHz or 300 MHz.
• YPbPr Input Resolution: Select Auto or specify the input resolution, if known: 480i,
480p, 576i, 576p, 720p or 1080i.
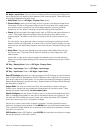
Triggers: Select Triggers from the Service menu to configure the 12-volt trigger outputs.
You can assign one or more trigger outputs to each aspect ratio. Those triggers are then
activated by selecting that aspect ratio.
If your projector is equipped with the Runco CineWide with AutoScope system, assign at
least one trigger output (the same one to which the lens motor is connected) to the
Cinema and Virtualwide 2.35 aspect ratios.
To save the trigger settings so that they can be restored after a System Reset (described
below), press
repeatedly to highlight “Save.” Then, press ENTER.
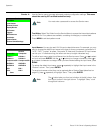
Miscellaneous: Select Miscellaneous from the Service menu to set the following options:
• Language: Select Language from the Miscellaneous menu and press the up- or
down-arrows to select the OSD Language (English, French, Spanish or German).
•Menu Mode: This is the manner in which the OSD menus appear and disappear when
you press MENU. Choose one of the following:
0 = No transition; menus abruptly appear and disappear.
1 = Menus fade in and out.
2 = “Checkerboard” dissolve; menus appear and disappear in sections.
3 = “Window shade” effect; menus are drawn on a diagonal from top left to bottom
right, and retract in the opposite direction.
• Timeout - Short/Long: These settings control how long the OSD menus stay on
screen. Select a time-out period of from 2 to 60 seconds.
• Side Bar Color: This controls the color of the inactive image area. The range is from
-100 (black) to 100 (white).
The inactive image area is on either side of the active image area when using the
Standard 4:3 aspect ratio, and above and below the active image area when using the
Letterbox aspect ratio.
• Film Mode: Enable Film Mode to smooth out moving images from interlaced,
standard-definition (SD) sources. In most cases, the VX-2ix detects the proper
“pull-down” rate and vertical frequency. However, if your source is jittery and/or tearing
you may wish to enable Film Mode to ensure stable processing for that source.
Resolution: The VX-2ix defaults to an output resolution of 720p. When using the VX-2ix
with a computer or certain HD sources, you may want to force it to use a different output
resolution. If so, select Resolution from the Service menu and choose one. Then, press
ENTER to confirm.
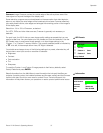
HD Format
HD/RGB 1 Auto
HD/RGB 2 Auto
ADC Bandwidth Auto
YPbPr Input Resolution