USER’S MANUAL
H.264 REAL TIME DVR
49
3) Backup
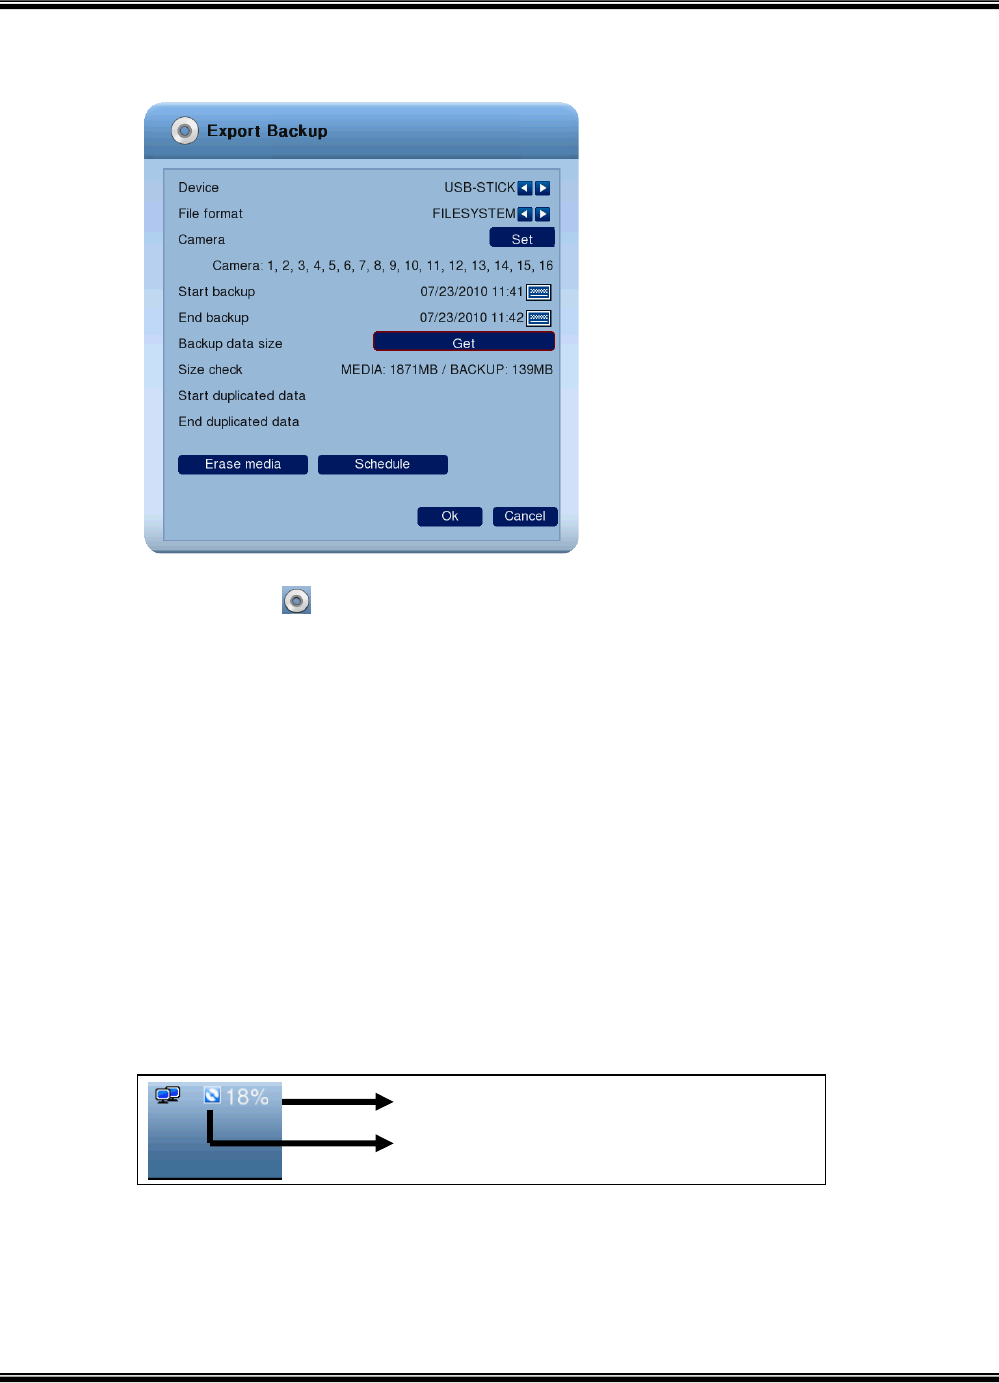
Here you can backup your recorded footage by selecting a start and end point.
A. Select the
icon, located at the bottom of the screen.
B. Select a device to backup data will be stored.
C. Select media type. If you select FILESYSTEM, backup data will be stored as native
format with backup player. If you select AVI, only one channel is backup
D. If you select the camera you want to perform a backup, click “SET” button and select
cameras you want. On the other hand, when AVI is selected, only one camera can be
selected.
E. It displays selected cameras. (CAMERA : 1,2,3,4,5,6,7,8,9,10,11,12,13,14,15,16)
F. Specify starting date/time of backup period.
G. Specify ending date/time of backup period.
H. Check the data size to backup. But, when AVI is selected, only one camera can be
selected.
I. If duplicated data exists in the backup data period, select one data from “START
DUPLICATED DATA” or “END DUPLICATED DATA”.
J. After finishing setting for backup, click OK button
K. When backup is started, the screen moves from search to real time live mode and the
icon and text will be shown as below to display backup progress.
It shows on backup.
It shows the progress of backup.


