


Additions and Changes to Main Unit Operating Procedures1
English 7
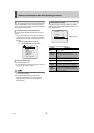
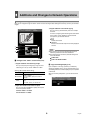
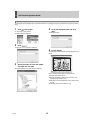
[Settings] ( indicates default setting)
z You can configure presets 2 to 9 for a 9-channel model
or presets 2 to 16 for a 16-channel model.
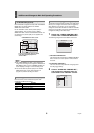
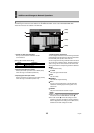
3 Press the [EXIT/OSD] button.
New settings are saved, and you are returned to the normal
screen.
z Before configuring trigger actions, be sure to configure
the settings under “ALARM REC MODE SET” and
“PROTOCOL/ADDRESS SET”.
z In the case more than one camera has issued an alarm
simultaneously, some or all trigger actions may fail to
operate correctly because only one camera can be
operated at a time.
z Actually available actions depend on each camera. For
more information, refer to the camera's instruction
manual.
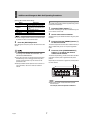
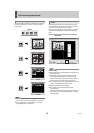
To register preset positions that are applied during camera
control, follow these steps:
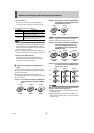
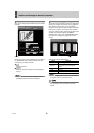
1 Press the [FUNC.] button (1).
The FUNC. indicator lights up in blue to indicate that you are
now in camera control mode.
2 Set the camera lens orientation.
Adjust the lens to your desired orientation using the pan/tilt
functions.
3 Press and hold the [PRESET] button (2)
for about 3 seconds.
The buzzer beeps twice and the button indicator flickers (at
4Hz) to indicate that you are now in preset registration
mode.
4 Press one of the [CAMERA SELECT]
buttons (3) to specify the channel
number for the camera.
The button stops flickering, and the camera lens orientation
at the time of button press is registered as the preset
position.
Repeat steps 2 and 3 above to register the preset positions
for other cameras.
z Each preset number is associated with a specific
channel number.
For example, CH02 corresponds to PRESET 2.
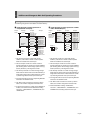
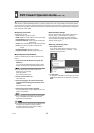
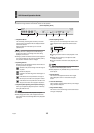
Setting Description
OFF No action triggered.
PRESET
Moves the camera lens to the angle
corresponding to your selected preset
number.
PAN Starts automatic panning.
TOUR Starts tour.
SEQUENCE Starts sequence.
How to Register Preset Positions (P147)
3
21