


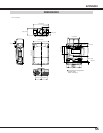


- 3 -
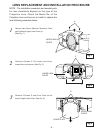
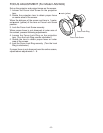
LENS LOCK
SCREW
DRIVER
IN THE LENS
LOCATE MOTOR
ON RIGHT SIDE
LENS ATTACHMENT
Part No. (610 275 6029)
CONNECTOR
Fig-4
LENS MOTOR LEAD
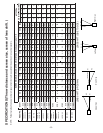
Fig-6
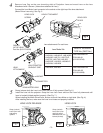
Fig-5
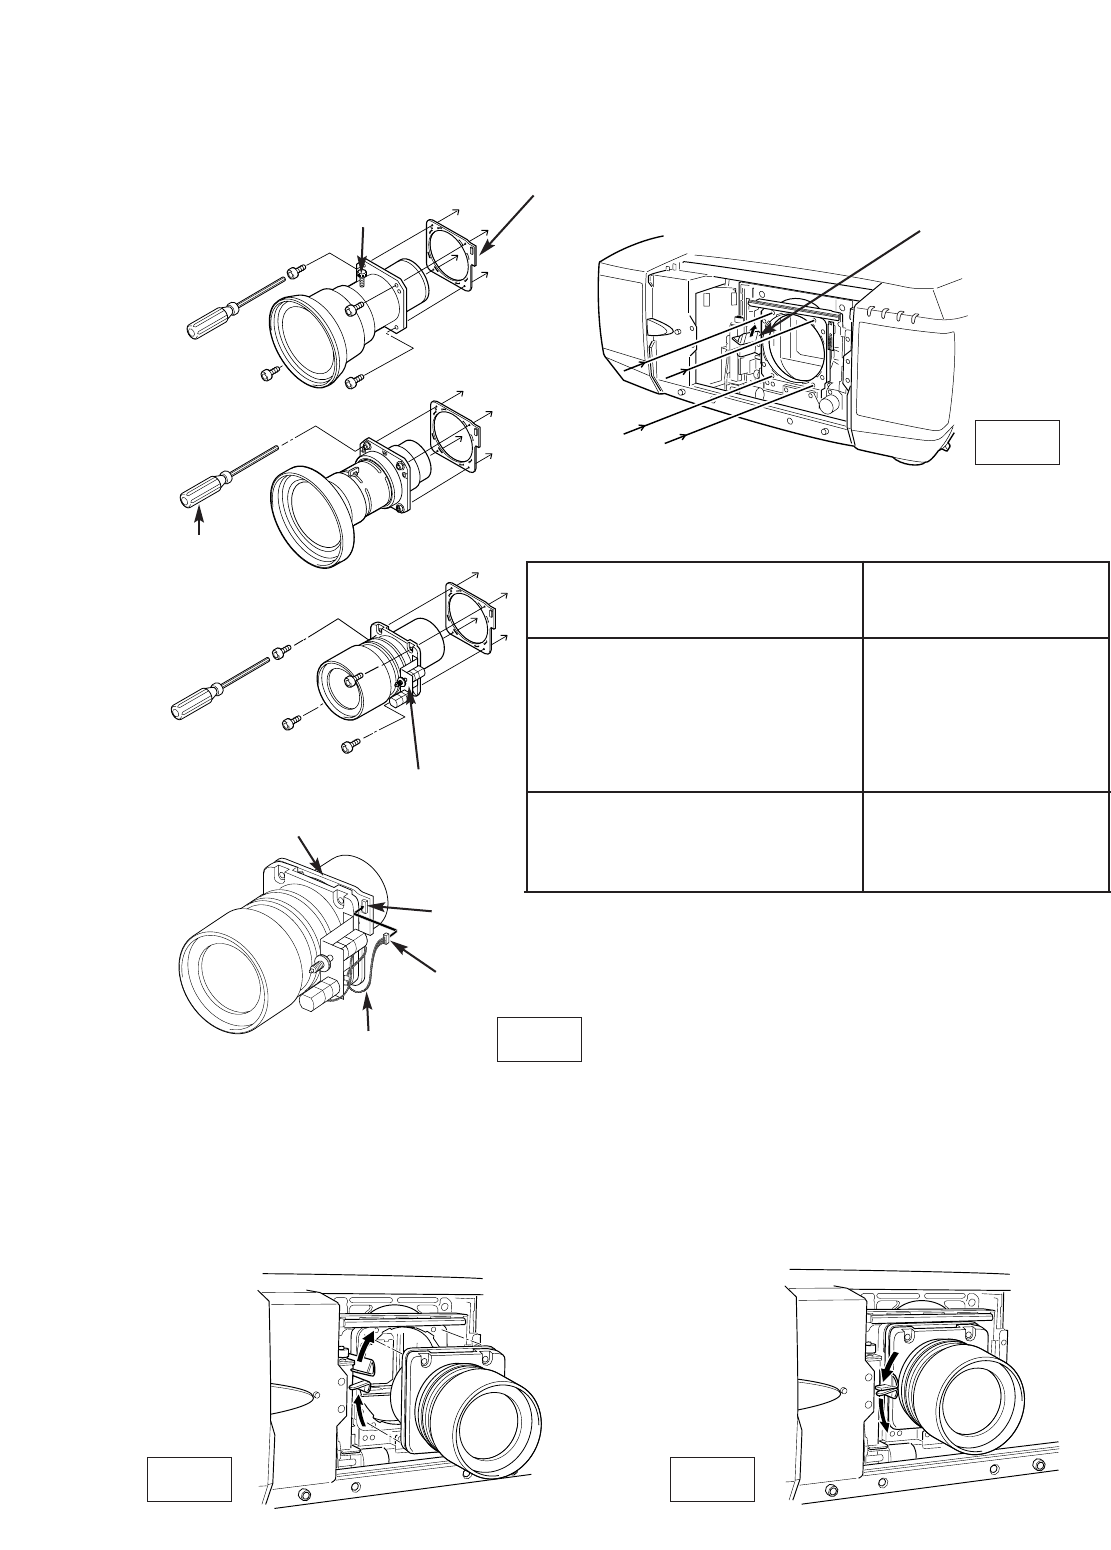
Fig-7
LENS LOCK
LEVER
LENS
ATTACHMENT
SOCKET
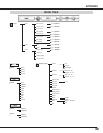
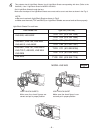
Lens attachments For each lens.
LNS-W01, LNS-W01Z, LNS-W02Z,
LNS-W03, LNS-T01, LNS-T01Z,
LNS-T02, LNS-T03, LNS-S02,
LNS-S02Z, LNS-S03, LNS-M01Z,
LNS-W04, LNS-W06
Lens Attachment 01
POA-LNA-01
(610 303 8742)
LNS-W02, LNS-M01
Lens Attachment 02
POA-LNA-02
(610 304 6228)
Lens Model No.
LENS ATTACHMENT
TYPE No. (PART No.)
LENS LOCK RELEASE
LENS LOCK
4
Remove Lens Cap on the rear (mounting side) of Projection Lens and mount Lens on the lens
Attachment with 4 Screws. (Use screws attached on lens.)
5
Grasp (release lock) the Lens Lock Lever and turn it fully upward. (See Fig. 6.)
Install the Lens into the projector. Grasp the Lens Lock Lever and turn the Lever fully downward until
lever is Locked (clicked position) properly. (See Fig. 7.)
When installing the Motor Driven Lens, be sure to mount Lens Motor on right side. (See Fig. 4.)
After installing the lens, make sure the Lens is not loose and properly installed.
Connect the Lens Motor Lead connector to the socket on the right-top of the lens attachment.
(Motor Driven Lens only.) See Fig. 5.
Grasp (unlock)
Lens Lock Lever
and pulling
upward.
Grasp (unlock)
Lens Lock Lever
and fully pulled
downward until it is
locked (clicked).