


12
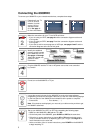
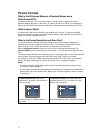
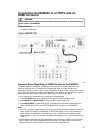
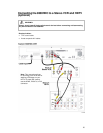
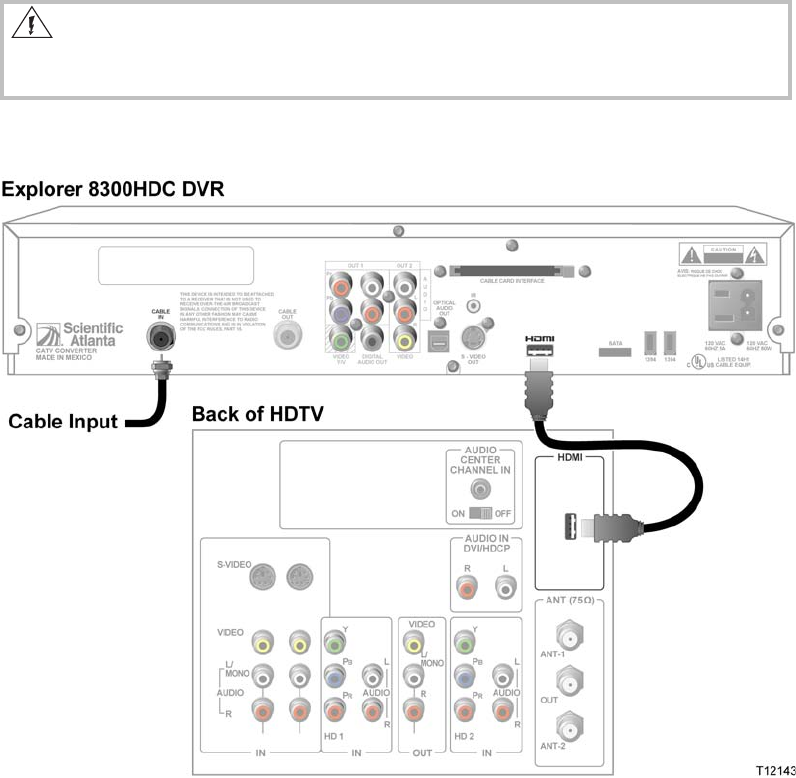
Connecting the 8300HDC to an HDTV with an
HDMI Connector
Important Notes Regarding the HDMI Interface on the 8300HDC
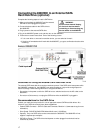
The HDMI interface automatically configures the audio output for a format supported by the
television. Because not all TVs support the Dolby®
Digital input, the HDMI interface may
automatically select a 2-channel stereo audio configuration instead of Dolby Digital, which it carries
over to the other digital audio outputs of the 8300HDC. This prevents your home theater system or
Dolby Digital decoder from providing the full Dolby Digital surround-sound effect.
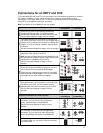
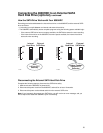
You can override this configuration by completing the following steps.
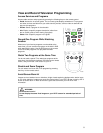
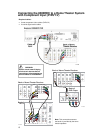
1. Press SETTINGS twice on the remote control to open the General Settings menu.
2. Press MOVE UP or MOVE DOWN to select the option Audio: Digital Out.
3. Press MOVE RIGHT to select Dolby Digital. This setting will send Dolby Digital audio to the
HDMI, DIGITAL AUDIO OUT, and OPTICAL AUDIO OUT connectors on the 8300HDC.
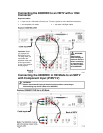
Notes:
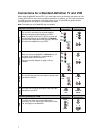
• If the TV is not Dolby Digital capable, it may not produce audio through its speakers when the
Audio: Digital Out setting on the 8300HDC is set to Dolby Digital. You can either switch the
Audio: Digital Out setting back to HDMI when you are not using the home theater or Dolby
Digital decoder, or you can connect the baseband audio outputs (OUT 1 Audio Left and Right)
to the TV.
• Digital content is encrypted with High-Bandwidth Content Protection (HDCP) on the DVI/HDMI
port. The HDC DVR is not compatible with devices that do not support HDCP. You must use
either the YPrPb or 1394 connection to connect the DVR to these devices.
WARNING:
Electric shock hazard! Unplug all electronic devices before connecting or disconnecting any
device cables to the 8300HDC.
Required cables:
• 1 HDMI-to-HDMI cable