


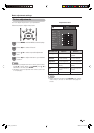


Change Password
Channel Setting
Reset
New Password
Reconfirm
27
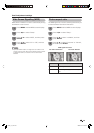
Useful adjustment settings
NOTE
• As a precautionary measure, make a note of your
password on the back of this operation manual, cut
it out and keep it in a safe place that children cannot
reach.
• This function is only available for TV input mode.
• To relock a channel which has been temporarily unlocked
by inputting the correct password, turn power off and then
on again.
• When no password is input for 20 seconds after the
prompt message is displayed, the TV goes into standby
mode.
NOTE
• To view a locked channel you must enter a password.
When you select a locked channel, a password prompt
message pops up.
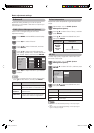
Enter the same 4-digit number as in step 6 to
confi rm.
7
Password setting for child lock (for
TV input mode)
Allows you to use a password to protect certain
settings from being accidentally changed.
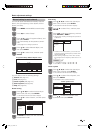
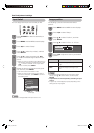
Setting a password
Register a 4-digit password number to use the Child
Lock function.
Press MENU and the MENU screen displays.
1
Press
c
/
d
to select “Setup”.
2
Press
a
/
b
to select “Child Lock”, and then
press ENTER.
3
If you already set the password, enter it here.
4
Press
a
/
b
to select “Change Password”, and
then press ENTER.
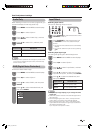
5
Change Password
Channel Setting
Reset
New Password
Reconfirm
Enter the 4-digit number as a password using
0 — 9.
6
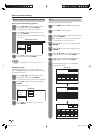
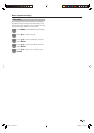
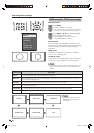
Setting a channel
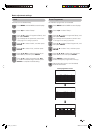
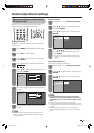
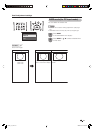
Resetting the password
Allows you to reset your password.
Yes
No
Change Password
Channel Setting
Reset
Repeat steps 1 to 4 in Setting a password.
1
Press
a
/
b
to select “Yes”, and then press
ENTER.
3
Press
a
/
b
to select “Channel Setting”, and
then press ENTER.
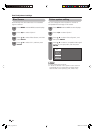
2
Press
a
/
b
/
c
/
d
to select the channel that
you wish to apply the Child Lock, and then
press ENTER.
• The Child Lock setting becomes effective only
when the TV is turned off after the Child Lock is
applied.
4
Yes
No
Change Password
Channel Setting
Reset
Repeat steps 1 to 4 in Setting a password.
1
Press
a
/
b
to select “Yes”, and then press
ENTER.
3
Press
a
/
b
to select “Reset”, and then press
ENTER.
2
PX5X_en_f.indd 27PX5X_en_f.indd 27 2006/11/30 16:50:302006/11/30 16:50:30