


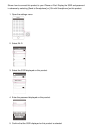

product.
3. Press the START/STOP button of this product.
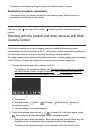
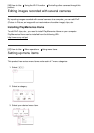
All devices are connected to this product will start recording. is displayed on the
icons of this product and the cameras that are recording movies.
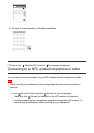
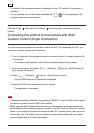
By selecting , or icons displayed in B in the figure above during shooting,
you can check the image being recorded with the connected camera on the LCD
monitor of this product.
PHOTO or the zoom lever can be used even during shooting with Multi Camera
Control.
4. Press the START/STOP button of this product.
Recording ends.
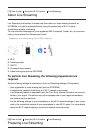
Menu items that you can set
[Connect Device Swt] (displayed when one camera is connected)
Disconnects the currently connected camera and selects another device.
[Connect Device Reg] (displayed when several cameras are connected)
Registers cameras that have not been registered before.
[Shooting Mode]
Selects the shooting mode of the connected camera (for one camera when only one camera
is connected and for all cameras when several cameras are connected).
[ Movie]: Records movies.
[ Still Image]: Records photos.
[ Interval Shoot]: Continues to record photos at regular intervals.
[ Audio]: Records sound only
[Shooting Settings]
Movie shooting settings (displayed when one camera is connected and the Shooting
Mode is set to [ Movie])
You can configure settings for movie shooting of the connected camera.
[Recording Mode]: Sets the movie image quality
[ SteadyShot]: Sets to activate the camera-shake reduction.
[ Shooting Angle]: Sets the shooting angle.
[Flip]: Sets whether to record images upside down.
[ File Format]: Sets the file format for recording movies
Still image shooting settings (displayed when one camera is connected and the
Shooting Mode is set to [ Still Image])
You can configure settings for photo shooting of the connected camera.