


Using the Menus
88
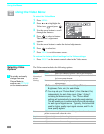
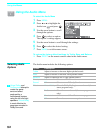
Using the Video Menu
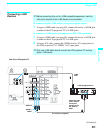
To select the Video Menu
1 Press MENU.
2 Press B or b to highlight the
Video icon and press .
3 Use the arrow button to scroll
through the features.
4 Press to select a feature.
That feature’s adjustment
appears.
5 Use the arrow button to make the desired adjustments.
6 Press to select/set.
7 Press MENU to exit the menu screen.
To restore the factory default settings for the Video settings:
❑
Press RESET on the remote control when in the Video menu.
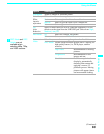
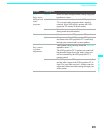
Selecting Video
Options
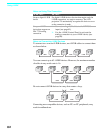
The Video menu includes the following options.
Option Description
Mode
Customized
picture
viewing
Vivid Select for enhanced picture contrast and sharpness.
Standard Select for standard picture settings. Recommended
for home entertainment.
Pro Select to display a picture with minimum
enhancements.
✍ You can alter the Video menu settings (Picture,
Brightness, Color, etc.) for each Mode.
✍ You may set up a “Picture Mode” (Vivid, Standard, Pro)
independently for each Video input (Video 1-Video 7,
including the Antenna input). Your “Picture Mode”
settings will automatically be saved after each selection.
This will enable you to customize the Picture Mode setting
for each type of signal source. Typically, Vivid should be
used for higher quality input signal sources, and Pro for
lower quality signals.
Picture Adjust to increase picture contrast and deepen the color or decrease
picture contrast and soften the color.
Brightness Adjust to brighten or darken the picture.
Color Adjust to increase or decrease color intensity.
Hue Adjust to increase or decrease the green tones.
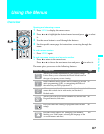
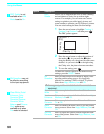
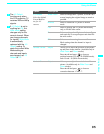
To quickly and easily
change from one
Picture Mode to
another, use PICTURE
on the remote control.
z