


56
4 Press </, to adjust the setting, and
press ENTER.
The default settings are underlined.
“Y NR”: (weak) Off 1 2 3 (strong)
“C NR”: (weak) Off 1 2 3 (strong)
“BNR”: (weak) Off 1 2 3 (strong)
“DVE”*: (weak) Off 1 2 3 (strong)
“PB Video Equalizer”:
• Contrast: (weak) –3 ~ 0 ~ 3 (strong)
• Brightness: (dark) –3 ~ 0
~ 3 (bright)
• Color: (light) –3 ~ 0 ~ 3 (deep)
• Hue: (red) –3 ~ 0
~ 3 (green)
Repeat steps 3 and 4 to adjust any other items.
* “1” softens the outlines of the images. “2”
enhances the outlines and “3” enhances them more
than “2.”
Notes
• If the outlines of the images on your screen become
blurred, set “BNR” to “Off.”
• Depending on the disc or the scene being played, the
above BNR, Y NR, or C NR effects may be hard to
discern. And, these functions may not work with some
screen sizes.
• When playing a disc recorded in SLP recording mode,
the BNR setting may have little effect.
• When using the DVE function, noise found in the disc
may become more apparent. In this case, it is
recommended that you use the BNR function with the
DVE function. If the condition still does not improve,
set the DVE level to “1” or “Off.”
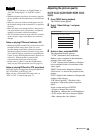
Adjusting the sound quality
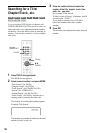
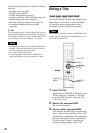
1 Press TOOLS during playback.
The TOOLS menu appears.
2 Select “Audio Settings,” and press
ENTER.
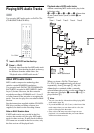
3 Select an item, and press ENTER.
“Surround (TVS)” (DVD VIDEO only):
Selects one of the surround modes. For more
information, see “Playback options”
(page 53).
“Audio Filter” (all discs): Selects the digital
filter to reduce noise above 22.05 kHz (Fs* is
44.1 kHz), 24 kHz (Fs is 48 kHz), or 48 kHz
(Fs is above 96 kHz).
• Sharp (default): Provides a wide frequency
range and spatial feeling.
• Slow: Provides smooth and warm sound.
* Sampling frequency of audio source
This function only adjusts the output signals
from the LINE OUT (AUDIO L/R) 1/2 jacks.
4 Press </M/m/, to select the option,
and press ENTER.
Note
There may be little effect by changing the Audio Filter
depending on the disc or playback environment.
+
RW
+
R
DVD
VCD
CD
-
RW
VR
-
RW
Video
-
R