


19EN 19EN
Disc
Management
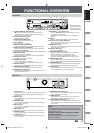
Recording PlaybackIntroduction
Connections
Basic Setup Editing Function Setup VCR Function Others
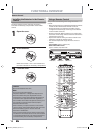
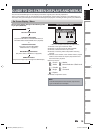
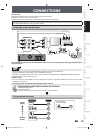
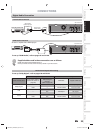
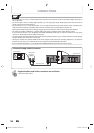
CONNECTIONS
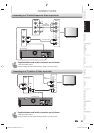
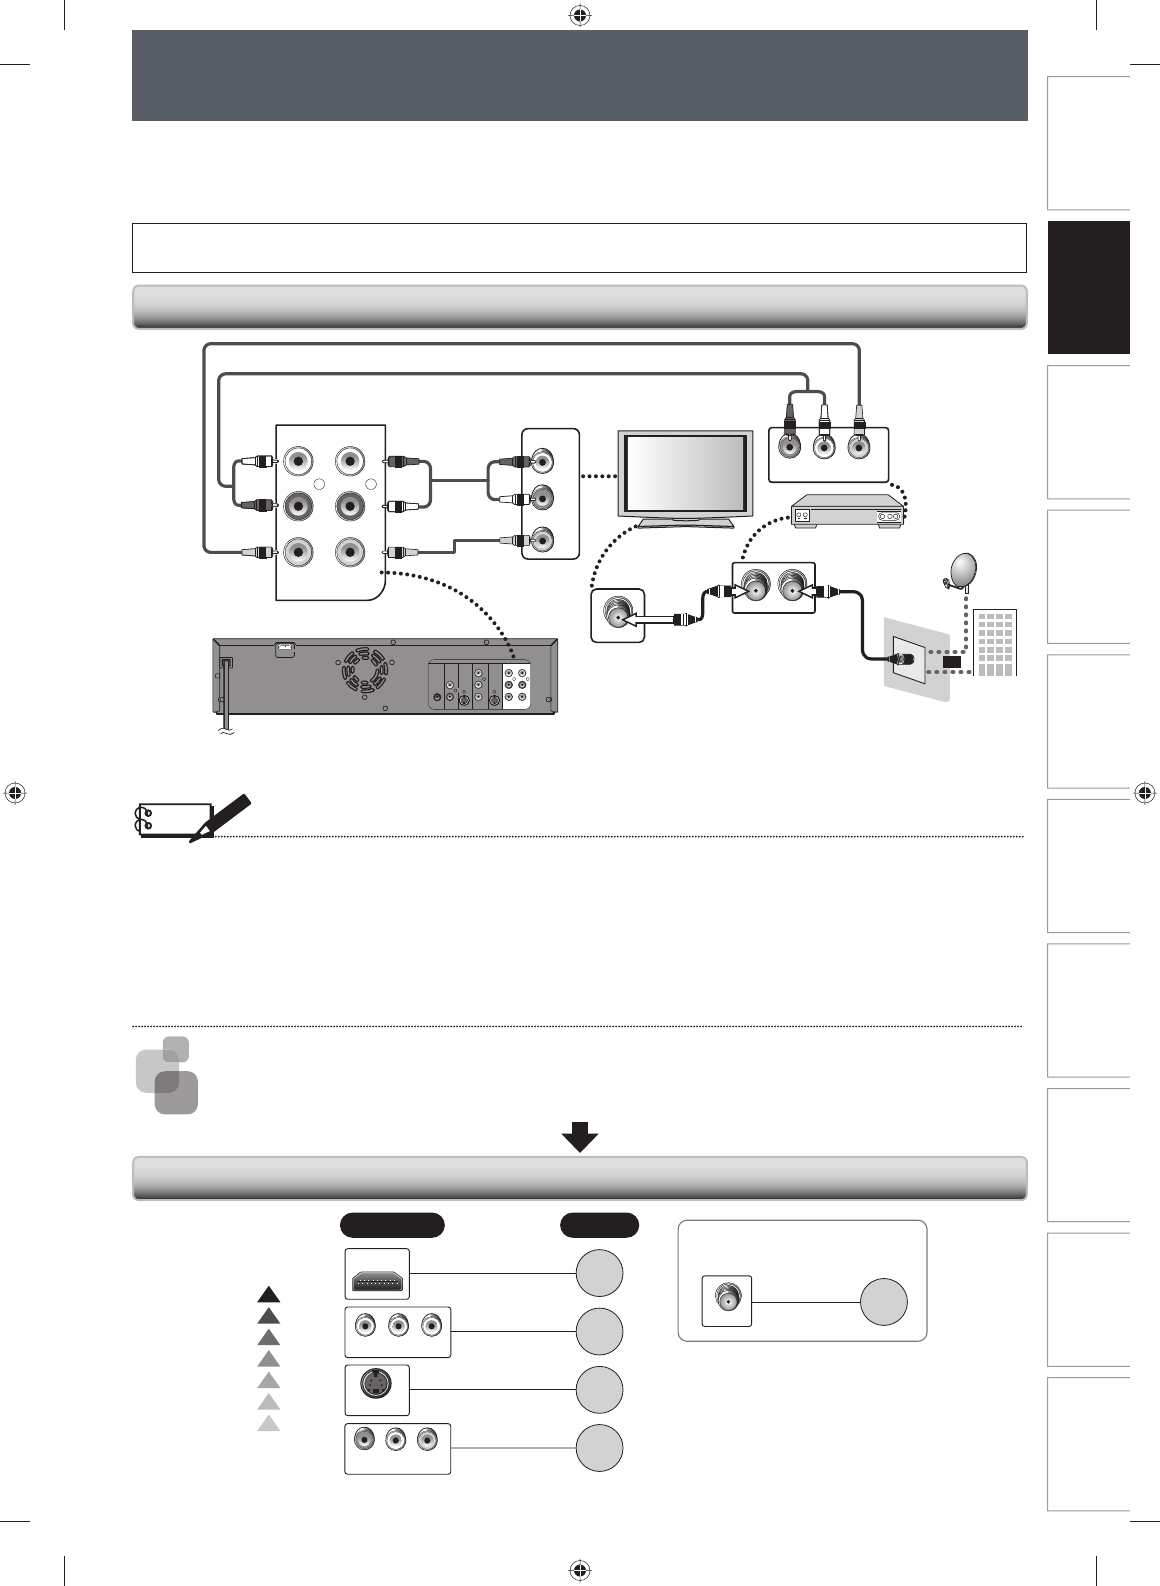
Connecting to an External Tuner
Read this first:
1) Disconnect the AC power cords of the devices from the AC outlet.
2) Make the connection as illustrated below.
3) After making all the connections, connect the AC power cords of the devices.
• Connect this unit directly to the TV. If the RCA audio/video cables are connected to a VCR, DVD playback pictures
may be distorted due to the copy protection system.
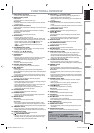
TV Connection Overview
If Your TV has
Refer to
Standard
Quality
Higher
Quality
If your device has
only an ANT. IN jack
page
20
COMPONENT VIDEO IN
AUDIO IN
LR
VIDEO IN
page
22
page
21
page
21
page
22
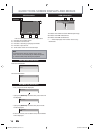
S-VIDEO IN
HDMI IN
ANT. IN
VIDEO IN
AUDIO IN
L
R
L
R
L
R
IN --- AUDIO --- OUT
IN --- VIDEO --- OUT
ANT. INANT.OUT
LR
VIDEO OUTAUDIO OUT
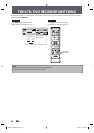
rear of this unit
external tuner
RCA audio cable
RCA video cable
satellite
dish
ANT. IN
cable TV
company
RF coaxial cable
or
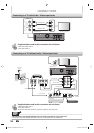
DIGITAL
AUDIO OUT
AUDIO
OUT
S-VIDEO
OUT IN
COAXIAL
L
R
L
Y
P
B
/CB
PR
/CR
R
L
R
S-V IDE O IN --- A UD I O --- OUT
IN --- VI DE O --- OUT
COMPONENT
VIDEO OUT
DVD/VCR
HDMI OUT
(L1)
(L1)
RCA audio
cable
RCA video cable
RF coaxial cable
Note
• Required cables and connecting methods differ depending on the cable/satellite box.
For more information, please contact your cable/satellite provider.
• Instead of using VIDEO OUT jack of this unit, you can also use S-VIDEO OUT jack, COMPONENT VIDEO OUT jacks or
HDMI OUT jack for connecting to your TV.
With this setup:
• You can record any unscrambled channel by selecting the channel on the cable/satellite box. Be sure that the cable/
satellite box is turned on.
• You cannot record one channel while watching another channel.
Supplied cables used in this connection are as follows:
• RCA audio cable (L/R) x 1
• RCA video cable x 1
Please purchase the rest of the necessary cables at your local store.
After making the connection as described above, make sure to select the appropriate input type by following the
steps on page 27.
E9PKBUD_DKVR60KU_EN.indd 19E9PKBUD_DKVR60KU_EN.indd 19 8/11/2009 4:00:04 PM8/11/2009 4:00:04 PM