


21
3.1 Connecting to a DVR and Viewing Video
Once the DVR has been added as a Site, connecting to it is easy.
Connecting to a DVR and Viewing Video
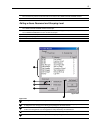
1) Right click on a DVR inside the CONNECTION WINDOW (See Section 1.2) and select the CONNECT SITE
option.
Icons representing cameras will be displayed beneath the DVR in the CONNECTION WINDOW.
2) Drag a camera you want to view onto the MAIN DISPLAY AREA.
Right clicking on a camera in the CONENCTION WINDOW brings up several options. These are:
SITE CONFIGURATION Opens setup on the select DVR unit.
NETWORK BACKUP This option opens the BACKUP window which allows you to locally save video which is
located on the DVR.
START LIVE START LIVE places the selected camera onto the MAIN DISPLAY AREA..
STOP LIVE STOP LIVE temporarily stops playing the video on the selected camera.
CLOSE LIVE CLOSE LIVE removes the camera from the MAIN DISPLAY AREA.
SHOW REMOCON SHOW REMOCON opens the PTZ controller.
BEGIN SEARCH This option opens the search window and allows you to search through saved video.
Moving Cameras Around on Screen
To move cameras around, simply drag them from one location to another on the screen.
Removing a Camera from the Live View
Right-Click on the cameras and select CLOSE.
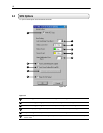
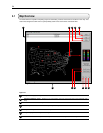
3.2 Multiple Screen Divisions
The SCS software allows you to create several groups of
cameras and customize the organization of the cameras. These
screens can be selected from the SCREEN Dropdown menu.
Each Screen can contain up to 36 different cameras, and the
Screen Division buttons will affect only the selected screen.
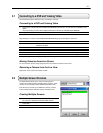
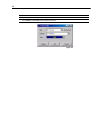
Creating Multiple Screens
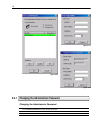
1) Click the blue Monitor icon next to the SCREEN dropdown
list to open the SCREEN POSITION NAME window.
2) Once this is opened, type a name into the text field and then
select ADD.
3) Continue adding as many new Screens as necessary.