


6 Installation
MAN0131 (Rev. 12/23/2005)
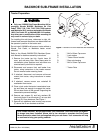
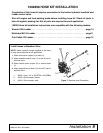
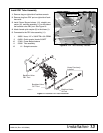
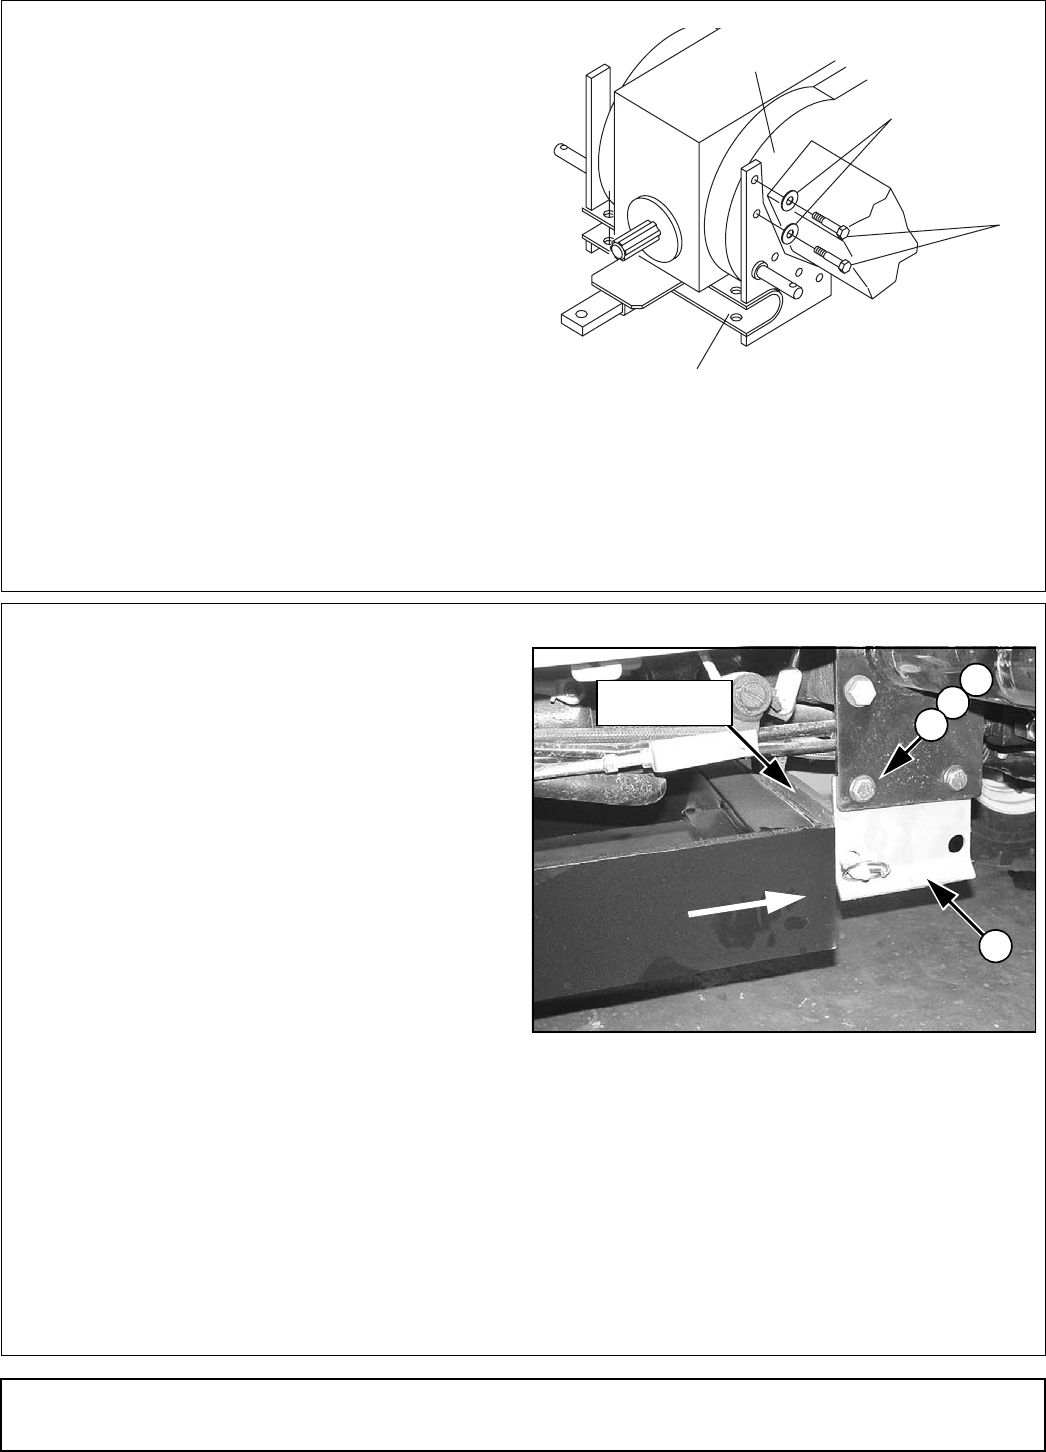
Install Rear Mounting Bracket
Refer to Figure 2.
1. Position rear mounting bracket (2) on tractor axle
housings (D).
2. Install cap screws (9) and hardened flat washers
(8) in top two holes of mounting bracket (2) as
shown.
3. Install cap screws (A) and lock washers (B) previ-
ously removed in bottom three holes of mounting
bracket (2) as shown.
4. Torque bolts (9 & A) to 30 lbs-ft.
5. Remove jack from under tractor transmission.
A. * M10 x 85 mm Cap screw
B. * Lock washer
2. 55026 Rear mounting bracket
8. 44546 3/8 Hardened flat washer, thick
9. 52540 M10 x 1.25P x 85 mm Cap screw
* Tractor Parts
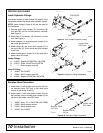
Figure 2. Rear Mounting Bracket Installation
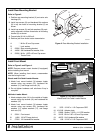
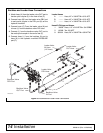
Install Front Mount
Refer to Figure 3 and Figure 4.
NOTE: Remove mower mount bracket (if equipped)
before installing front mount.
NOTE: When installing front mount, crossmember
must be facing the rear.
Woods and Cub Cadet Loader Mounts.
1. Attach front mount bracket (3) between loader
mounts using cap screws (12), hardened flat
washers (11), and flange lock nuts (10).
2. Do not tighten hardware until sub-frame fit-up is
complete.
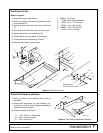
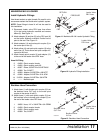
Mahindra Loader Mount.
1. Attach adapter plate (16) to the outside of loader
mounts using cap screws (18) and hardened flat
washers (19).
2. Attach front mount bracket (3) between loader
mounts using cap screws (20), hardened flat
washers (11), spacer washers (17), and flange
lock nuts (10).
3. 55041 Front mount
10. 11900 1/2 NC Flange lock nut
11. 57816 1/2 Hardened flat washer
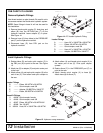
Figure 3. Front Mount Installed,
Woods and Cub Cadet Loader Mounts
12. 3379 1/2 NC x 1-1/2 Cap screw GR5
16. 1011542 Adapter plate
17. 23883 Spacer, 1/2 ID x 1-1/2 OD washer
18. 33125 M14 x 2.0P x 50 mm Cap screw
19. 46070 9/16 Hardened flat washer
20. 639 1/2 NC x 2-1/2 Cap screw GR5
9
8
2
CD5017B-1
D
DP1
11
12
Front Mount
Crossmember
10
3
FORWARD