4-4
Removing an Induction Element
1. Unplug cooktop or disconnect power.
2. Remove the cooktop glass from the cooktop
(see page 4-2 for the procedure).
Left Front Induction
6 inch Element
Left Rear Induction
9 inch Element
Right Rear Induction
8 inch Element
Right Front Induction
6 inch Element
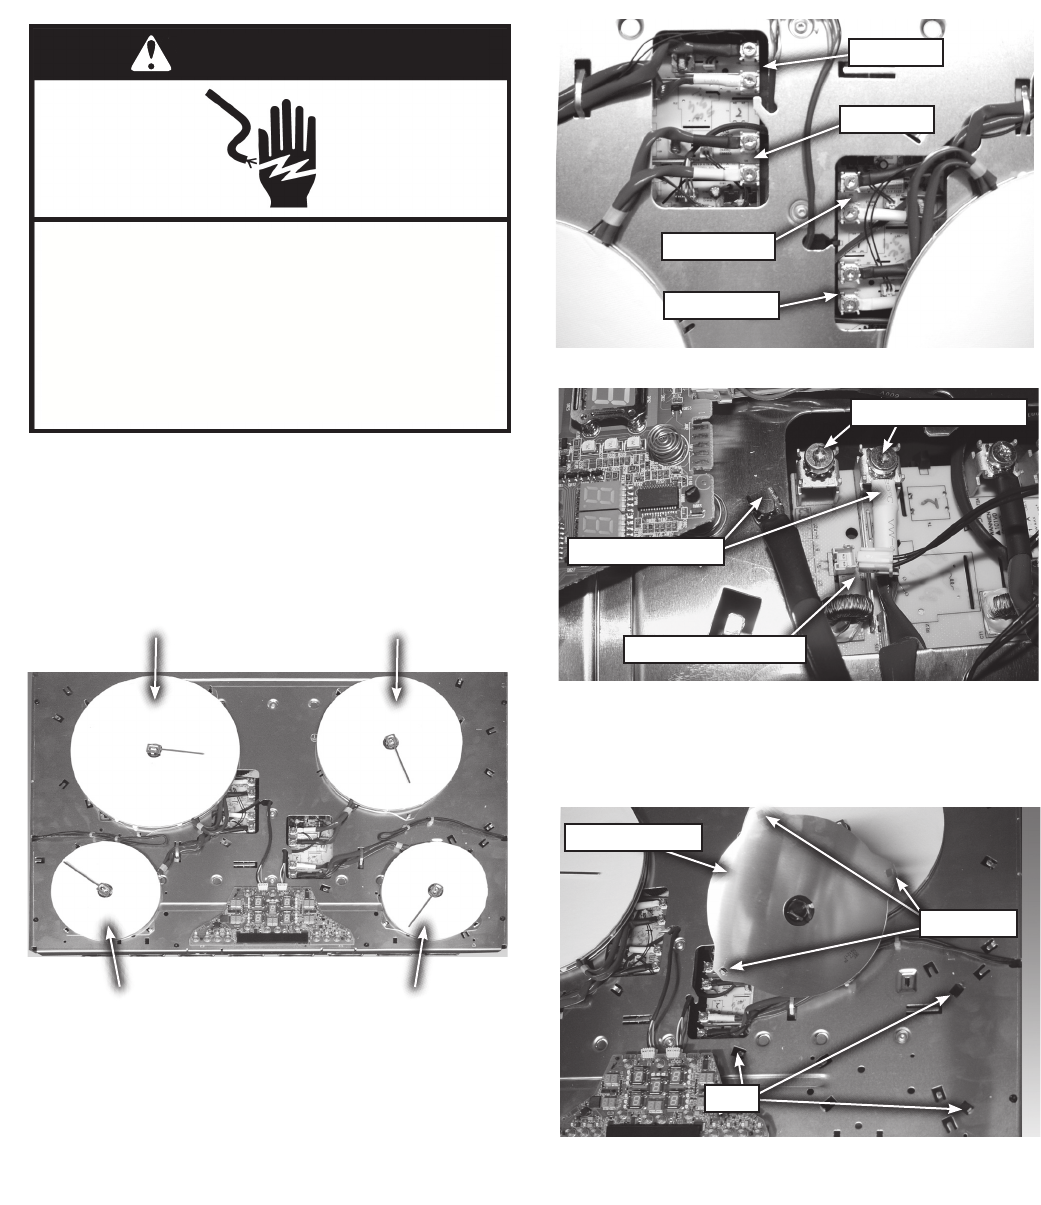
3. The elements are connected to the right
and left power boards by means of two
centrally located openings in the
aluminum cover plate, see gure 2.
To remove an element, loosen the
connector screw for each of the 2 leads
on the element.
5. The elements are located on the cooktop by
a series of tabs that engage corresponding
openings in the element base. Remove the
element by lifting the element up off of the
tabs, see gure 4.
4. Slip the “U” connector out. Disconnect the
sensor connection from the P.C. board, and
remove the element, see gure 3.
Figure 2
Figure 3
Figure 4
Figure 1
“U” connectors
Tabs
Element Base
Openings
Sensor Connector
Left Rear
Right Front
Left Front
Right Rear
Connector Screws
Electrical Shock Hazard
Disconnect power before servicing.
Replace all parts and panels before
operating.
Failure to do so can result in death or
electrical shock.


