


8x8 and 16x16 VGA / HDTV Matrix Switch with Audio, RS232 & IP Control
13
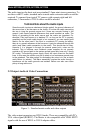
Press and release any Input button, the backlit LED of that button will light, and
all the backlit LEDs for the outputs tied to it will light up solid. At this point,
pressing any output buttons will be breaking or making connections.
To disconnect a tie, press the lit output button once. To make new ties, press any
of the unlit output buttons. The output LED will be blinking to indicate a pending
change of state. If you change your mind simply press the blinking output LED
again and it will go back to its previous state.
When you are done, press ENTER to save new changes. If you wait too long (8
seconds of inactivity) your changes will be lost and all the input and output LEDs
will go out.
Video only or Audio only
Press and release the AUD and/or VID buttons so that the backlit LED of the
desired button is lit and the other one is off.
Follow the same procedure as described above
3.1.2.2 Making a tie by Output
Video and Audio to follow each other
Make sure both VID and AUD LEDs are lit, indicating that your changes will be
synchronized (i.e. audio and video are from the same input).
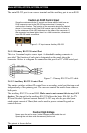
Press and release any Output button, the backlit LED of that button will light,
and all the backlit LEDs for the input tied to it will light up solid. At this point,
pressing any output buttons will be breaking or making connections.
To disconnect a tie, press the lit input button once. To make a new tie, press any
of the unlit input buttons. The new input LED will be blinking to indicate a
pending change of state. If you change your mind simply press the blinking input
LED again and it will go back to its previous state.
When you are done, press ENTER to execute and save the changed route. If you
wait too long (8 seconds of inactivity) your changes will be lost and all the input
and output LEDs will go out.
Video only or Audio only
Press and release the AUD and/or VID buttons so that the backlit LED of the
desired button is lit and the other one is off. Follow the same procedure as
described above.