


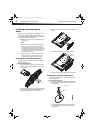
TV/DVD combo components
7
DX-26LD150A11/DX-32LD150A11
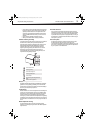
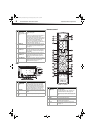
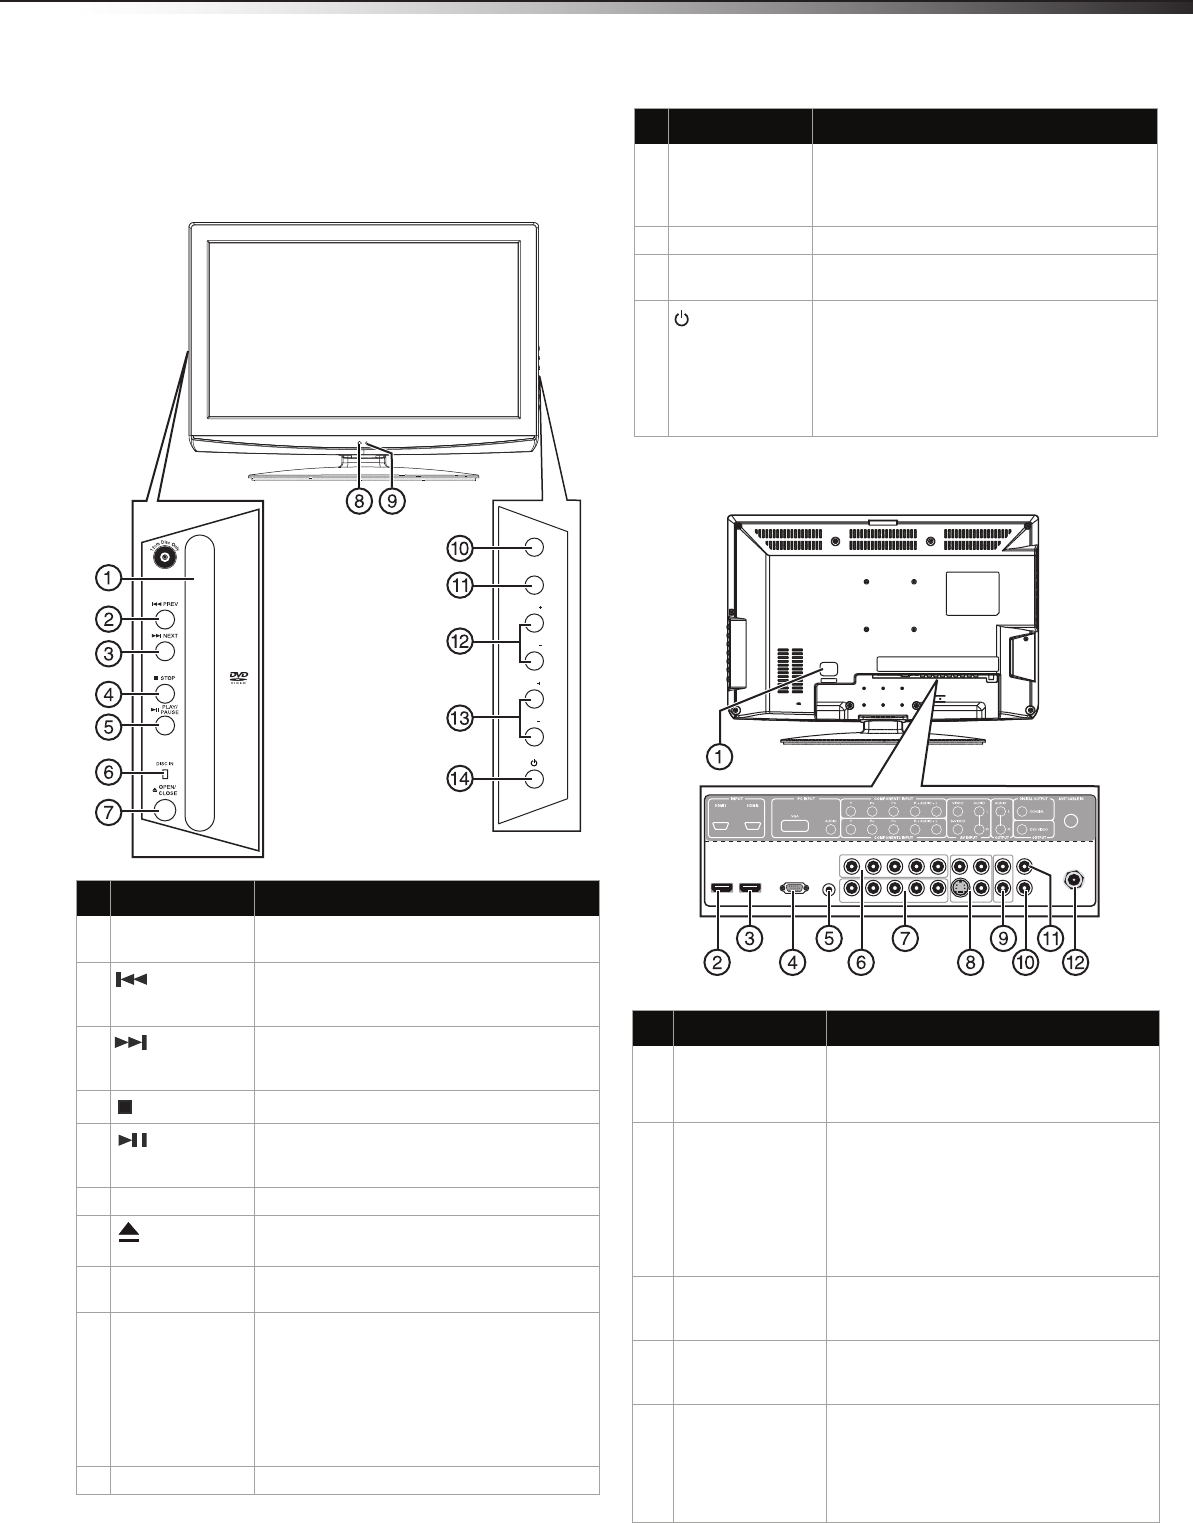
Front
Model DX-26LD150A11 is used as the example throughout this guide. If
you are using Model DX-32LD150A11, there may be slight differences
from the illustrations.
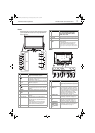
Back
# Component Description
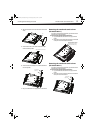
1 Disc slot Insert a disc (DVD or CD) into this slot to
change mode and begin playback.
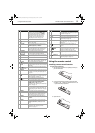
2
PREV button
Press to skip to the previous chapter or track.
See “Playing a DVD” on page 35, or “Playing
an audio CD” on page 35.
3
NEXT
button
Press to skip to the next chapter or track. See
“Playing a DVD” on page 35, or “Playing an
audio CD” on page 35.
4
STOP button
Press to stop playback.
5
PLAY/PAUSE
button
Press once to begin playback. Press again to
pause playback. Press once more to resume
playback.
6 DISC IN Lights when a DVD or CD is in the disc slot.
7
OPEN/CLOSE
button
Press to eject the disc in the disc slot.
8 Remote sensor Receives signals from the remote control. Do
not block.
9 Power indicator Lights blue when your TV/DVD combo is
turned on.
Lights red when your TV/DVD combo is in
standby mode.
No light when power cord is unplugged.
For more information, see “Turning your
TV/DVD combo on or off“on page 15.
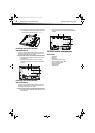
10 MENU Press to open the on-screen TV menu.
VOL
VOL
INPUT
MENU
CH
CH
Dis
c
labeltowardsfront
11 INPUT Press to select the AV signal input. You can
select TV, AV, S-Video, Component1,
Component2, DVD, HDMI1, HDMI2,
HDMI3, VGA, or USB.
12 VOL+/VOL– Press to increase or decrease the volume.
13 CH+/CH– Press to go to the next or previous channel in
the channel list.
14
(Power)
button
Press to turn your TV/DVD combo on or off
(standby mode).
For more information, see “Turning your
TV/DVD combo on or off“on page 15.
Note: Even when your TV/DVD combo is off, power is still
flowing through it. To disconnect power, unplug the power
cord.
## Component Description
1 AC INPUT Connect the power cord to this jack.
Note: Even when your TV/DVD combo is off, power is still
flowing through it. To disconnect power, unplug the power
cord.
2
and
3
HDMI1and HDMI2
INPUT jacks
Connect an HDMI device, such as a cable
box or DVD player, to this jack. An HDMI
cable carries both video and audio, so you
do not need to make an audio connection.
An additional HDMI jack is available on the
side of the TV/DVD combo. For more
information, see “Connecting an HDMI
device (best picture)” on page 11.
4 PC INPUT VGA
jack
Connect the video signal from a computer
to this jack. For more information, see
“Connecting a computer” on page 13.
5 PC INPUT AUDIO
jack
Connect the audio signal from a computer
to this jack. For more information, see
“Connecting a computer” on page 13.
6
and
7
COMPONENT1
and
COMPONENT2
INPUT (Y, Pb,Pr,
and L/R Audio)
jacks
Connect a component video device to
these jacks. For more information, see
“Connecting a component video device
(better connection)” on page 11.
# Component Description
DX-26LD-36LD_09-1090.book Page 7 Wednesday, January 27, 2010 8:33 AM