2
DVD+VCR User’s Guide
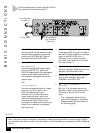
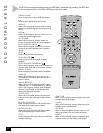
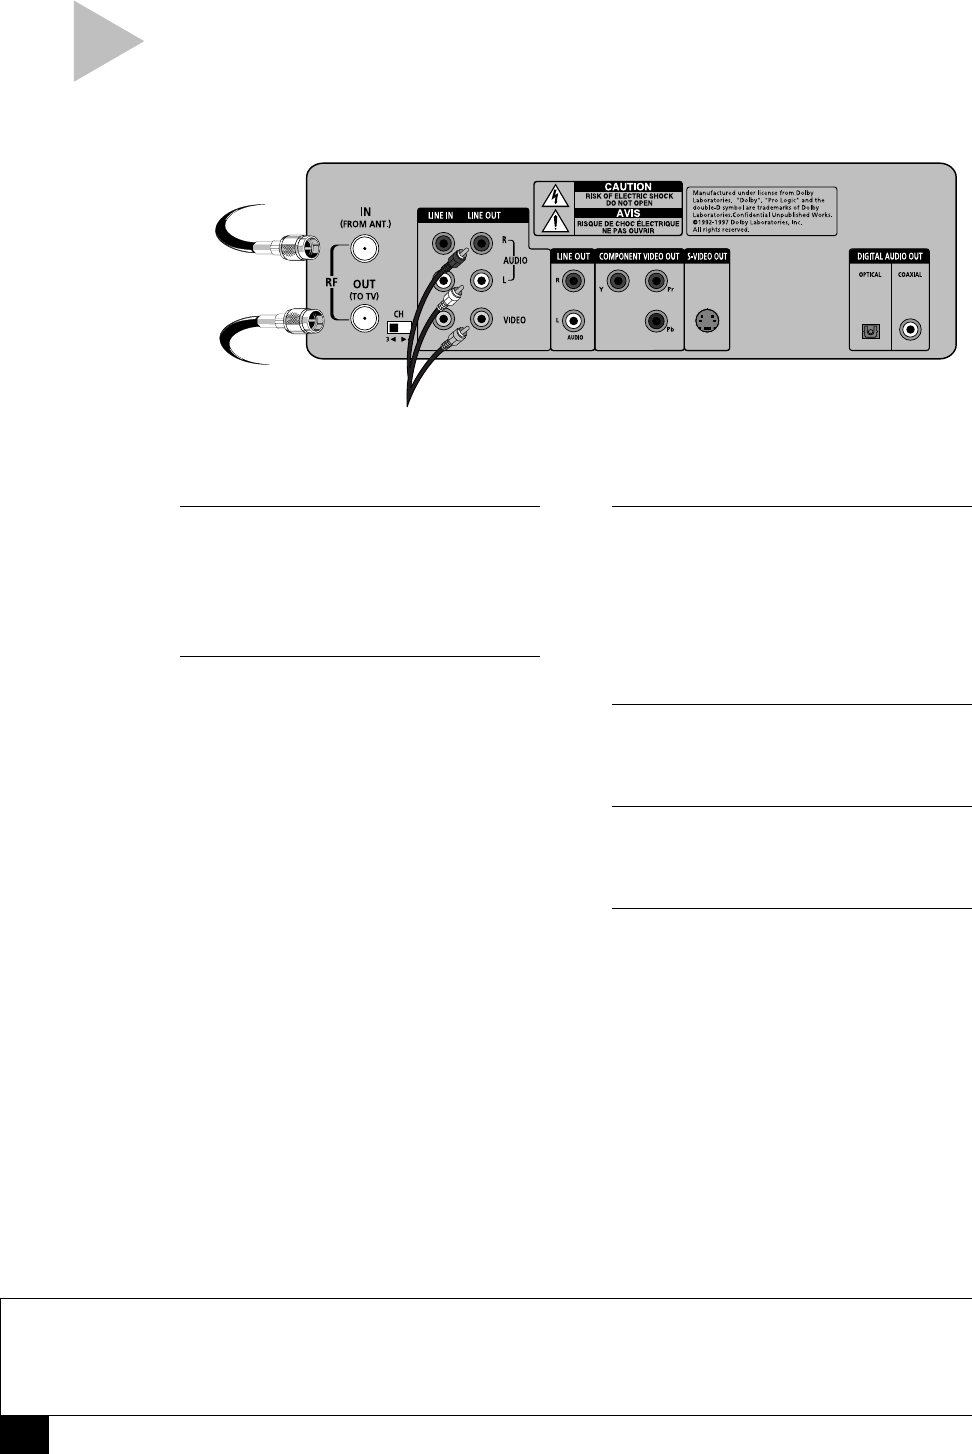
1 CONNECT ANTENNA/CABLE TV
Connect the RF coaxial cable from your
indoor/outdoor antenna or cable wall
outlet to the IN (FROM ANT.) jack on
the back panel of the DVD+VCR.
2 CONNECT DVD+VCR TO TV
RF Connection
Connect the supplied RF coaxial cable
from the “OUT (TO TV)” jack on the
DVD+VCR back panel to your television’s
antenna in jack. Use this connection if
your television is equipped with a basic
antenna input.
OR
Line Connection
Connect the supplied stereo A/V cable
from the “Line Out” jacks on the
DVD+VCR back panel to your
television’s Line In jacks. Be sure to
match yellow to video, red to right
audio and white to left audio on your
television and DVD+VCR. Use this
connection for better sound and picture
quality if your television is equipped
with line inputs.
BASIC CONNECTIONS
3 SET DVD+VCR OUTPUT CHANNEL
If you used the RF connection in Step 2,
set the CH (Channel) switch on the back
panel of the DVD+VCR to 3 or 4,
whichever is not an active channel in
your area. If you used the Line Connec-
tion, skip to Step 4.
4 PLUG IN DVD+VCR
Connect the DVD+VCR power cord to a
standard 120V/60Hz wall outlet.
5 TURN ON TV AND DVD+VCR
Turn on your television, and press
POWER on your DVD+VCR.
6 SET TV TO CHANNEL 3, 4,
OR LINE
Set your TV to the same channel you
selected in Step 3. If you used the Line
Connection, set your TV to its Line
input.
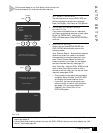
• The “Language/Langue/Idioma”
menu should appear on the screen.
• Please proceed with Auto Setup on
the following page.
NOTES
• For Advanced Connections, please refer to Appendix A.
• Even if you plan to use the S-Video or Component Video Outputs you MUST connect the DVD+VCR to
your television with either the RF or Line Connection. This will enable you to operate the DVD+VCR setup
menus.
Follow these steps to connect the DVD+VCR to
your television and antenna/cable TV.
To Line Inputs on
your Television
(Optional)
From Antenna
or Cable TV
To Television


