7
2 - Quick Tour
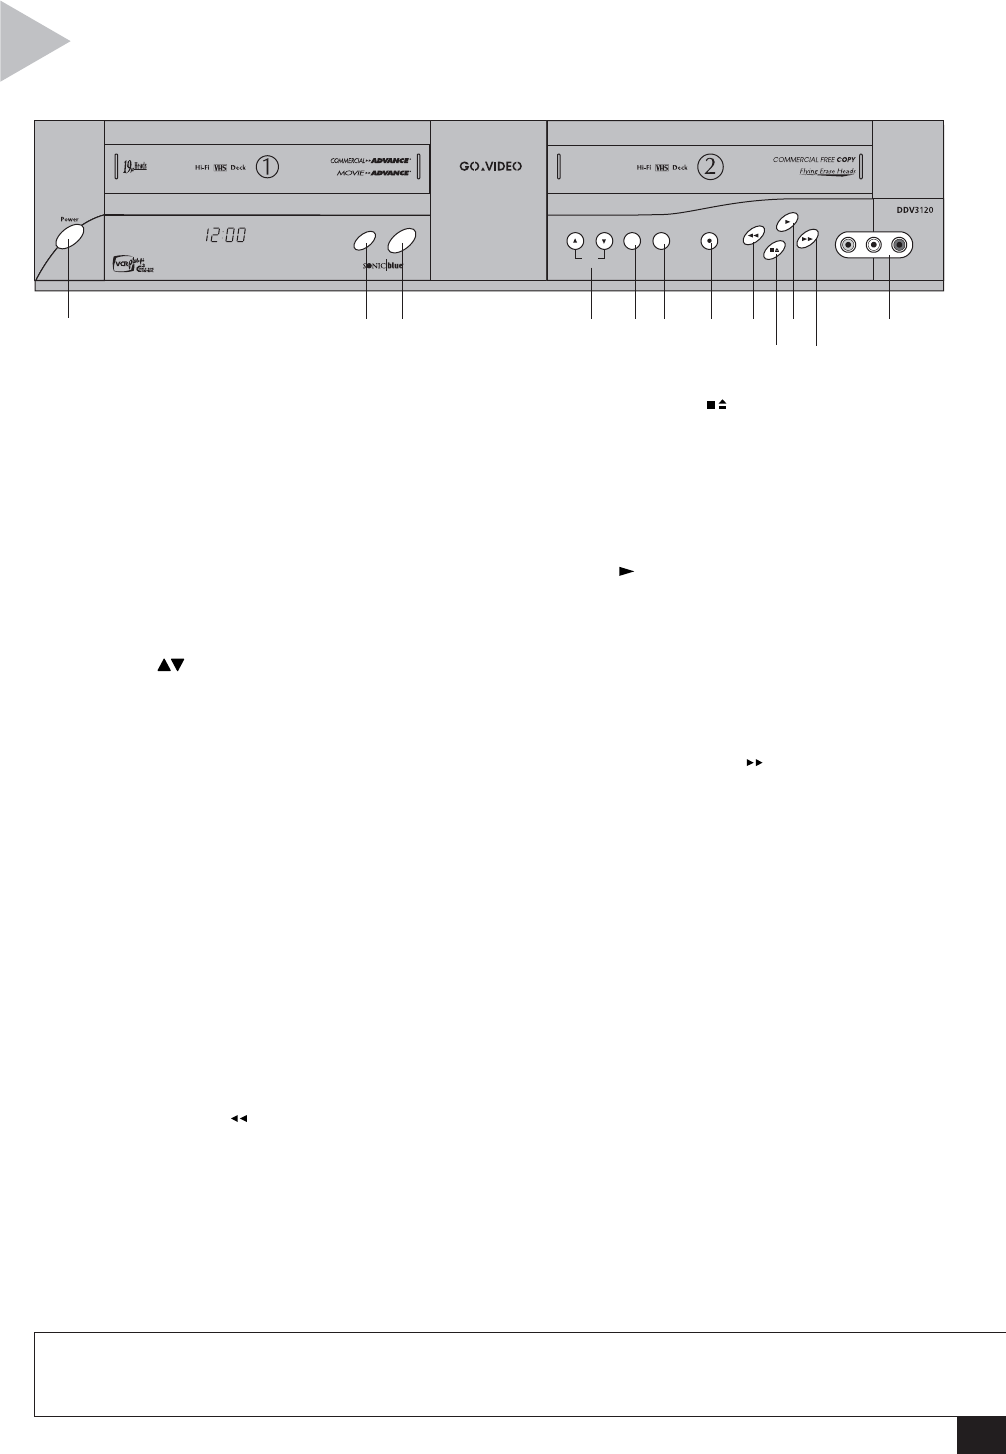
FRONT PANEL
1 POWER
Press to power the VCR on and off.
2 DECK SELECT
Press to switch control between
Deck 1 and Deck 2.
3 COPY TAPE
Press to copy the tape in Deck 1 to
the tape in Deck 2 (see page 10).
4CH
Press to select the next or previous
channel.
5 TV/VCR
Press to switch back and forth
between the TV tuner and the VCR
tuner.
6 MENU
Press to display the VCR’s Main
Menu.
7 REC
Press to start recording in the active
deck. Press repeatedly to add
recording time in 30-minute incre-
ments (see page 14).
8 REWIND
While the VCR is stopped, press to
rewind the tape in the active deck.
While a tape is playing, press to
visually search backward (Review). In
the menu system, press to return to
the previous menu.
9 STOP/EJECT
Press once to stop the tape in the
active deck, or press twice to eject
the tape. In the menu system, press
to move the blinking selection
arrow down.
10 PLAY
Press to play the tape in the active
deck. While a tape is playing or
recording, press to pause the tape
in the active deck. In the menu
system, press to move the blinking
selection arrow up.
11 FAST-FORWARD
While the VCR is stopped, press to
fast-forward the tape in the active
deck. While a tape is playing, press
to visually search forward (Cue). In
the menu system, press to make
selections.
12 FRONT AUDIO/VIDEO
INPUT (LINE 1)
Connect to the composite video
(yellow) and stereo audio outputs
(white and red) of an external
component, such as a camcorder or
videogame, using RCA cables. Use
the white input for mono sources.
The following is an overview of the Dual-
Deck VCR front panel.
Ch
Rec
Deck Select
MenuTV/VCR
Copy
VCR
Video Audio
12345678
9
10
11
12
NOTE
• Line Input Labels - Throughout the menu system, the front audio/video input is referred to as “Line 1”
(or “L1”), and the rear audio/video input is referred to as Line 2 (or “L2”). To change these labels to match
the components you have connected, see page 43.
