


Basic Operations (Recording)
40
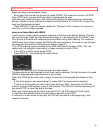
TURN ON CABLE BOX AND
TUNE IT TO CH 02
OUTPUT CH 03
PROCEED GUIDE
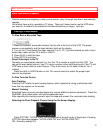
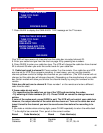
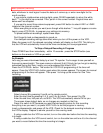
7. Press GUIDE to display the CABLE BOX TYPE message on the TV screen.
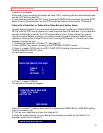
CABLE/DSS BOX SETUP
TURN ON CABLE BOX AND
TUNE IT TO CH 02
OUTPUT CH 03
CABLE BOX TYPE --
ENTER CABLE BOX TYPE
FROM OWNER'S MANUAL
END GUIDE
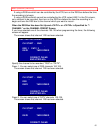
Your VCR will now receive all channels from the cable box via output channel 03.
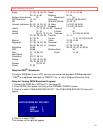
8. Enter your cable box type from the chart on page 43 by pressing two numbers.
9. Press GUIDE to enter your cable box type. The VCR will change the cable box from channel
02 to channel 09 when you enter the correct code for your cable box.
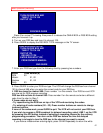
10. Cable box tuned to channel 9: Press number 2 on the remote. Your cable box and VCR
are now set for VCR Plus+ program recording. In most cases, you can use the remote's
channel up/down control to change the channels on your cable box. (The VCR channel will not
change, but the cable box will change channels.) Depending on the manufacturer of your cable
box, certain models will allow you to enter the channel directly by using the numbers on the
remote.
Cable box did not tune to channel 9: Press number 1 on the remote and enter a different
code from the chart.
If these codes do not work:
• Try repositioning the cable box on top of the VCR and reentering the codes.
• Try entering all code numbers (00 - 61). Press CLEAR on remote to change incorrect
entries.
If none of the codes work, press GUIDE to quit. The VCR will not control your cable box.
However, the output channel of the cable box has been set. Turn on the cable box and
leave it tuned to the channel you want to record some time before the recording is to
begin.
If you make a mistake when entering digits, press CLEAR repeatedly to return the white dash
"-" to the digit to be corrected. Then, punch in the correct number.
Brand Code Number(s) Brand Code Number(s)
Anvision 07, 08 Randtek 07, 08
Cablestar 07, 08 RCA 00, 27, 39, 44