English-59
Recording Schedule
You can set a programme to record automatically.
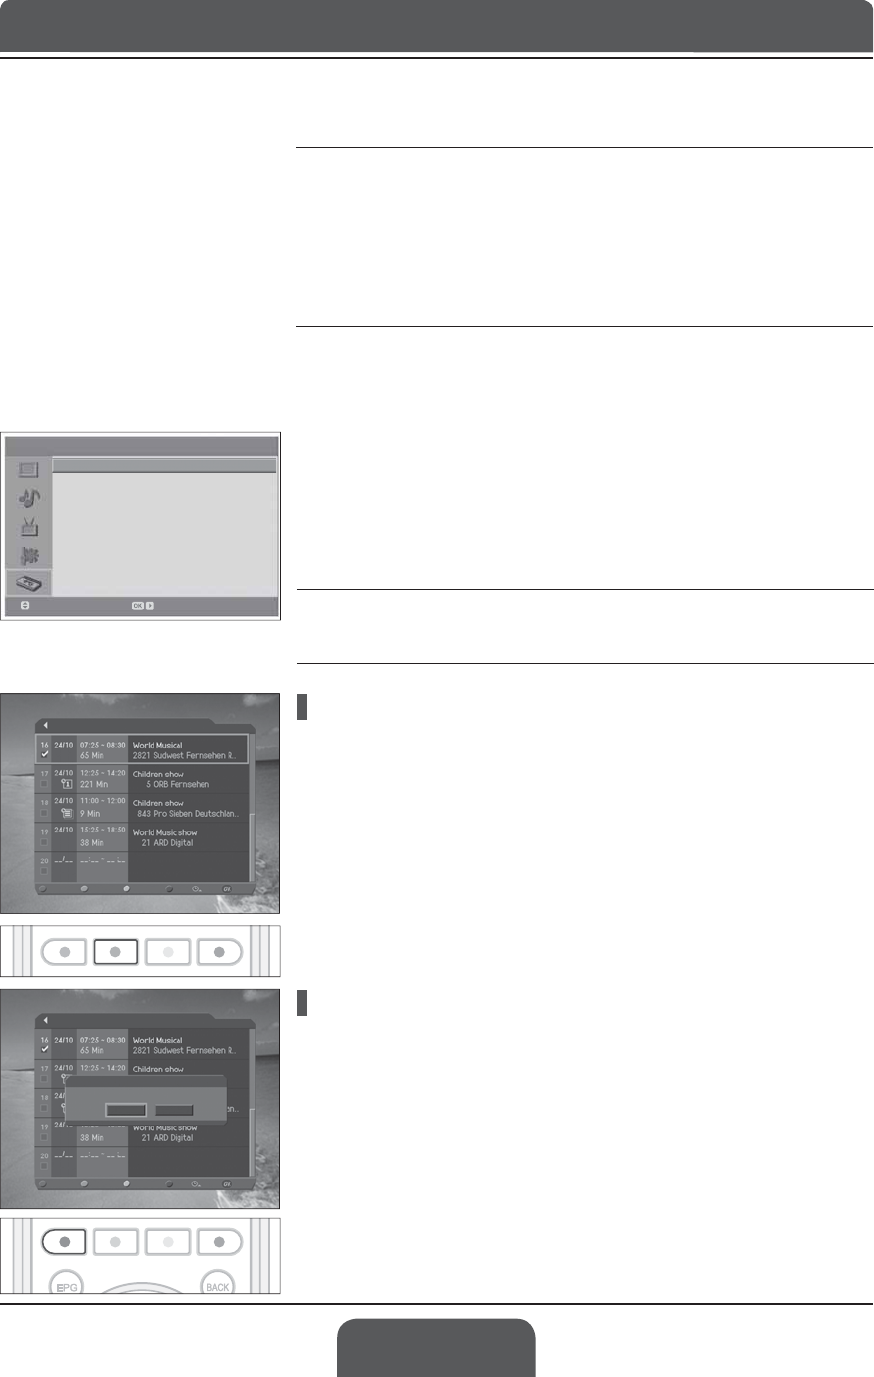
1 Press the MENU button.
2 Select RecordingXVLQJWKHŸźEXWWRQDQGSUHVVWKHOKRUŹEXWWRQ
3 Select ScheduleXVLQJWKHŸźEXWWRQDQGSUHVVWKHOKRUŹEXWWRQWR
display the reserved recording list on the screen.
Note: You can schedule recording easily using the programme guide. Refer to
Chapter 5. Using the Electronic Programme Guide (EPG) > Reserving a
Programme.
Selecting/Unselecting Reserved Programmes
1 Select a programme and press the GREEN button. You can select multiple
programmes.
2 To unselect the selected programmes, press the GREEN button again.
Deleting Reserved Programmes
1 After selecting reserved programmes using the GREEN button, press the
RED button.
2 Select Yes and press the OK button to delete the reserved programmes.
Notes:
1. Make sure that the hard disk drive is connected correctly before recording.
2. During recording, the standby indicator on the front of your TV turns on RED.
3. Ensure that there is enough free space before recording. If the free space on
WKHFRQQHFWHGKDUGGLVNGULYHLVLQVXI¿FLHQWUHFRUGLQJZLOOVWRS5HFRUGLQJRQH
hour of programme may require up to 2 or 3GB of hard disk space. The space
for recording a 1 hour programme may differ depending on the programme.
4. You can record radio programmes also.
Chapter 11 >> Recording and Playback
> Recording
Schedule
Playlist
MP3
HDD Control
Move
Enter
Recording Schedule
Delete Select Reserve Sort Edit
Recording Schedule
Delete Select Reserve Sort Edit
Notice
Do you want to cancle this reservation?
OK Cancel
