12
Insignia NS-LCD42 42" LCD TV
www.insignia-products.com
4 Press the or buttons to select Channel
Scan, then press OK. The TV will scan for all
available channels in your area.
5 Press the or buttons to select Tuner
Mode, then press OK.
6 Press the or buttons to select the signal
source for your TV (CABLE for cable service,
or AIR for an antenna).
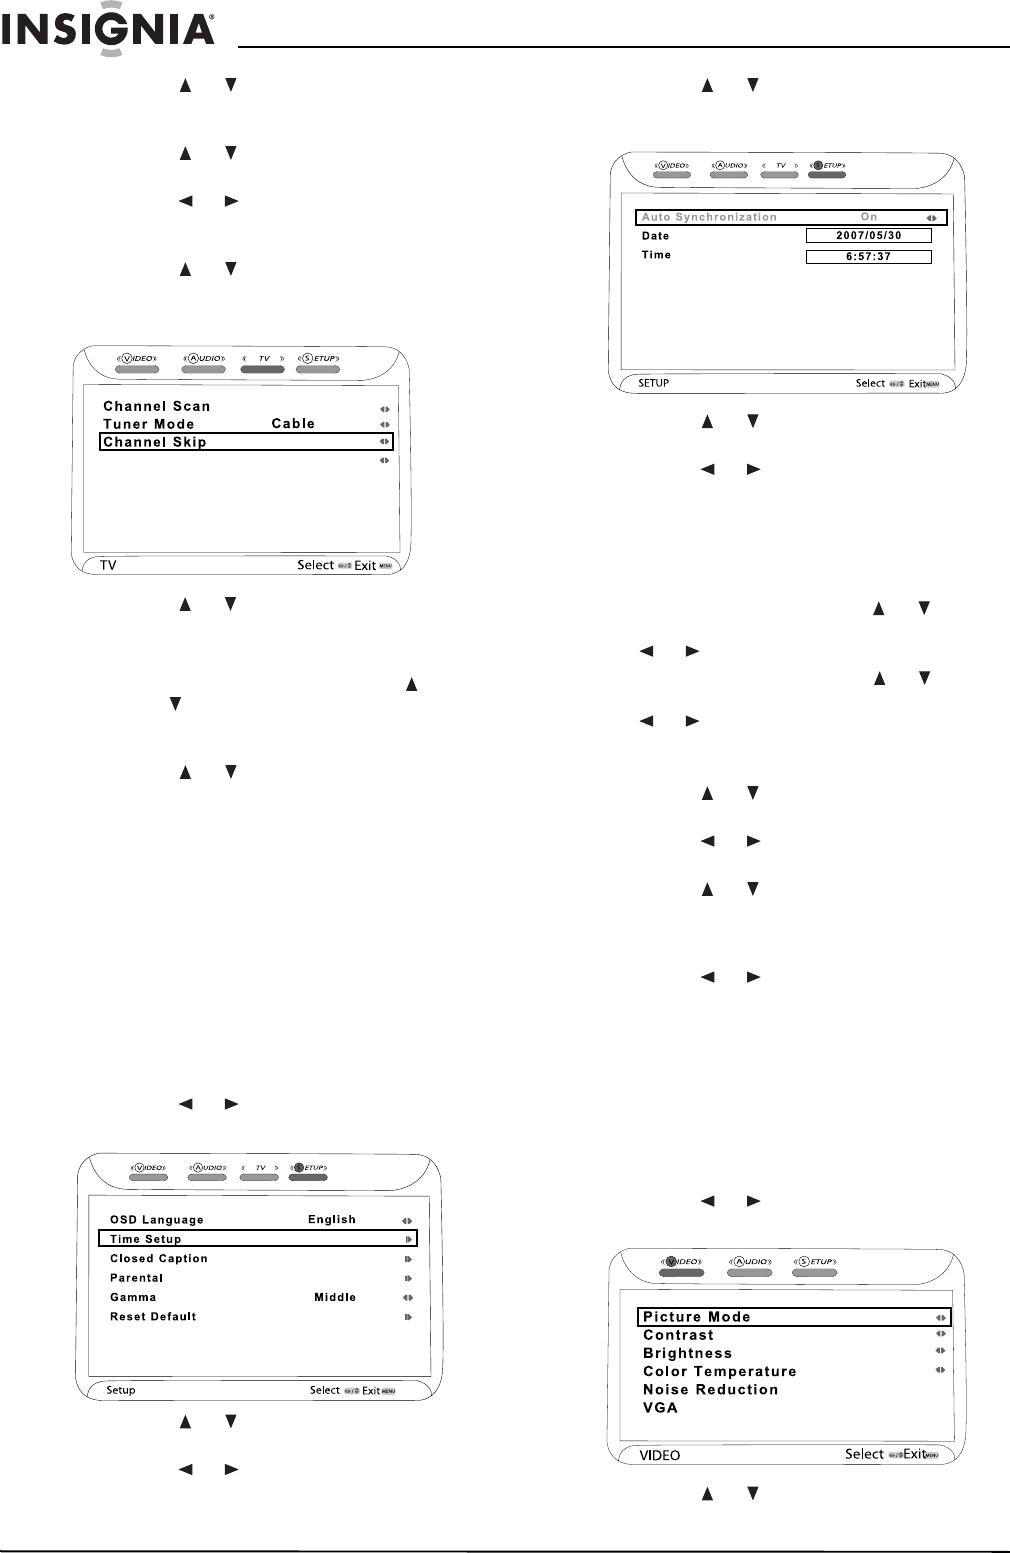
7 Press the or buttons to select Channel
Skip, then press OK. The
Channel Skip
submenu opens.
8 Press the or buttons to select a channel
you want skip, then press OK. The
checkmark will be removed from the box
adjacent the channel, and the channel will be
skipped when you use the Channel or
Channel buttons (you can still access the
channel directly by inputting the number on
the number pad of the remote control).
9 Press the or buttons to select Favorite
List, then press OK. The Favorite List
submenu opens.
10 Highlight a channel you want to add, then
press OK. A check mark appears in the box.
Uncheck a box to delete a channel from your
Favorite List.
11 Press EXIT to exit the on-screen menu.
Setting up TV preferences
To initially set up your TV preferences:
1 Turn on your TV.
2 Press the MENU button on the remote
control. The initial on-screen menu opens.
3 Press the or buttons to select SETUP,
then press OK. The
SETUP
menu opens.
4 Press the or buttons to select OSD
Language, then press OK.
5 Press the or buttons to select the
language you want when viewing text on
screen, then press OK to confirm.
6 Press the or buttons to select Time
Setup, then press OK. The
Time Setup
menu
opens.
7 Press the or buttons to select Auto
Synchronization, then press OK.
8 Press the or buttons to set Auto
Synchronization to ON or OFF.
When Auto Synchronization is ON (grayed
out), both time and date are automatically
set. When Auto Synchronization is OFF, you
can set the time and date manually.
• To set the Date, press the or buttons
to select Date, press OK, then press the
or buttons to set the date.
• To set the Time, press the or buttons
to select Time, press OK, then press the
or buttons to set the time.
9 Press EXIT on the remote control, or MENU
on the TV to return to the
SETUP
menu.
10 Press the or buttons to select Gamma,
then press OK.
11 Press the or buttons to select a brighter
or darker overall picture.
12 Press the or buttons to select Reset
Default, then press OK. A note appears
asking if you want to reset all settings to the
factory default.
13 Press the or buttons to select OK or
CANCEL, then press OK to proceed.
14 Press EXIT to exit the on-screen menu.
Changing the video settings
To use a preset picture mode on your TV:
1 Turn on your TV.
2 Press the MENU button on the remote
control. The initial on-screen menu opens.
3 Press the or buttons to select VIDEO,
then press OK. The
VIDEO
menu opens.
4 Press the or buttons to select Picture
Mode, then press OK.
Favorite List
On
