Intel® Server Chassis SC5400 User’s Guide xv
List of Figures
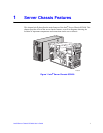
Figure 1. Intel
®
Server Chassis SC5400 ................................................................................... 1
Figure 2. Internal Component Locations ................................................................................... 6
Figure 3. Front Control Panel.................................................................................................... 7
Figure 4. Intel
®
Local Control Panel Features........................................................................... 9
Figure 5. Server Chassis Back................................................................................................ 10
Figure 6. Optional Peripherals................................................................................................. 11
Figure 7. Removing the Chassis Cover................................................................................... 16
Figure 8. Installing the Chassis Cover..................................................................................... 17
Figure 9. Removing the Front Bezel........................................................................................ 18
Figure 10. Installing the Front Bezel........................................................................................ 19
Figure 11. Removing the Processor and Memory Air Ducts ................................................... 20
Figure 12. Removing Inner Plastic Air Baffle from Processor Air Duct ................................... 21
Figure 13. Installing the Processor and Memory Air Ducts ..................................................... 22
Figure 14. Removing a Fixed Fan........................................................................................... 23
Figure 15. Removing Hot Swap Fan ....................................................................................... 24
Figure 16. Installing Hot Swap Fan ......................................................................................... 25
Figure 17. Removing Slide/Drive Assembly from Upper Device Bay...................................... 26
Figure 18. Re-inserting Empty EMI Shield/Slide Assembly into Chassis................................ 27
Figure 19. Re-inserting Empty EMI Shield/Slide Assembly into Chassis................................ 28
Figure 20. Removing EMI Shield/Slide Assembly from Upper Device Bay............................. 29
Figure 21. Attaching Slides to a DVD or CD-ROM Drive ........................................................ 29
Figure 22. Removing Six-drive Fixed Drive Cage from Chassis ............................................. 31
Figure 23. Unlocking and Opening Upper Door of Fixed Drive Cage ..................................... 31
Figure 24. Opening Lower Door of Fixed Drive Cage ............................................................. 32
Figure 25. Removing Drive/Slide Assembly from Drive Cage................................................. 32
Figure 26. Inserting Empty Device Slides into Drive Cage...................................................... 33
Figure 27. Closing Lower Door of Fixed Drive Cage............................................................... 33
Figure 28. Closing Upper Door of Fixed Drive Cage............................................................... 34
Figure 29. Tightening Thumb Screw ....................................................................................... 34
Figure 30. Removing Six-drive Fixed Drive Cage from Chassis ............................................. 35
Figure 31. Unlocking and Opening Upper Door of Fixed Drive Cage ..................................... 36
Figure 32. Opening Lower Door of Fixed Drive Cage ............................................................. 36
Figure 33. Removing Slides from Drive Cage......................................................................... 37
Figure 34. Attaching Device Slides to Hard Drive ................................................................... 37
Figure 35. Inserting Drive/Slide Assembly into Drive Cage..................................................... 38
Figure 36. Closing Lower Door of Fixed Drive Cage............................................................... 38
Figure 37. Closing Upper Door of Fixed Drive Cage............................................................... 39
Figure 38. Tightening Captive Screw ...................................................................................... 39
Figure 39. Routing Power Cables to Fixed Drives .................................................................. 40
Figure 40. Routing SAS/SATA Data Cables ........................................................................... 41
Figure 41. Releasing Drive Carrier from Hot Swap Cage ....................................................... 42
Figure 42. Removing Hard Drive from Drive Carrier ............................................................... 42


