


58 EN
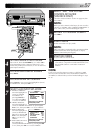
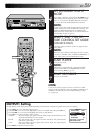
ANT. IN
AC IN
AUDIO
VIDEO
DV PLAYBACK
COMPONENT
VIDEO OUT
R
R
L
L
IN
OUT1
OUT2
CABLE
BOX
S VIDEO OUT
1
S VIDEO IN
2
Y
P
b
P
r
S VIDEO OUT
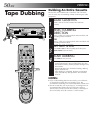
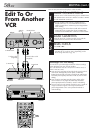
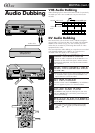
Edit To Or
From Another
VCR
You can use your VCR as the player or the recorder.
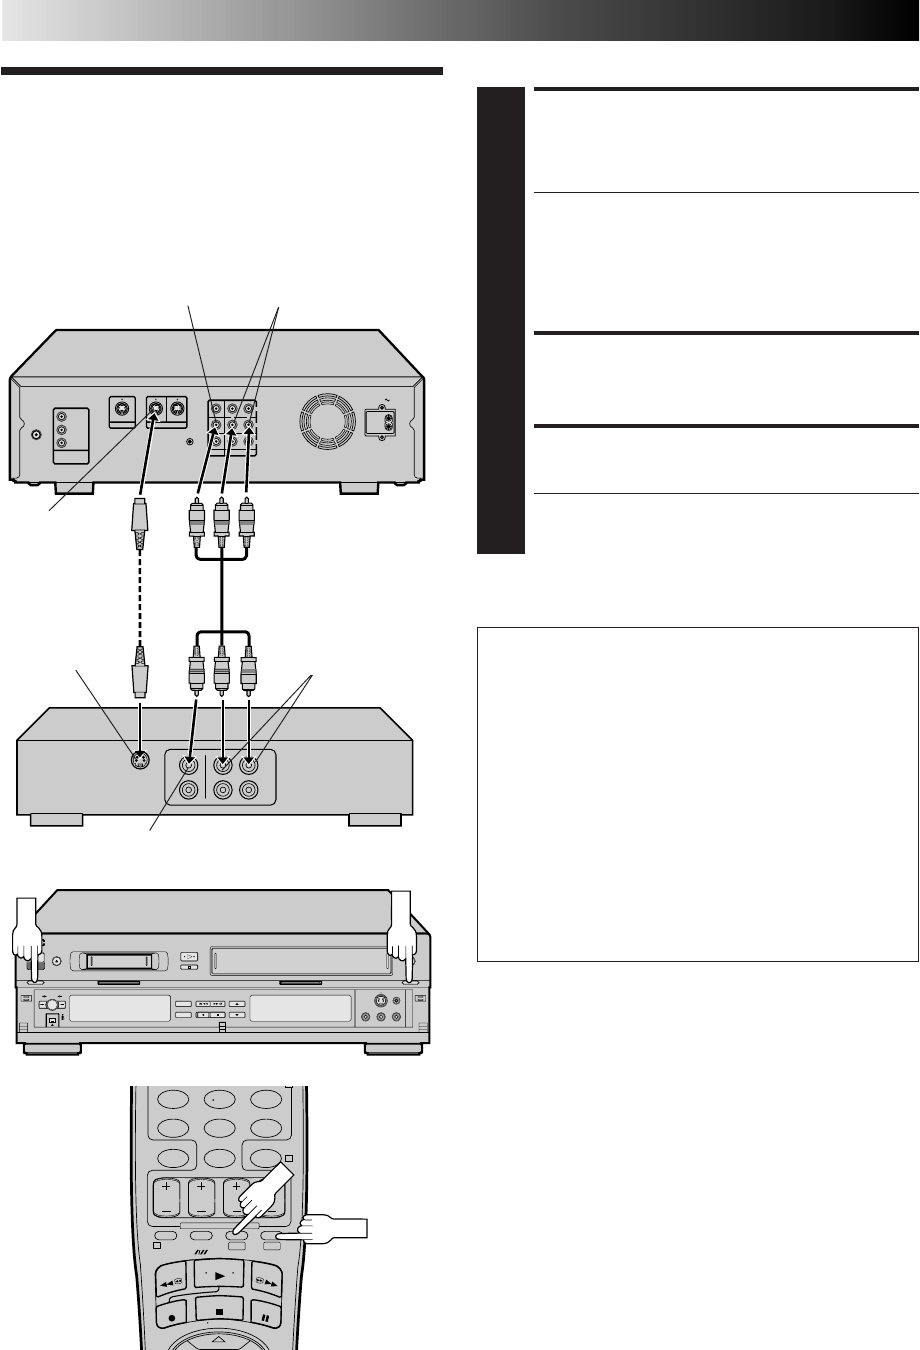
MAKE CONNECTIONS
1
Connect an AV cable between the player’s VIDEO OUT
and AUDIO OUT connectors and the recorder’s VIDEO
IN and AUDIO IN connectors.
● If using another VCR with an S-VIDEO input or
output connector, it is recommended to use the S-
VIDEO connection to minimize picture degradation
while editing.
● When using your VCR as the recorder and a monaural
VCR as the player, connect the player’s AUDIO OUT
connector to the AUDIO IN L connector on the recorder.
LOAD CASSETTES
2
Insert the playback cassette into the player and the
cassette to be recorded on into the recorder.
SELECT DECK
3
Press VHS or DV.
● When using your VCR as the source player, set
"OUTPUT1" to "VHS" or "DV", depending on the
deck being selected (੬ pg. 59).
Recorder
Another VCR
AUDIO IN
Audio/Video cable
(supplied)
VIDEO IN
Player
Your VCR
VIDEO
OUT
AUDIO OUT
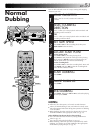
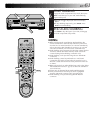
Advantages Of S-VHS Editing
S-VHS allows you make high resolution video recordings
when dubbing from one VCR to another.
You can edit from VHS to S-VHS, from S-VHS to VHS, or
from S-VHS to S-VHS.
● From VHS to S-VHS: Record VHS playback signals in the S-
VHS mode. Although the picture quality is inherently
limited by the orignal VHS source material, the edited tape
has better picture quality than those made by VHS-to-VHS
editing.
● From S-VHS to VHS: Because the picture quality of the
source material is very high, the edited tape has better
picture quality than those made by VHS-to-VHS editing.
● From S-VHS to S-VHS: A high resolution copy is made of
a high resolution original S-VHS tape with minimal
picture degradation. This is the preferred method of
video dubbing.
S-Video cable
(supplied)
S VIDEO IN
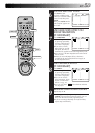
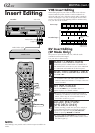
EDITING (cont.)
DV
VHS
456
7
89
0
2
4
1
DV VHS
DV
VHS