62 EN
123
456
7
89
0
2
4
1
3
T W
DV VHS
VHS Insert Editing
Insert editing replaces part of the recorded scene with new
material. Both the picture and Hi-Fi audio soundtrack are
replaced with new ones, while the normal audio soundtrack
remains unchanged. If you wish to change the normal audio
track as well, use the audio dubbing function simultaneously.
Use your VCR as the recorder.
Insert Editing
EDITING (cont.)
DV Insert Editing
(SP Mode Only)
The picture is replaced with new one, while the audio
soundtrack remains unchanged.
Use your VCR as the recorder.
MAKE CONNECTIONS
1
Connect the player's VIDEO OUT or S-VIDEO OUT
and AUDIO OUT connectors to your VCR's VIDEO IN
or S-VIDEO IN and AUDIO IN on the front panel.
SELECT RECORDING DECK
2
Press VHS or DV.
● When using the DV deck as the recoding deck, press
← so that the video and audio signals from the
VIDEO/S-VIDEO and AUDIO L + R input connectors
can be recorded.
SET INPUT MODE
3
Press the NUMBER key "0" and CH so that "L-2"
appears in place of a channel number.
● Be sure to select the correct FRONT AUX INPUT
("VIDEO" or "S-VIDEO"). (To select the correct AUX
INPUT, follow steps 5 – 7 from the "Edit From A
Camcorder" section ੬ pg. 57).
LOCATE END POINT
(VHS DECK ONLY)
4
Load the recording cassette into your VCR, and play it
back to determine the edit-out point (the end of the
segment to be replaced) using the JOG/SHUTTLE
controls or pressing ™£ and PAUSE.
● To use the JOG dial/SHUTTLE ring, first press the
JOG/SHUTTLE button on the remote control so that
the button lights up.
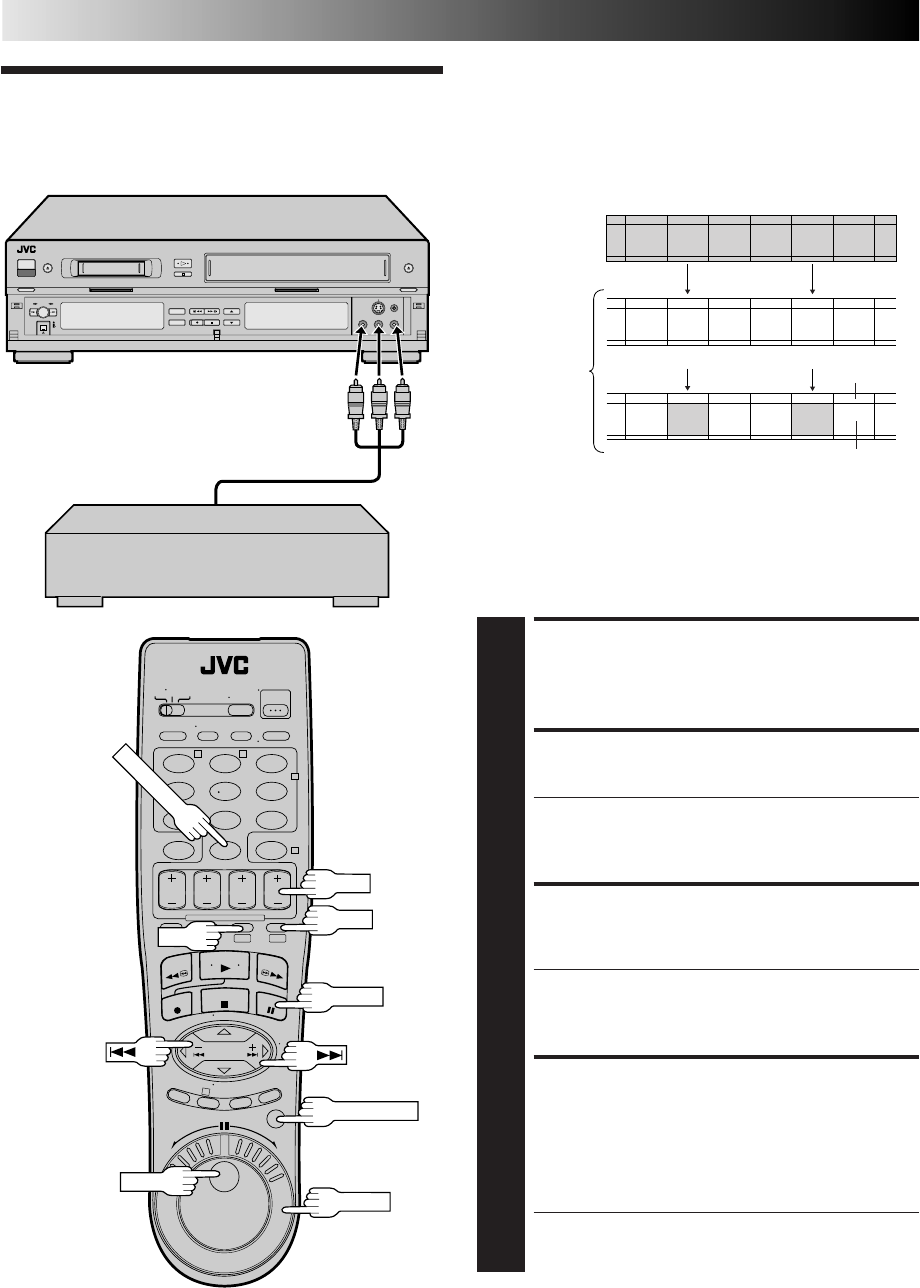
Before insert editing
After insert editing
Source tape
Recorded tape
Normal audio
track
Video/Hi-Fi
audio track
Player
Recorder
Your VCR
Another VCR
Audio/Video cable
(supplied)
PAUSE
Audio/Video signal
CH
JOG/SHUTTLE
SHUTTLE
JOG
NOTE:
Insert Editing is not possible with a Mini DV tape recorded in LP
mode.
VHS


