36 EN
STANDBY-ON
OPEN/CLOSEVIDEO/TV VCR
.@/:
GHI
PQRS TUV WXYZ
JKL MNO
ABC DEF
DVD
DISPLAY
SETUP
OK
0
21
4
65
3
9
7
8
CHANNEL
TIMER
TIMER SET
SEARCH AUDIO DUBBING
SLOW
CM SKIP
RAPID PLAY
VCR REC DVD REC REC MODE
DISC MENU
RETURN
CLEAR/C-RESET TITLESPACE
STANDBY-ON
OPEN/CLOSEVIDEO/TV VCR
.@/:
GHI
PQRS TUV WXYZ
JKL MNO
ABC DEF
DVD
DISPLAY
SETUP
OK
0
21
4
65
3
9
7
8
CHANNEL
TIMER
TIMER SET
SEARCH AUDIO DUBBING
SLOW
CM SKIP
RAPID PLAY
VCR REC DVD REC REC MODE
DISC MENU
RETURN
CLEAR/C-RESET TITLESPACE
Recording
DVD+
RW
DVD+
RW
DVD+RDVD+R
DVD-RW
DVD-RW
+VR
DVD-R
DVD-R
+VR
VCR
VCR
Before recording from an external source, see the instructions for the
connection on page 35.
Recording from an external source
4
Setting a disc to protect
DVD+
RW
DVD+
RW
DVD+RDVD+R
DVD-RW
DVD-RW
+VR
DVD-R
DVD-R
+VR
To prevent accidental recording,
editing or erasing the titles, you
can protect them from the Setup
menu.
1
Press [SETUP].
2
Using [K / L], select “Disc Edit”.
Press [OK].
Disc menu will appear.
3
Using [K / L], select “Disc
Protect OFF ON”. Press
[OK].
Confirmation window will appear.
4
Using [K / L], select “Yes”.
Press [OK].
A disc will be protected.
1
2
3
4
POWER ON
STANDBY-ON
REW F.FWDSTOP/EJECT PLAY RECORD CHANNEL D.DUBBING
OPEN/CLOSE
VCRSOURCEDVD STOP PLAY RECORD
S-VIDEO VIDEO
L AUDIO R
IR
No
Yes
Disc Protect OFF ON
Note
To cancel the disc protect:
•
When you insert a disc protected
with this unit,
“Disc Protect ON
OFF” will
appear instead of “OFF ON”.
To release the protect for the
disc, select “Disc Protect
ON
OFF” at step 3, then
select “Yes”.
No
Yes
Disc Protect ON OFF
Settings for an external source (cont’d)
6
This operation may take
a while to be completed.
2
3
5
6
8
4
8
8 6
1
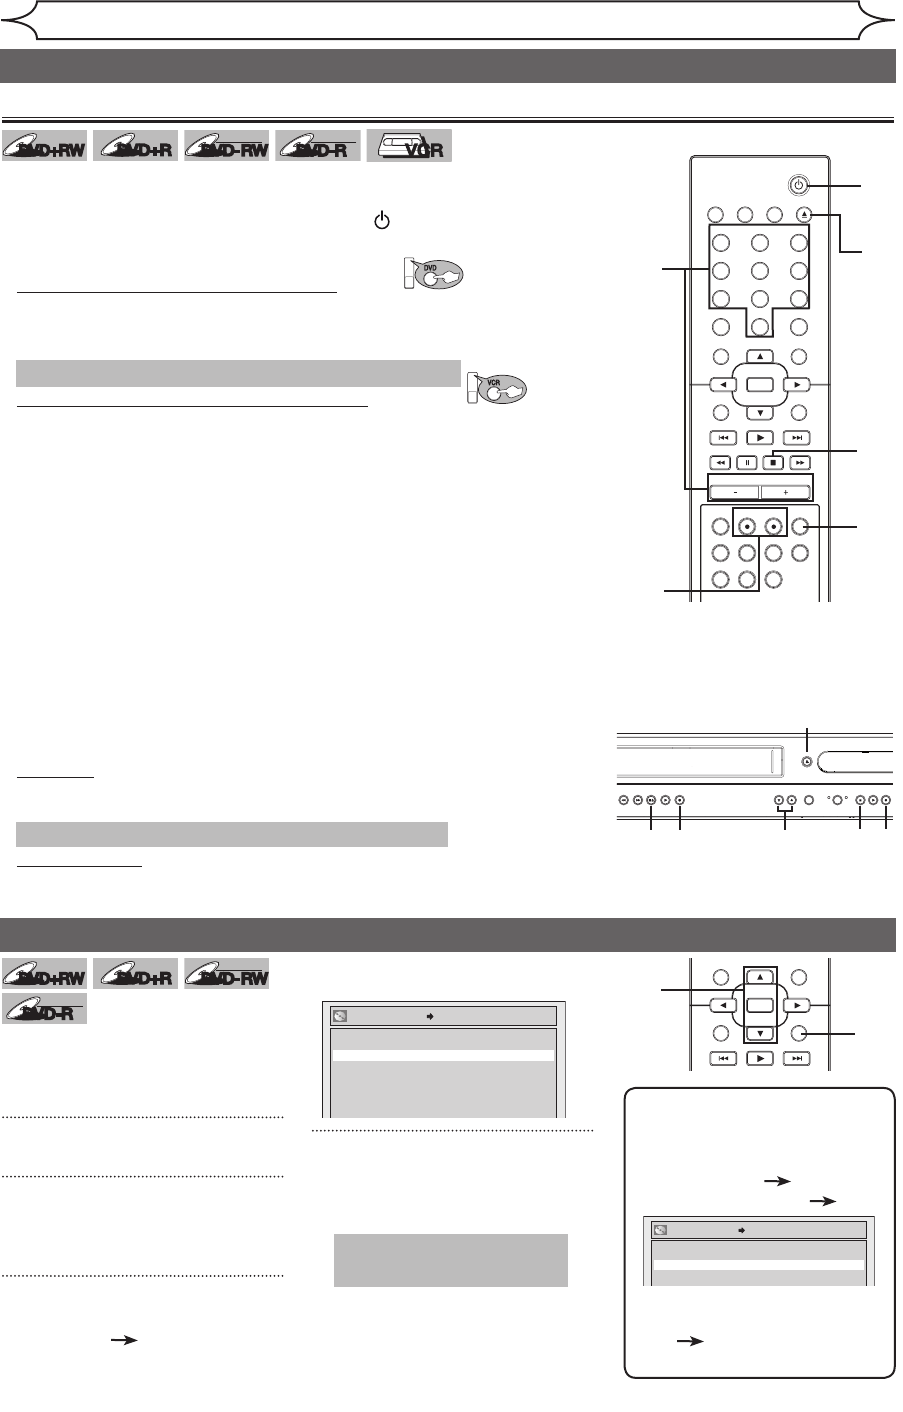
1. Turn on the TV and press [STANDBY-ON ] and be sure to select
the input of the TV to which the unit is connected.
Refer to the table on page 15.
2.
When you want to record to the disc: Press:
DVD
Press [OPEN/CLOSE A] to open the disc tray. Place the disc to
record properly.
3. Press [OPEN/CLOSE
A] to close the disc tray.
This operation may take a while to be recognized.
When you want to record to a videotape: Press:
VCR
Insert the videotape with a record tab into the cassette
compartment.
4. Select the input of the unit which the external equipment is
connected. (E2 or E1)
• To use the input jacks on the back of this unit, select “E1” position by
pressing [0], [0], [1] with the Number buttons or using
[CHANNEL
-
/ +] on the remote control, or [CHANNEL L / K] on the
front panel.
• To use the input jacks on the front of this unit, select “E2” position by
pressing [0], [0], [2] with the Number buttons or using
[CHANNEL
-
/ +] on the remote control, or [CHANNEL L / K] on the
front panel.
5. Select a recording mode by pressing [REC MODE].
Refer to “Recording mode” on page 25
for DVD or page 74 for VCR.
6. Press [DVD REC I] ([VCR REC I]) on the remote control or
[RECORD I] (DVD/VCR) on the front panel to start recording.
7. Press “Play” on the external source to record from.
8.
For disc:
Press [STOP
C] on the remote control or on the front panel to stop
recording.
This operation may take a while to be completed.
For videotape:
Press [STOP
C] on the remote control or [STOP C / EJECT A] on
the front panel to stop recording.
2 3


