EN - 41
EN
D Note
“Easy Connect (WPS)” cannot be used when the Security mode of your Access Point is set to “WEP”.
Please try either method below.
• Connect the unit to the Access Point using “Auto Scan” or “Manual” mode.
• Change the Access Point's security mode from “WEP*” to “WPA” or “WPA2”.
* “WEP” is not recommended to be used due to its “Major security flaws”. Change the Security protocol on the wireless
router to “WPA” or “WPA2 (recommended)” mode. (For Access Point configuration, please consult the user manual of
your wireless router or manufacturer.)
Auto Scan (Wireless)
1. Follow steps 1 and 2 in “Push Button Method” on page 40.
2. Use [] to select “Auto Scan”, then press [OK].
• This unit will automatically start searching for nearby wireless networks.
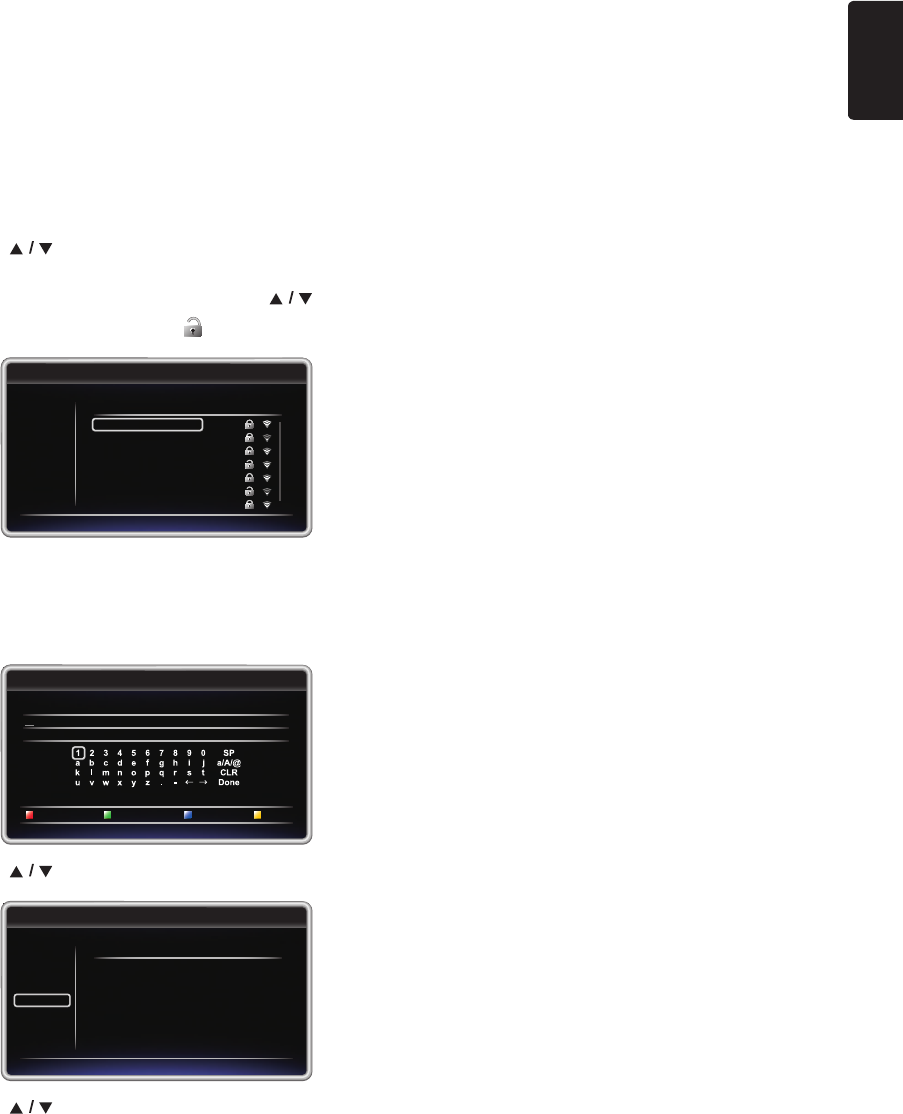
3. The search result will be displayed. Use [] to select an appropriate SSID, then press [OK].
• If you select an SSID with “ ” (no password is required), please go to step 5.
4. “WEP / WPA / WPA2 Key” entry screen will appear. Enter the WEP/WPA/WPA2 password of the selected wireless
network using Cursor buttons, Number buttons and Color keys, then press [RED] to confirm the password.
• If you do not know the WEP/WPA/WPA2 key for your wireless network, please confirm the sticker on the router.
• The WEP / WPA / WPA2 key entries are case-sensitive.
5. Use [] to select “Next”, then press [OK].
6. Use [] to select “Auto” or “Manual”, then press [OK].
• If you select “Auto”, follow step 4 in “Auto (Wired)” on page 38.
• If you select “Manual”, follow steps 3 to 13 in “Manual (Wired)” on page 39.
Access Point Setting
Please select the access point.
3 / 7
Wireless Access Point A
Wireless Access Point B
Wireless Access Point C
Wireless Access Point D
Wireless Access Point E
Wireless Access Point F
Wireless Access Point G
Retry
Return
Cancel
Please input the WEP / WPA key with software keyboard.
Done Return Clear a/A/@
Access Point Setting
3 / 7
Please confirm the setting.
SSID
Security
WEP/WPA Key
: Wireless Access Point A
: WPA-PSK (AES)
: xxxxxxxxxxxxxxxxxxxxxxxx
xxxxxxxxxx
Next
Retry
Return
Cancel
Access Point Setting
3 / 7
continued on next page


