


40
ENGLISH
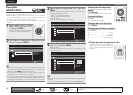
Video Setting
Sets up TV connection, HDMI connection, and 3D video software playback.
TV
Default settings are underlined.
Set the video output signal according to the connected TV.
Setting items Setting details
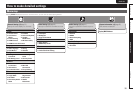
TV Aspect (Aspect ratio)
Set the screen type and
display mode of the TV.
16:9 Squeeze Auto : Outputs to a wide screen TV. For 4:3 video, displays
in the center of the screen without changing the aspect ratio.
z1
WIDE (16:9) : Outputs to a wide-screen TV.
4:3 PS : Outputs to a 4:3 TV. For wide video, trim the left and right side of
the image and display in 4:3 aspect ratio.
z2
4:3 LB : Outputs to a 4:3 TV. Displays all of the wide video.
Wallpaper
Setting for displaying the
background when playback
is stopped.
Picture : Displays the Marantz logo.
Black : Sets the background to black.
Gray : Sets the background to gray.
Blue : Sets the background to blue.
Progressive Mode
z3
Sets an appropriate
progressive conversion
mode for the source video
material.
Auto : Detects the type of video material and automatically switches the
mode. Normally, this setting is used.
Video : Suitable for playing video material discs.
Film : Suitable for playing film material discs.
z1 This has no effect with the video output.
z2 Depending on the video content, even though you set it to 4:3 PS (Pan Scan), the content may be
output in 4:3 LB (Letter Box).
z3 This mode is activated for the video source of 480i/576i.
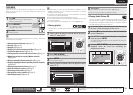
HDMI
Default settings are underlined.
Set the HDMI output signal.
Setting items Setting details
Color Space
Sets the video signal system
to be output from HDMI.
YCbCr : Outputs using the color difference video system (16 (black) to
235 (white)).
RGB Normal : Outputs using the RGB video system
(16 (black) to 235 (white)).
RGB Enhanced : Outputs using the RGB video system
(0 (black) to 255 (white)).
HDMI Deep Color
Sets the HDMI terminal to
output Deep Color. Expands
the color depth (number of
used colors) of the HDMI
video signal, enabling
playback with more natural
colors and free of streaking.
Auto : Deep Color is automatically output when the connected HDMI
device supports Deep Color.
Off : No Deep Color output.
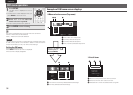
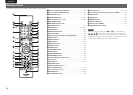
Remote control operation
buttons
Displaying the menu
Cancel the menu
Move the cursor
(Up/Down/Left/Right)
Decision the setting Return to previous menu
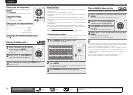
3D
Default settings are underlined.
Sets up 3D video software playback.
Setting items Setting details
3D Output Setting
Sets up video outputs for
3D video playback (only for
HDMI).
Auto : Automatically determines whether the video software is 3D or 2D
and plays it back.
• When you play 3D video, 3D and 2D video parts are played back as 3D
and 2D, respectively.
• Normally, use this setting.
Off : Always outputs 2D video signals.
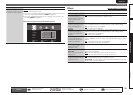
TV Screen Size Setting
Sets up the screen size of
your 3D enabled TV.
Use uio p or 0 – 9 to enter three digits for the screen size of your TV
in the setting screen, and press ENTER for confirmation.
• The default setting is “046” (46’ TV screen size).
NOTE
Set up the correct size, otherwise you may not be able to view 3D video
properly.
3D video playback operations may differ according to the disc to be used.
Refer to the instruction manual supplied with your disc.
NOTE
When passing 3D video signals output from this device through an AV receiver to a 3D enabled TV, the AV
receiver must also be compatible with inputting / outputting 3D video signals.
To view 3D video, use a 3D enabled TV.
• To connect the unit with a 3D enabled TV, use a high speed HDMI cable.
• During 3D playback, you cannot adjust “Video Resolution” (vpage25), “HDMI output Settings”
(vpage25), or “Adjusting the picture quality” (vpage26).