


10 MatrixPRO 12x - 12 Input Matrix Switcher Manual # 26-0301000-00 / Revision C
Operation
This portion of the manual provides instructions that indicate how to control all MatrixPRO functions. Keys on the
MatrixPRO front panel are used to select input sources and output destinations, save and recall looks, and mute
audio sources.
Power-Up Initialization for MatrixPRO
First, locate the Power Switch on the back of the MatrixPRO frame and turn the power ON. The LED will light and
the last saved setup will be recalled.
MatrixPro12x4 and 12x8 Front Operation
A/V
OUTPUT
MUTE
EERSACR
4321
UP DOWN
H
1 2 34
6587
MUTE
INPUT
5 6 7 8 9
TAKE
ESC/
STATUS
FP LOCKOUT
1110 12
AUDIO
RECALL
SAVE
PRESETS
VIDEO
TM
MatrixPRO
12X8
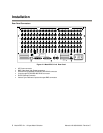
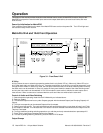
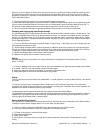
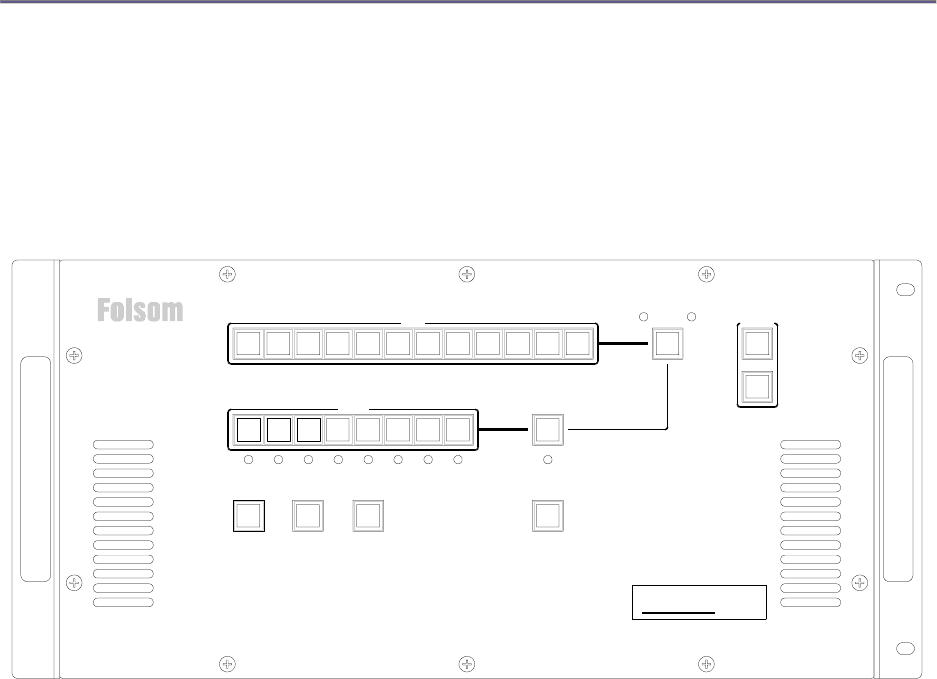
Figure 3-1: Front Panel 12x8
A/V Key
A/V Key allows the user to select three operating modes; Audio only (Audio LED on), Video only (Video LED on) or
A/V Follow (both Audio and Video LEDs are on). Successive activations of the A/V key are used to sequentially cycle
through the three modes. In Audio only mode, the front panel shows the status of the audio switching matrix and only
the audio matrix can be switched. In Video only mode, the front panel shows the status of the video switching matrix
and only the video matrix can be switched. In A/V Follow mode the same audio is switched to same output as the
video channel. When a new source is selected both the audio and video are switched at the same time.
Control of Audio and Video Switching
1) Select the desired operating mode with the A/V Mode Key as indicated above.
2) Select an Output.
3) The selected Output as well as any other Outputs grouped with the selected Output (see Grouping Outputs) will
light up.
4) The Input corresponding to the selected Output will be illuminated.
5) Select a new Input source. The newly selected Input will start blinking and the current Input will stay lit until Take
or new Output is selected. This indicates that a new source has been selected to be switched to the Output once the
Take key is activated.
6) To set up additional pending switching operations or to edit the previously entered selections repeat steps 2-5.
7) Press Take to route the pre-selected Inputs to the Outputs.
8) To erase all pending switching selections, press the ESC/STATUS button.
Output Groups