127
FX3S Series Programmable Controllers
User's Manual - Hardware Edition
11
Built-in Analog
12
Output Wiring
13
Wiring for
Various Uses
14
Test Run,
Maintenance,
Troubleshooting
15
Other Extension
Units and
Options
16
Display Module
(FX
3S
-5DM)
17
Memory
Cassette
A
Special Devices
(M8000-, D8000-)
B
Instruction List
C
Discontinued
models
14 Test Operation, Adjustment, Maintenance and Troubleshooting
14.1 Preparation for Test Operation
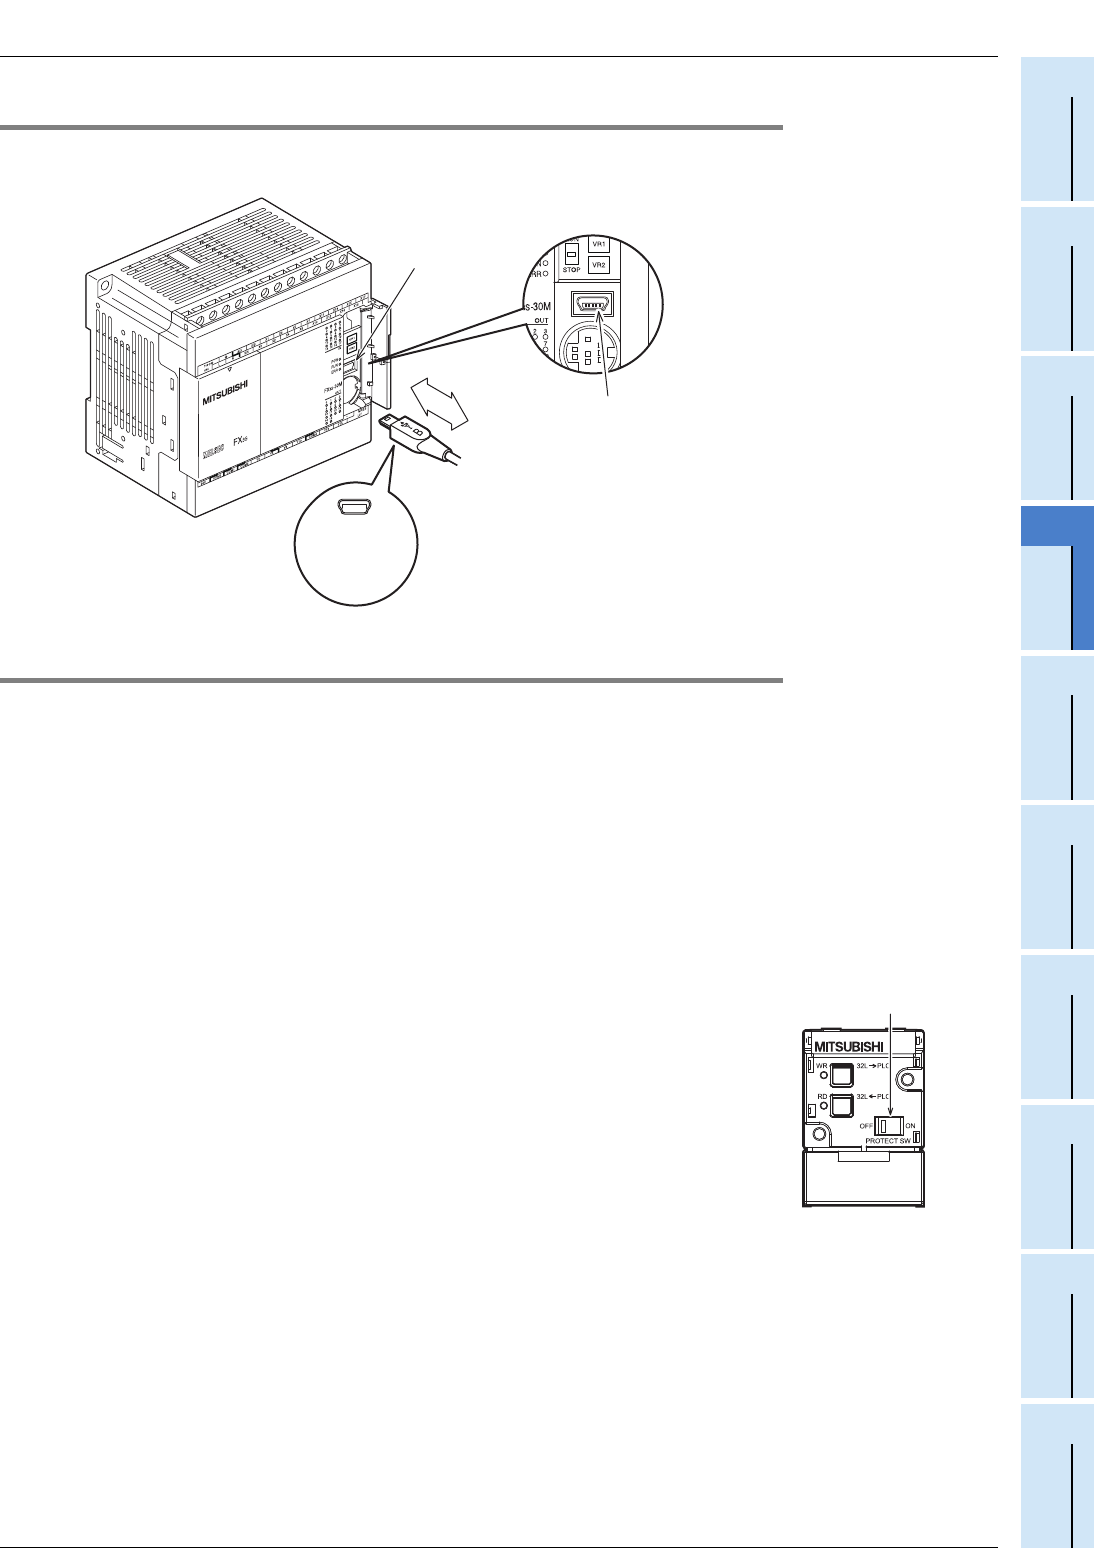
14.1.3 Connection to peripheral device connecting connector (USB)
Connect and disconnect the communication cable for the peripheral device (personal computer).
At connection, confirm the cable and connector shape.
14.1.4 Writing of program and program check [power ON and PLC stopped]
1 Turn on the PLC power.
Make sure that the RUN/STOP switch of the PLC is set to STOP, and turn the power on.
2 Check the program.
Check for circuit errors and grammatical errors with the program check function of the
programming tool.
3 Transfer the sequence program.
Write the program to the PLC with the programming tool.
When the memory cassette is used
Make sure to set the PROTECT switch of the memory cassette to OFF
(shown right).
For details on the memory cassette, refer to Chapter 17.
4 Verify the sequence program.
Verify that the program has been correctly written to the PLC.
5 Execute PLC diagnosis.
Check for errors in the PLC main body with the PLC diagnostic function of the programming tool.
For details on the PLC diagnosis with GX Works2, refer to Section 14.6.
For details on the PLC diagnosis with FX-30P, refer to FX-30P operation Manual.
Programming
connector
(USB)
USB Mini-B connector
USB Mini-B
plug
PROTECT switch


