20
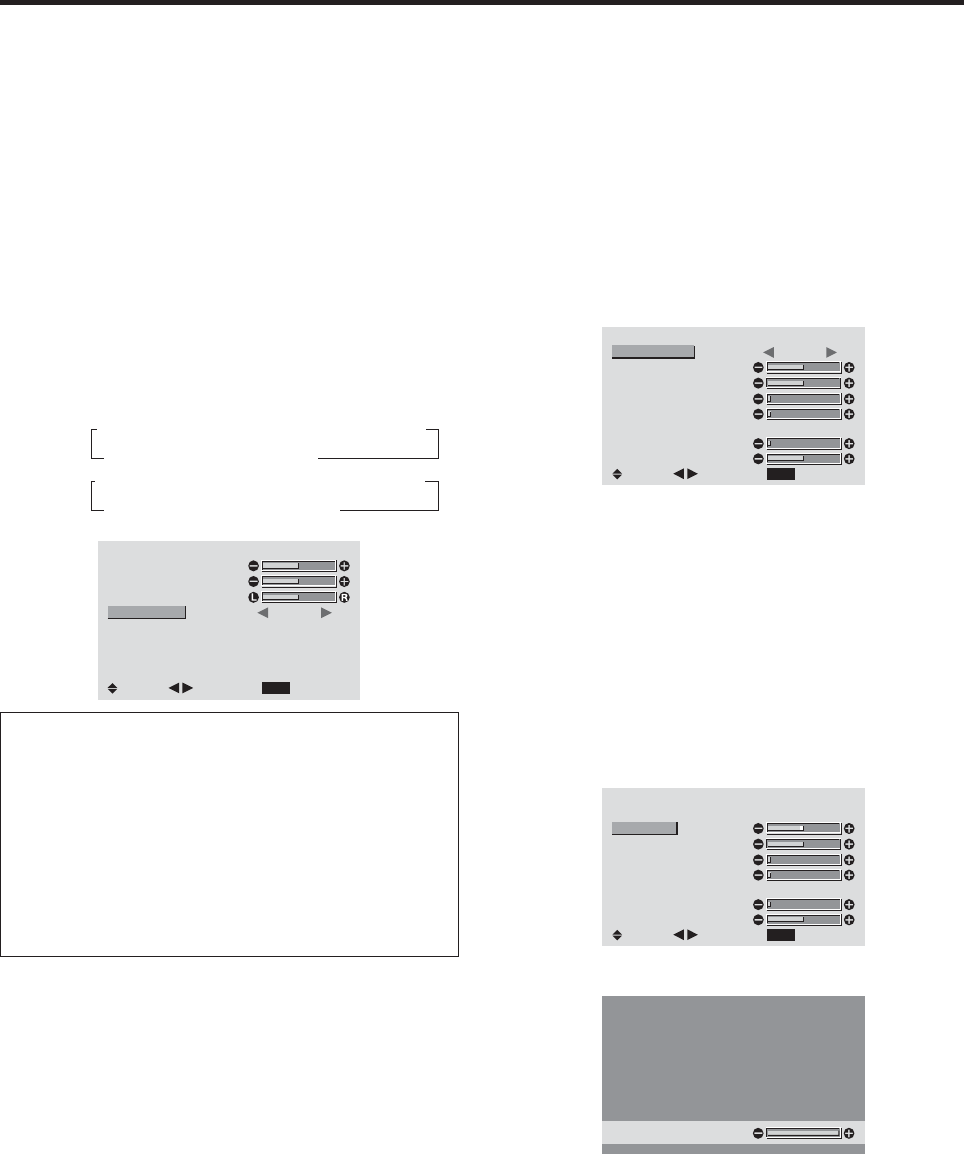
Setting the allocation of the audio connectors
Setting the AUDIO 1, 2, and 3 connectors to the desired
input.
Example: Setting “AUDIO INPUT1” to “VIDEO 2”
1. On the MAIN MENU, select “AUDIO SETTINGS”,
then press the MENU/ENTER button.
The “AUDIO SETTINGS” screen appears.
2. Use the ▲ and ▼ buttons to select “AUDIO INPUT1”.
3. To set the AUDIO INPUT1 to “VIDEO2”...
Use the
ᮤ
and
ᮣ
buttons to select “VIDEO2”.
The mode switches as follows each time the
ᮤ
or
ᮣ
button is pressed:
The available sources depend on the setting of “BNC
INPUT”.
RGB:
COMP.:
AUDIO SETTINGS
EXIT
BASS
TREBLE
BALANCE
AUDIO INPUT1
AUDIO INPUT2
AUDIO INPUT3
: VIDEO2
: HD/DVD1
: RGB1
SEL.
RETURN
ADJ.
Information
Ⅵ AUDIO INPUT
A single audio input cannot be selected as the audio
channel for more than one input terminal.
Ⅵ Restoring the factory default settings
Select “ALL RESET” under the OPTION1 menu. Note
that this also restores other settings to the factory
defaults.
→ VIDEO1 ↔ VIDEO2 ↔ VIDEO3 ↔ HD/DVD1←
→MONLINK ↔RGB2 ↔RGB1 ←
→ VIDEO1 ↔ VIDEO2 ↔ VIDEO3↔ HD/DVD1←
→MONLINK ↔RGB1 ↔HD/DVD2 ←
Monitor Settings Menu
Adjusting the Position, Size, Fine Picture, Picture Adj
The position of the image can be adjusted and flickering
of the image can be corrected.
Example: Adjusting the vertical position in the
NARROW mode
1. On the MAIN MENU, select “MONITOR
SETTINGS”, then press the MENU/ENTER button.
The “MONITOR SETTINGS” menu appears.
(only for RGB/PC setting)
MONITOR SETTINGS
EXIT
ASPECT MODE
V-POSITION
H-POSITION
V-HEIGHT
H-WIDTH
AUTO PICTURE
FINE PICTURE
PICTURE ADJ.
: NARROW
: OFF
SEL.
RETURN
ADJ.
* The settings on the MONITOR SETTINGS menu are
not preset at the factory.
To select a mode ...
Use the
ᮤ
and
ᮣ
buttons to select a mode.
The mode switches as follows each time the
ᮤ
or
ᮣ
button is pressed:
NARROW ↔ STANDARD
* The mode can also be switched by pressing the
FORMAT button on the remote control.
2. To adjust the vertical position ...
Use the ▲ and ▼ buttons to select “V-POSITION”.
MONITOR SETTINGS
EXIT
ASPECT MODE
V-POSITION
H-POSITION
V-HEIGHT
H-WIDTH
AUTO PICTURE
FINE PICTURE
PICTURE ADJ.
: NARROW
: OFF
SEL.
RETURN
ADJ.
3. Adjust using the
ᮤ
and
ᮣ
buttons.
V-POSITION
* If neither the
ᮤ
or
ᮣ
button is pressed within 5 seconds,
the current setting is stored into memory and the previous
screen reappears.
To continue making other computer image
adjustments ...
Repeat from step 2.
