V304 VIBRATORY ROLLER — OPERATION AND PARTS MANUAL — REV. #8 (11/13/09) — PAGE 15
V304 — ROLLER COMPONENTS
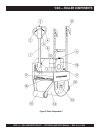
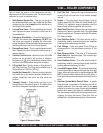
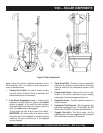
Figure 3 shows the location of the components and basic
components for the V304 compaction roller. The function of each
component or control is described below:
1. Multi-Position Handle Bar – This bar can be set to
four different positions, park, high, middle and low. When
transporting the roller,
always
have the handle bar in
the upright (stow) position.
2. Forward Travel Lever – This is a variable speed control
lever. Squeeze this lever to make the roller travel in a
forward direction.
3. Emergency Stop Button – Press this button to stop
the roller in the event of an
emergency
. DO NOT use
this button as a means of stopping the roller under
normal conditions. When starting the engine make sure
that this push-button switch is in the up position.
4. Reverse Travel Lever – This is a variable speed control
lever. Squeeze this lever to make the roller travel in a
reverse direction.
5. Vibration Control Lever – Move this lever to the ON
position an the eccentric will produce a vibration
frequency of 4,400 vpm (vibrations per minute). Move
the lever to the OFF position to stop the vibrations.
6. Lifting Hook Eye – Attach a crane or lifting device to
this lifting hook eye. The lifting device should have a
lifting capacity of 1,000 lbs. (450 kg.)
7. Handle Bar Release Pin – Remove this pin to position
the handle bar to the desired position. Make sure to
reinsert release pin and cotter pin after each new
position.
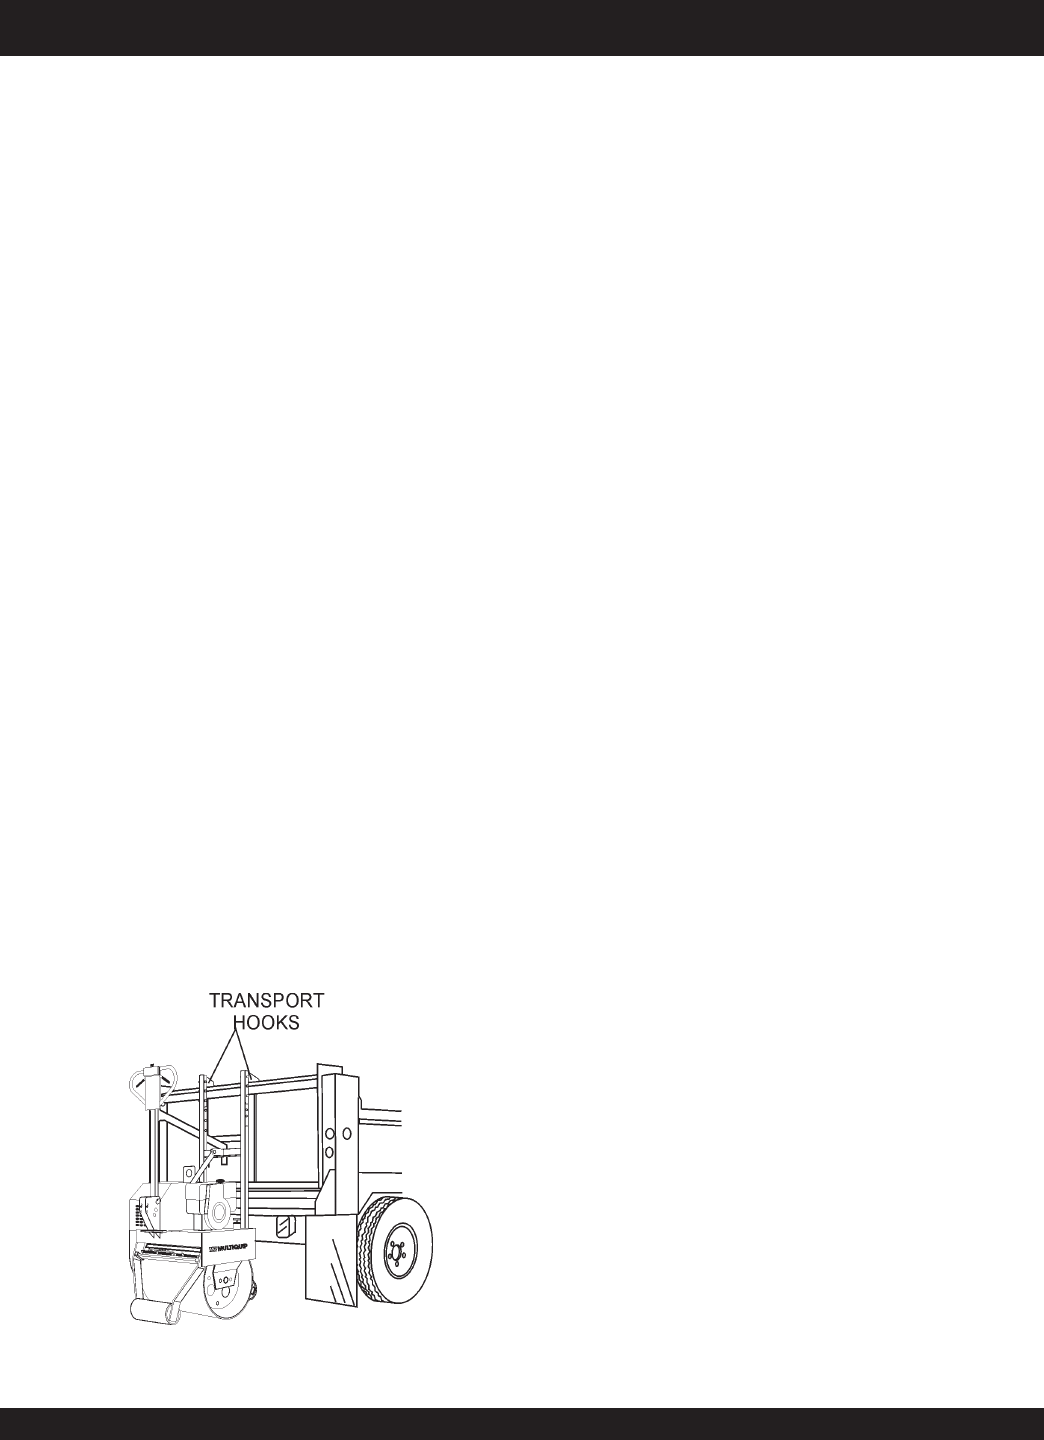
8. Transport Hooks – These hooks are used in the
transportation of the roller (Figure 4). The hooks allow
the roller to hang over the tailgate of a dump truck.
9. Fuel filler Port – Remove this cap to determine the
amount of fuel in the fuel tank. If low, add fuel through
this port.
10. Engine – This roller uses three different types of
engines, Honda GX-340, Robin EH-34 and Yanmar L100
(Diesel). For additional engine information read the
engine Owner's Manual supplied with the roller.
11. Water Tank Filler Port – Remove this cap to determine
the amount of water in the water tank. If low, add
clean
water through this port. This water tank holds 8.3 gallons
(31.4 liters) of water.
12. Rear Stabilizer Roller – This roller aids the roller in
maintaining stability (prevents tipping) and simplifies
handling when maneuvering the roller.
13. Zerk Fittings – Lube and grease these fittings as
recommended in the maintenance section of this
manual.
14. Main Vibratory Roller – This roller is 30 inches wide
steel drum
with beveled edges. The beveled help
prevent asphalt marring.
15. Front Stabilizer Roller – This roller aids the roller in
maintaining stability (prevents tipping) and simplifies
handing when maneuvering the roller.
16. Coco Mat/Scrapper Blade – This mat and blade helps
prevent the buildup of material between the drum and
frame. When using the roller for earth compaction DO
NOT let the mat come in contact with the roller drum. A
hook type latch is provide to keep the mat away from the
drum.
17. Sprinkler System/Water Shut-off Valve – A gravity
feed spray bar is provided for the wetting the roll for
asphalt pavement. Turn the water valve to the
open
position to let water flow, return this valve to the closed
position when water is not required. In addition a water
filter has been provided to prevent foreign matter from
clogging the spray bar holes. Clean this filter as
referenced in the maintenance section of this manual.
Figure 4. Transport Hooks


