


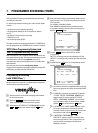

Synchronous editing (synchro-edit)
You can synchronously copy between this video recorder and
an appropriately equiped camera recorder. Both units are
started at the same time with the help of a synchronous
impulse and an adjustable start delay (=preroll time).
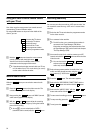
Connecting the video recorder and the
camera recorder.
a Connect the two units with a synchro-edit cable (socket
SYNCHROEDIT on the left front of the video recorder).
Connect the video/audio source to the input sockets
(programme number ’E3’) of the video recorder.
Please also observe the instruction manual of the camera
recorder.
b Switch on the TV set. If required, select the programme
number for the video recorder.
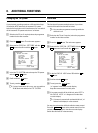
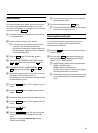
c Press the MENU button. The main menu appears.
d Select the line ’RECORDING FUNCTIONS’ with the
P = or ;P button and confirm with the P button.
e Select the line ’CAMERA LINK’ with the P= or
;P button.
f Switch the camera recorder to ’still picture’
(playback-pause).
g Confirm with the P button. The video recorder now
checks the connected camera recorder type.
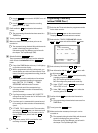
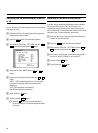
E The following message appears on the TV screen:
’VIDEO RECORDER TO CONTROL CAMERA’ when the
video recorder controls the camera recorder or ’CAMERA
TO CONTROL VIDEO RECORDER’ when the camera
recorder controls the video recorder.
Starting synchro-edit
a Switch on the TV set. If required, select the programme
number for the video recorder.
DFor this function, use a cassette whose number is
not stored in the Tape Manager (TM). More
information on removing the cassette number from
the Tape Manager (TM) can be found in the chapter
’The Tape Manager (TM)’.
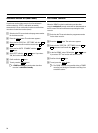
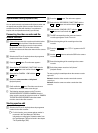
b Press the MENU button. The main menu appears.
c Select the line ’RECORDING FUNCTIONS’ with the
P = or ;P button and confirm with the P button.
d Select the line ’SYNCHRO EDIT’ with the P= or
;P button and confirm with the P button.
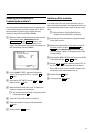
e The OSD corresponding to the connected camera
recorder type appears on the TV screen.
f Search the beginning of the recording on the video
recorder.
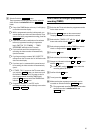
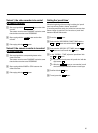
g Press the STILLR button. ’STILL’ appears on the TV
screen.
h Use the SELECT button to select the OSD for the camera
recorder.
i Search the beginning of the recording on the camera
recorder.
j Switch the camera recorder to ’still picture’
(playback-Pause).
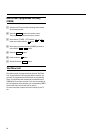
The way copying is started depends on the camera recorder
type used:
Variant 1: when the video recorder controls the camera
recorder, or
Variant 2: when the camera recorder controls the video
recorder.
34