


4
En
Before Proceeding
English
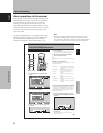
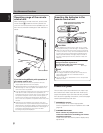
About operations in this manual
Each operation is described in its proper operating order.
These Operating Instructions will refer to the operating
controls found on the remote control unit, with the
exception of those buttons found only on the main
plasma display itself. When the plasma display controls
include equivalent buttons to those found on the remote
control unit, the commands can be performed on the
main unit as well.
The following illustrations are an example of the actual
operations used for the section “PICTURE adjustment”.
The examples are provided to allow you to confirm
whether the operation is performed correctly or not.
Before Proceeding
25
En
PICTURE/SCREEN Adjustment
English
PICTURE/SCREEN Adjustment
PICTURE adjustment
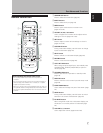
4 Press the SET button.
Pressing the SET button writes the value into the
memory and returns the display to the step 2 screen.
5 When the setup is finished, press the MENU
button to exit the menu screen.
Note
Make these adjustments for each input (INPUT1 or INPUT2) and
signals.
[PICTURE] mode adjustment items
Below are brief descriptions of the options that can be set
in the [PICTURE] mode.
CONTRAST ············· Adjust according to the surrounding
brightness so that the picture can be
seen clearly.
BRIGHTNESS·········· Adjust so that the dark parts of the
picture can be seen clearly.
R. LEVEL ················· Adjust the amount of red in the
picture.
G. LEVEL················· Adjust the amount of green in the
picture.
B. LEVEL ················· Adjust the amount of blue in the
picture.
H. ENHANCE··········· Sharpens the image in the horizontal
direction.
V. ENHANCE ··········· Sharpens the image in the vertical
direction.
To reset [PICTURE] mode settings to the default
If settings have been adjusted excessively or the picture
on the screen no longer appears natural, it may prove
more beneficial to reset the [PICTURE] mode to default
settings instead of trying to make adjustments under
already adjusted conditions.
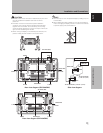
1 In step 2 in the previous procedure, use the 5/∞
buttons to select [PICTURE RESET], then press the
SET button.
SET
SET
EXIT
MENU
PICTURE RESET
YES
NO
2 Use the 2/3 buttons to select [YES], and press
the SET button.
All [PICTURE] mode settings are returned to the
factory set default.
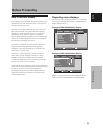
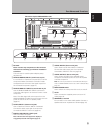
1 Press the MENU button to display the menu
screen.
MENU INPUT1
ENTER
SET
EXIT
MENU
PICTURE SCREEN SETUP OPTION
:
0
:
0
:
0
:
0
:
0
:
0
CONTRAST
:
0
BRIGHTNESS
R.LEVEL
G.LEVEL
B.LEVEL
H.ENHANCE
V.ENHANCE
PICTURE RESET
2 Use the 5/∞ buttons to select the adjustment
item, then press the SET button.
SET
MENU
MENU INPUT1
ENTER EXIT
PICTURE SCREEN SETUP OPTION
:
0
:
0
:
0
:
0
:
0
:
0
CONTRAST
:
0
BRIGHTNESS
R.LEVEL
G.LEVEL
B.LEVEL
H.ENHANCE
V.ENHANCE
PICTURE RESET
3 Use the 2/3 buttons to adjust the picture quality
as desired.
:
0
BRIGHTNESS
SET EXIT
MENU
2/3
5/∞
SET
MENU
5/∞
SET
2/3
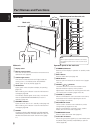
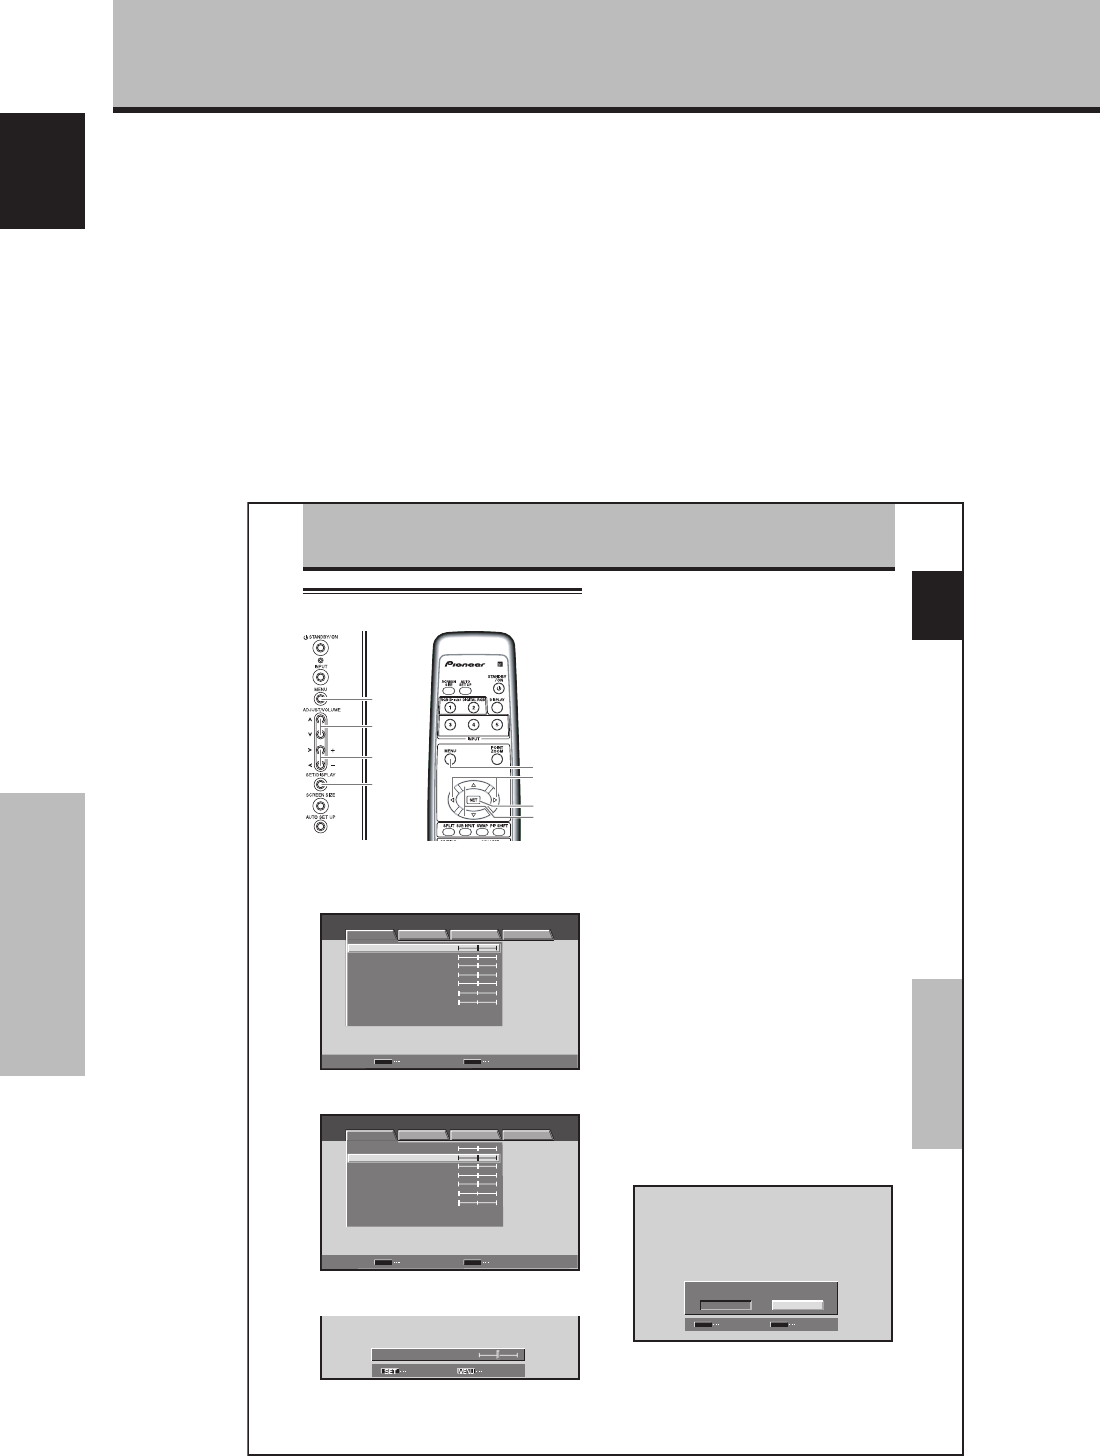
Main unit operating
panel
Remote control unit
Note
The screen images depicted in these Operating Instructions
should be considered typical images; some difference will be
seen in practice, depending on the screen item displayed and its
contents, the input source and various other control settings.