14
Making Connections
ANTENNA/
CABLE INPUT
POWER
VIDEO
AUDIO
L
R
INPUT 1
INPUT 2
INPUT 3
S-VIDEO
(S)VGA 1
STEREO INPUT
(S)VGA 2
AUDIO INPUTS
L
R
AUDIO OUTPUTS
FIXED
VARIABLE
LR L
R
EXT SPEAKERS
EXT
INT
L
R
++
USB
PC/
HUB
DIGITAL TV
INPUT
DEVICE/
HUB
AUDIO
R
L
YP
B
P
R
COMPONENT VIDEO INPUT
VIDEO
AUDIO
R
SELECTED OUTPUTS
L
VIDEO
AUDIO
R
R
L
L
HD RECEIVER
-OR-
G-LINK
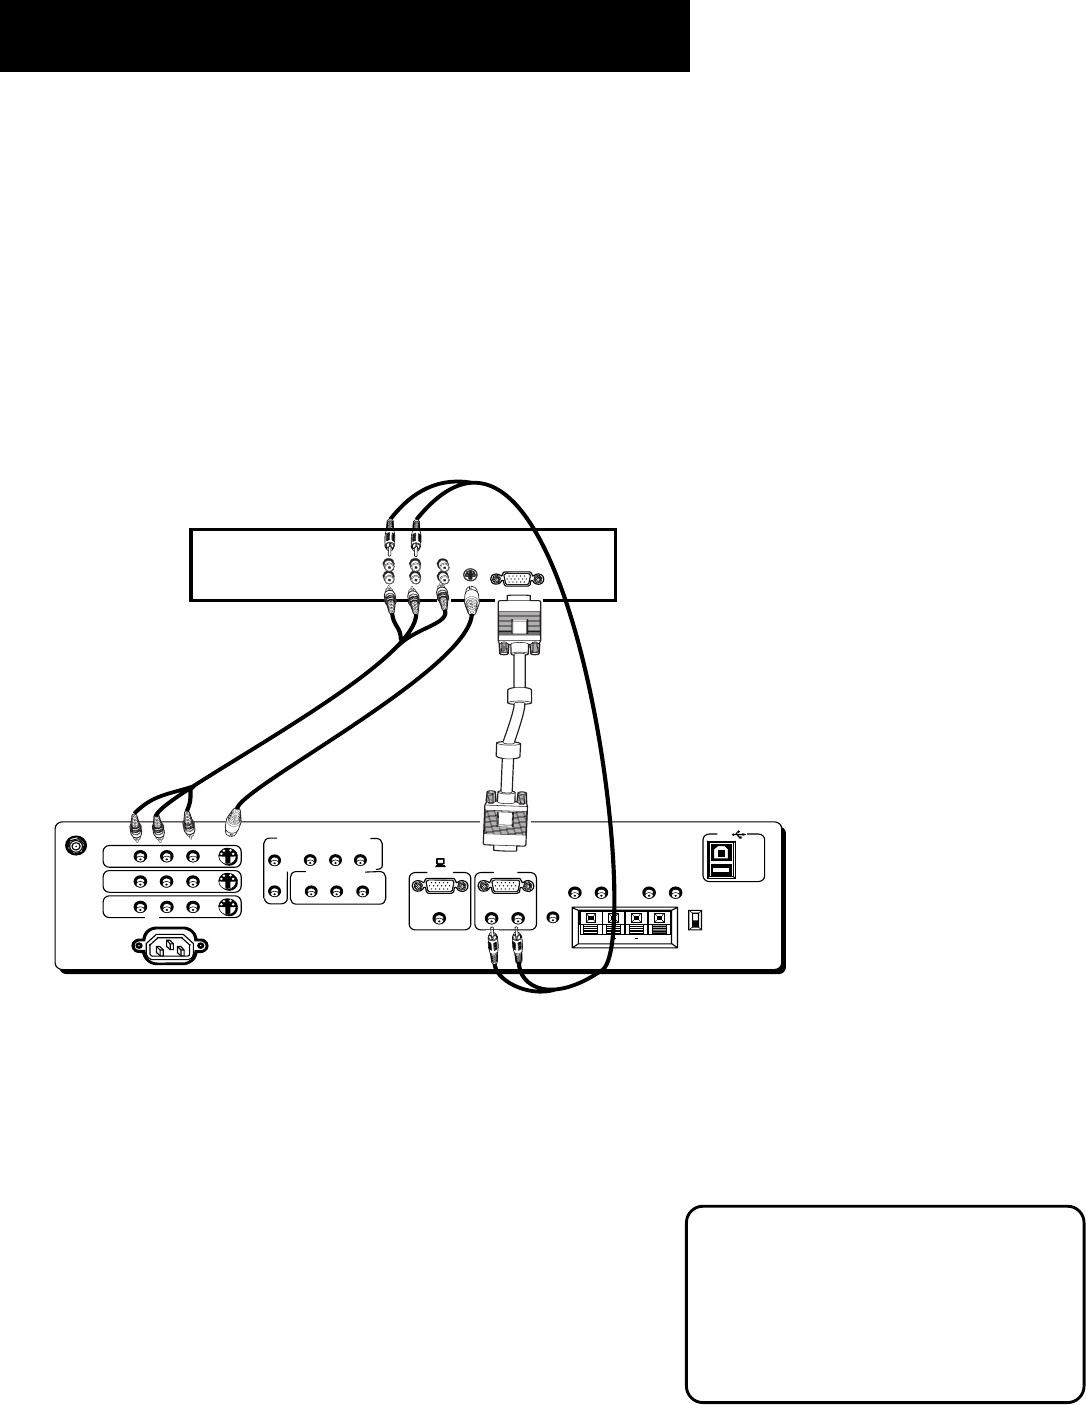
(S)VGA2 Input
The (S)VGA2 input can be used to connect an HD receiver so you can receive high
definition signals.
1. Connect the supplied (S)VGA cable to your HD receiver and to the monitor. Due to copyright
restrictions, you may not be able to view some high definition programs in high definition
format using this product. To view material in standard definition instead, you must connect
the Audio/Video jacks to the monitor.
2. Connect an RCA-type cable from the HD receiver’s audio Right, Left, and video jacks to the
audio in’s Right, Left, and video jacks on the monitor.
3. Connect an Audio cable from the HD receiver’s audio right and left jacks to the monitor’s
VGA left and right audio inputs.
4. Connect an optional S-Video cable from the HD receiver’s S-Video jack to the monitor’s
S-Video jack.
Viewing the (S)VGA2 Input
1. Turn on the monitor and the HD receiver.
2. Press the TV button on the remote control.
3. Press the WHO•INPUT button on the remote control to scroll
through the video inputs until you get to the VGA2 input.
If your RCA or PROSCAN HD receiver switches from a high definition
output to a standard definition output, you must press the WHO•INPUT
button to switch to the INPUT1 (VID1) channel in order to view the
signal. There are two situations in which this would occur:
• When recording from the HD receiver.
• When a high definition output signal is not allowed by the program
provider and/or movie studio for that particular program.
Direct Channel Tuning
You can set up the monitor to
automatically tune to the (S)VGA2 input
when you press the SAT•CABLE button on
the remote. This is called Autotuning. (See
“Menus and Features” for more
information.)
