


32
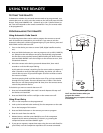
Menus and Features
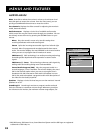
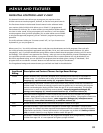
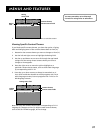
MAIN MENU
1 Audio...
2 Picture Quality...
3 Screen...
4 Channel...
5 Set Time...
6 Parental Controls...
7 GUIDE Plus+ Menu
0 Go Back
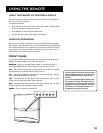
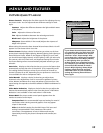
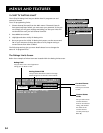
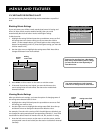
CHANNEL
1 Signal Type...
2
Auto Channel Search
...
3 List and Labels...
4 Autotuning...
0 Go Back
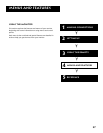
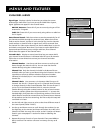
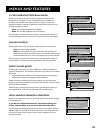
MAIN MENU
1 Audio...
2 Picture Quality...
3 Screen...
4 Channel...
5 Set Time...
6 Parental Controls...
7 GUIDE Plus+ Menu...
0 Go Back
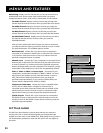
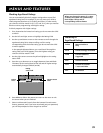
Autotuning Displays a choice list that lets you set up the monitor to
automatically tune to the correct input channel when you press a
component button (VCR1, VCR2, DVD, or SAT•CABLE) on the remote.
Set VCR1 Channel Displays a choice list that lets you select the
channel that the monitor tunes to when you press the VCR1 button.
Set VCR2 Channel Displays a choice list that lets you select the
channel that the monitor tunes to when you press the VCR2 button.
Set DVD Channel Displays a choice list that lets you select the
channel that the monitor tunes to when you press the DVD button.
Set SAT/CABLE Channel Displays a choice list that lets you select
the channel that the monitor tunes to when you press the
SAT•CABLE button.
After you have selected the device button you want to Autotune,
you need to select the input you want the monitor to tune to when
you press that button. The available options include:
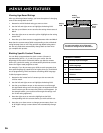
Not Connected Choose this if you do not have a component
connected to an antenna or video input on the back of the monitor,
or if you don’t want the monitor to tune to a channel when the
particular component button is pressed.
Channel 3 or 4 Choose this if your component is connected to the
antenna jack on the back of the monitor, and you want the monitor
to tune to channel 3 or 4 when you press the specified component
button. Reminder: Make sure the component’s Ch 3/4 switch, usually
on the back of the component, is set to the corresponding channel.
Video 1, Video 2, Video 3, or Front Input Choose this if your
component is connected to the INPUT 1, INPUT 2, INPUT 3 or Front
Input jacks of the monitor and you want the monitor to tune to
VID1, VID2, VID3 or FRNT input channel when you press the
specified component button. (If you connect S-video cables, the
channel marker displays SVID1, SVID2 or SVID3.)
Component Video Input Choose this if your compatible video
source, such as a DVD player or digital TV converter box, is
connected to the three component video jacks on the back of the
monitor and you want the monitor to tune to component video
input channel when you press the specified component button.
(S)VGA 2 Input Choose this if your component is connected to
the (S)VGA 2 input on the back of the monitor and you want the
monitor to tune to the (S)VGA 2 input channel when you press the
specified component button.
Set Time Menu
The Set Time menu displays a control panel that lets you enter the
current time. The on-screen directions guide you through the steps
needed to set the time. If your GUIDE Plus+ Gold System is set up, then it
will automatically update your time and this option will not appear in
the menu.