


14 Preparing for Installation
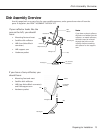
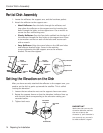
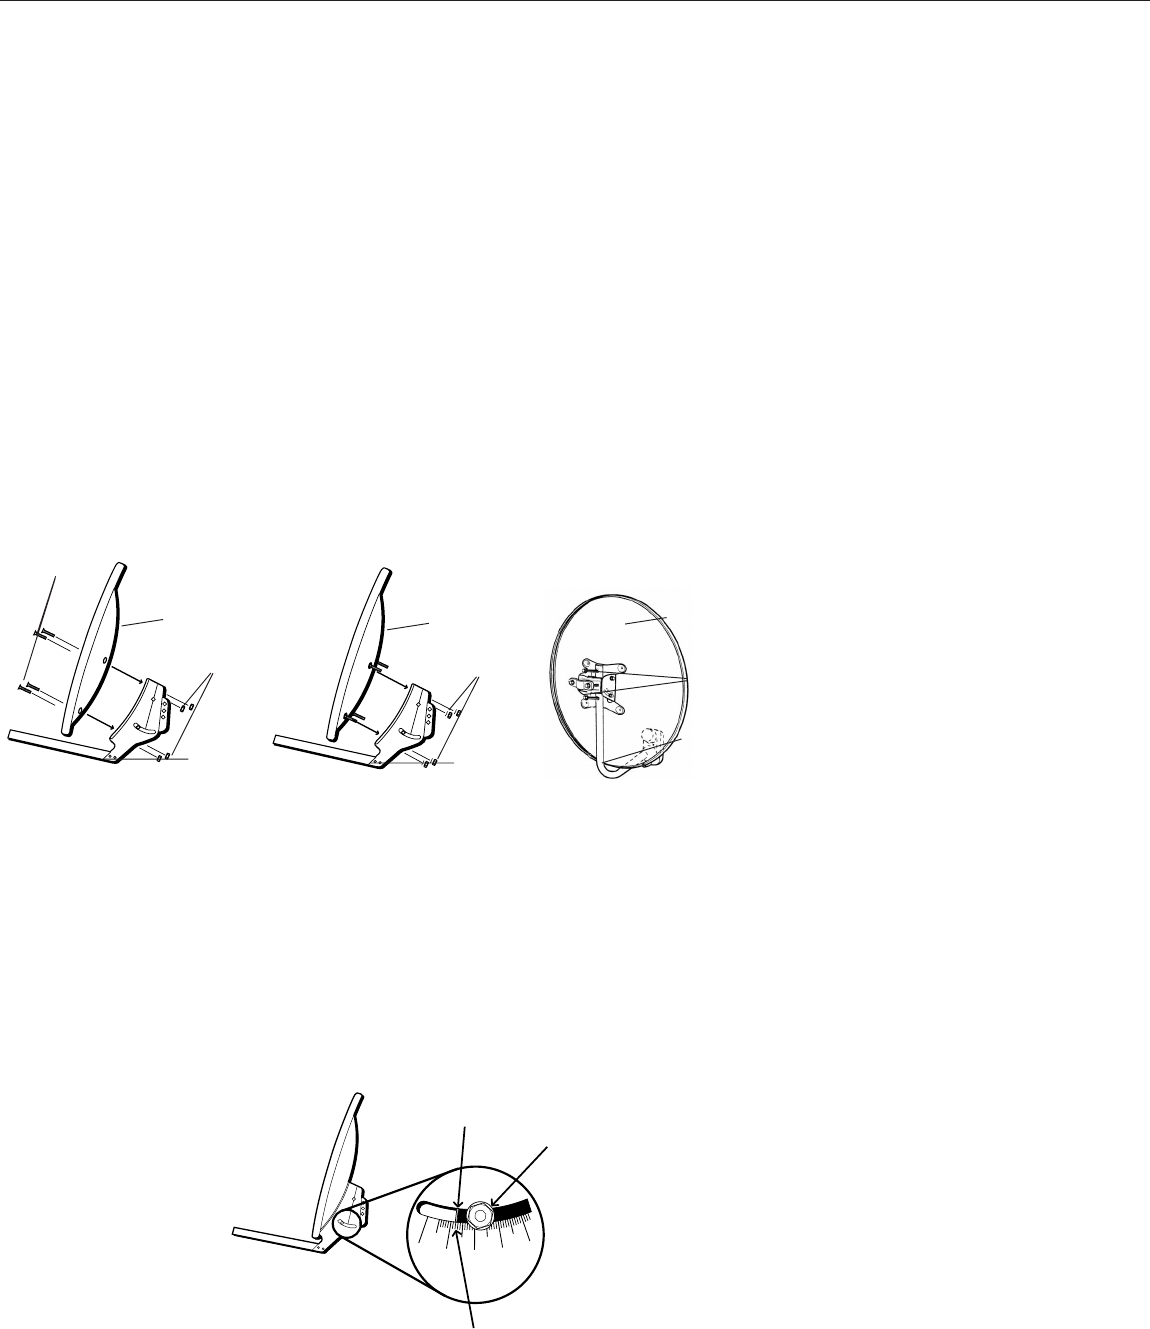
Partial Dish Assembly
Partial Dish Assembly
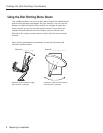
1. Locate the reflector, the support arm, and the hardware packet.
2. Attach the reflector to the support arm :
• Metal Reflector: Pass the bolts through the reflector, and
then place the reflector on the support arm by inserting the
bolts through the holes on the support arm. Use a wrench to
secure the four self-locking nuts.
• Plastic Reflector: Pass the four bolts molded into the back of
the reflector through the four holes on the support arm. Place
a star washer and nut on each of the bolts and secure each
with a wrench.
• Sony Reflector: Align the screw holes on the LNB arm holes
and reflector bracket holes. Screw in the machine
screws,tightening the LNB support arm to the reflector
bracket. Do not over-tighten.
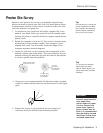
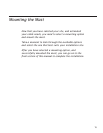
Setting the Elevation on the Dish
After you have securely attached the reflector to the support arm, you
need to set the dish to point up toward the satellite. This is called
“setting the elevation.”
1. Loosen the two elevation nuts so the support sleeve can rotate.
2. Rotate the support sleeve so that the elevation indicator lines up
with the tick mark corresponding to the elevation setting you
recorded earlier.
3. Tighten both nuts.
IMPORTANT
Make sure that you use the
elevation indicator and not
the nut to line up the
elevation. If your elevation is
not correctly set, you won’t
be able to obtain a signal.
Plastic
reflector
Support
arm
Hardware
Metal
reflector
Support
arm
Hardware
Hardware
2
0
3
0
4
0
5
0
6
0
Elevation
Indicator
Elevation
Nut
Tick Marks
Sony reflector
Hardware
Support arm