


10
VI. Establishing a Network Connection
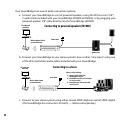
Wired Ethernet Network: After you have connected SoundBridge to your computer via a
switch/hub/router (or directly to your computer via crossover cable) and powered up the unit,
SoundBridge will auto-configure its network settings (using DHCP or AutoIP). There is nothing
you need to do. If for some reason you have trouble connecting to your network, select the
“SYSTEM CONFIGURATION” option, then select “SHOW WIRED ETHERNET STATUS.”
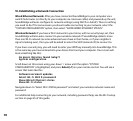
Wireless Network: If you have a Wi-Fi network in your home, with no security keys set, then
SoundBridge will also auto-connect to your wireless network. If SoundBridge detects more
than one Wi-Fi network (as some advanced users have in their home, or if your neighbor’s
signal is leaking over), then you will be asked to select the SSID (network ID) to connect to.
If you have a security key, you will need to enter your WEP key manually into SoundBridge. This
is the same key you have entered into your Access Point and your computer. Your screen will
look something like this:
No music libraries found (why?)
System configuration
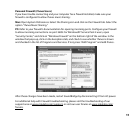
Scroll down on this screen using your down arrow until the option “SYSTEM
CONFIGURATION” is highlighted, and press Select [4] on your remote control. You will see a
screen that looks like this:
Software version & updates
Select Wi-Fi SSID & password
Show Wired Ethernet status
Show Wi-Fi status
Navigate down to “Select Wi-Fi SSID & password” and select your wireless network name and
password.
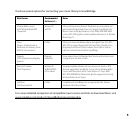
For additional help connecting to your network, including password help, see the Wi-Fi setup
section on page 45 of this guide.