English - 41
System Setup
1
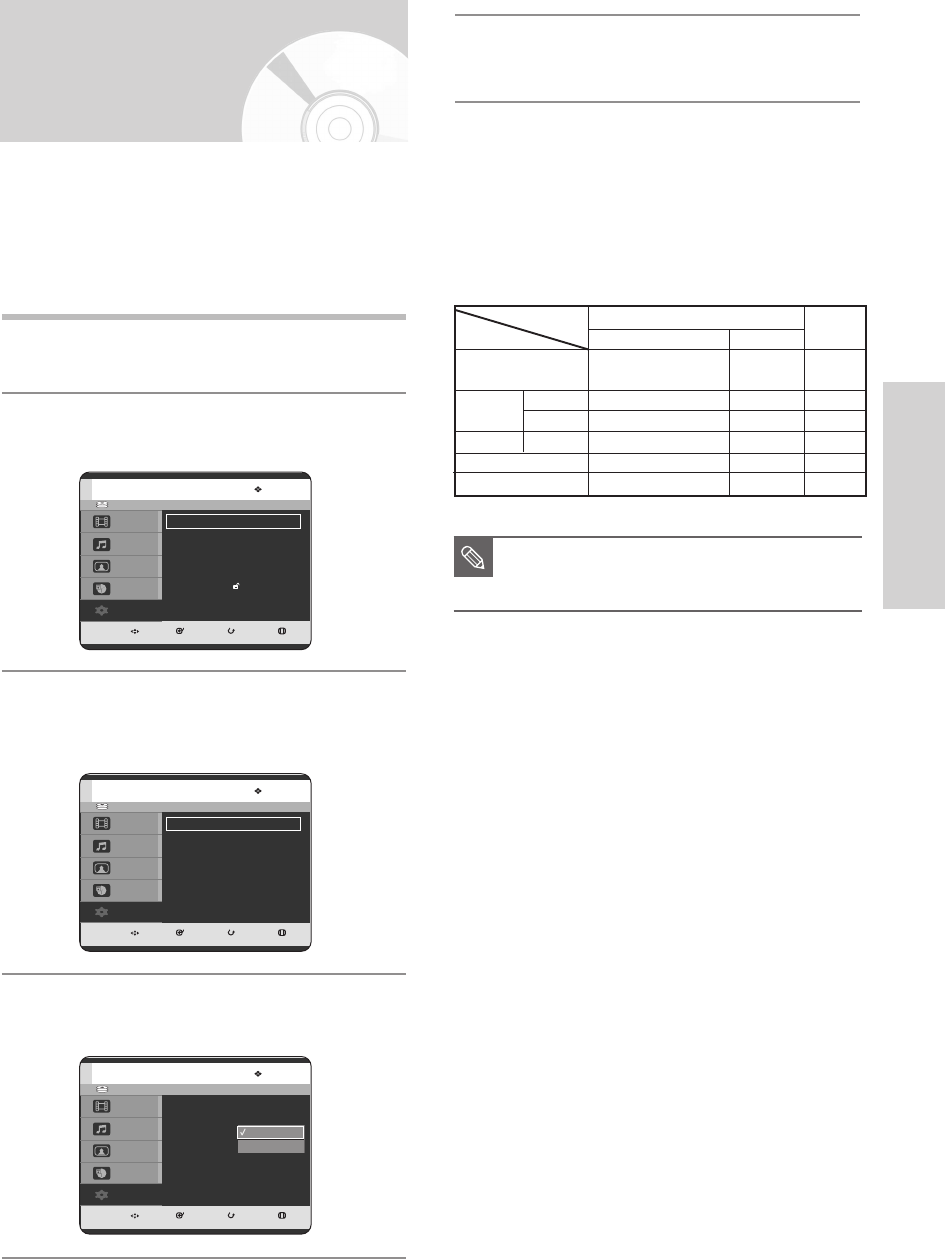
With the unit in Stop mode, press the MENU
button.
2
Press the …† buttons to select Setup, then press
the
OK or √ button.
3
Press the …† buttons to select Video
, then
press the
OK or √
button.
Video setup menu will be displayed.
4
Press the …† buttons to select Video Output
,
then press the
OK or √
button.
HDD
MOVE SELECT RETURN EXIT
Title
Music
Photo
Programme
Setup
Setup
System
√√
Clock Set
√√
Language
√√
Audio
√√
Video
√√
Parental Control
√√
Install
√√
HDD
MOVE SELECT RETURN EXIT
Title
Music
Photo
Programme
Setup
Video
TV Aspect : 16:9 Wide
√√
3D Noise Reduction : Off
√√
Video Output : Component
√√
HDD
MOVE SELECT RETURN EXIT
Title
Music
Photo
Programme
Setup
Video
TV Aspect : 16:9 Wide
√√
3D Noise Reduction : Off
√√
Video Output : Component
√√
Component
RGB
You can enjoy high quality image through RGB or
Component video connections. RGB video output is
available connecting scart jack(AV1) and component
video output is available connecting component(Y,P
B
,P
R
)
jack. Only one of these signals can be selected at one
time.
Setting up Video Output
Options
5
Press the …†
buttons to select the desired
item, then press the
OK or √
button.
In Component mode, you can set video output to
Progressive(P.SCAN) or Interlace, see page 42~43.
When the HDMI cable is not connected, available
video output jacks are as follow.
Available Video Output Jack
Component Output
(Y, Pb, Pr)
AV1 Scart
R, G, B
Composite
X
O
X
O
O
O
O
(TV in progressive mode)
X
X
X
X
X
O
X
O
O
O
O
AV2 Scart
Composite Video out
S-Video out
Composite
Setting mode
RGB Mode
Output jack
P.SCAN off mode (Interlace mode)
P.SCAN on mode
Component mode
■
When the HDMI cable is connected,
other Video output does not operate.
NOTE
3-00852A-XEU_25-45_SETUP 2005.6.25 10:1 AM Page 41
