


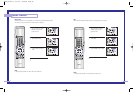
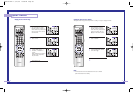


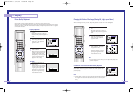
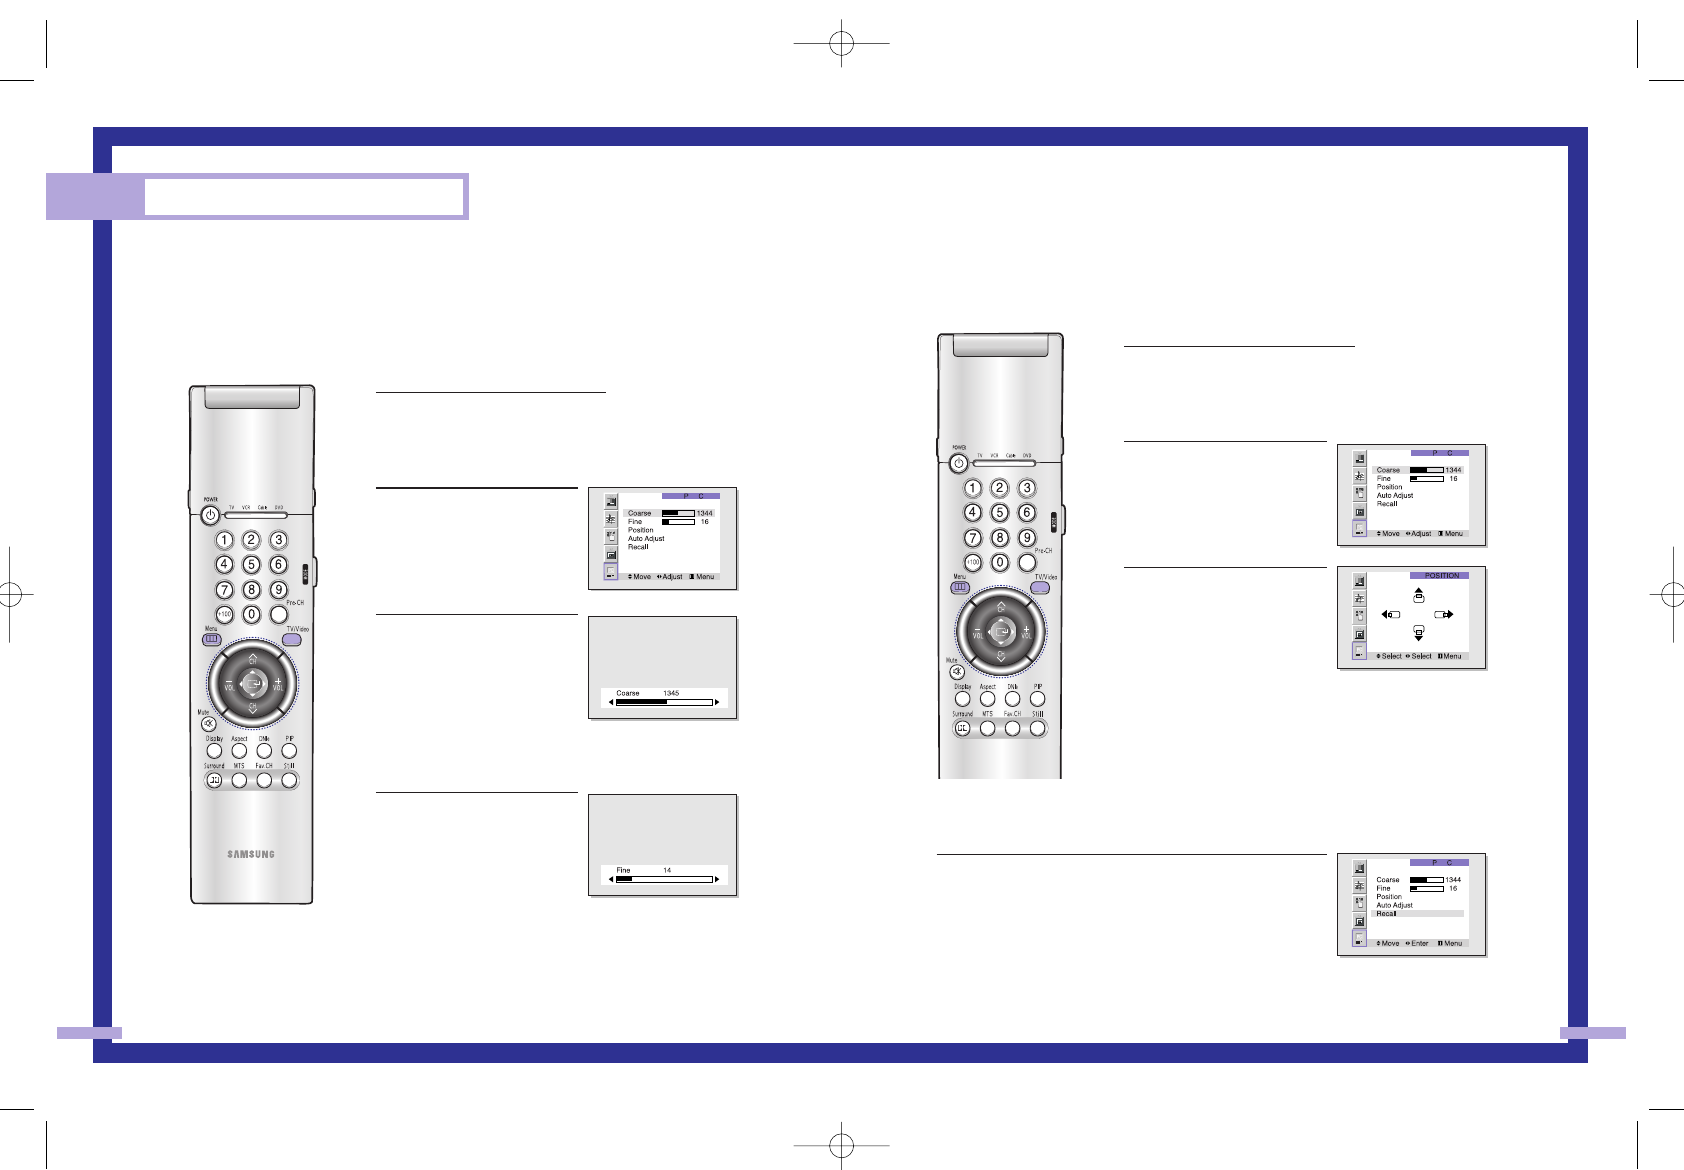
Changing the Position of the Image (Moving left, right, up and down)
After connecting the TV to your PC, adjust the position of screen if it is not well-aligned.
1
Press TV/VIDEO on the remote con-
trol.
Move the joystick up or down to
select PC, then press the joystick to
enter.
2
Press the Menu button.
Move the joystick down to
select “PC”, then press the
joystick to enter.
3
Move the joystick down to
select “Position”, then press
the joystick to enter.
Adjust the position of screen
by using the joystick button.
Press the Menu to exit.
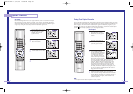
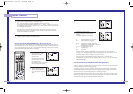
NOTE
• If a PC signal is input to DVI, you can’t adjust the quality and
position of picture.
To Initialize the Screen Position and Picture Quality Adjustment
After steps 1~2 above are completed, move the joystick down to
select Recall. Press the joystick to initialize the screen position and
picture quality.
NOTE
• When ‘Recall’ is active, the TV screen will become black and return to
the original view about five seconds later. (This is a normal opera-
tion.)
83
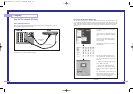
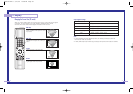
Picture Quality Adjustment
The purpose of picture quality adjustment is to remove or reduce picture noise.
If the noise is not removed by fine tuning alone, then do the frequency adjustments to the utmost
and fine tune again. After the noise has been reduced, re-adjust the picture so that it is aligned
on the center of screen.
Frequency Adjustment
1
Press TV/VIDEO on the remote
control.
Move the joystick up or down to
select PC, then press the joystick to
enter.
2
Press the Menu button.
Move the joystick down to
select “PC”, then press the
joystick to enter.
3
Move the joystick down to
select “Coarse”.
Remove picture noise (vertical
stripes) on the screen by mov-
ing the joystick right or left.
(If frequency is not set proper-
ly, then vertical stripes will
appear on the screen).
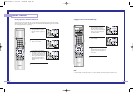
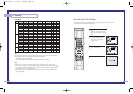
Fine tuning
4
Move the joystick down to
select “Fine”.
Remove picture noise (vertical
stripes) on the screen by mov-
ing the joystick right or left.
(If phase is not set properly,
the picture may be blurry.)
Press the Menu to exit.
PC Display
82
BP68-00142A-5 5/27/03 10:08 AM Page 82