E-11
Setup & Connections
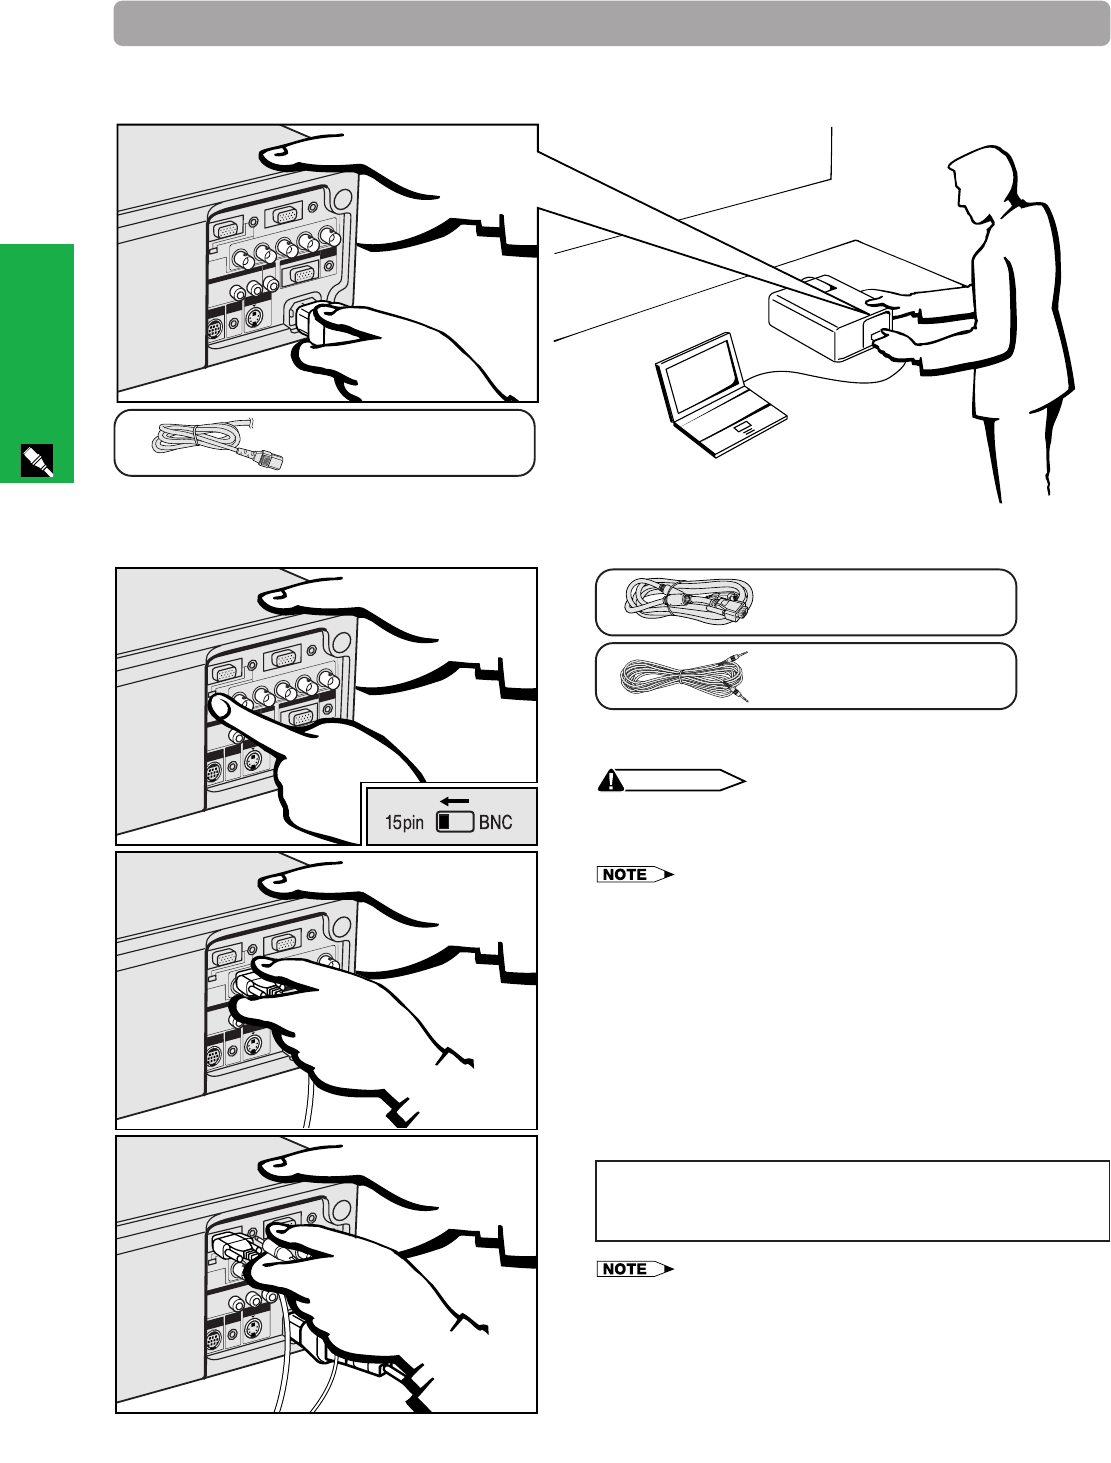
2. Connecting the Projector
Power cord
QACCU5013CEZZ
Connecting the Projector to a Computer
You can connect your projector to a computer for projection of full color computer images.
Connecting the Power Cord
Plug the supplied power cord into the AC socket on the back of the projector.
Computer audio cable
QCNW-4870CEZZ
Computer cable
QCNW-5304CEZZ
CAUTION
• Before connecting, be sure to turn both the projector and the
computer off. After making all connections, turn the projector
on first. The computer should always be turned on last.
• Please read the computer’s operation manual carefully.
• Refer to pages 55 and 56 “Input Signals (Recommended Timing)” for a
list of computer signals compatible with the projector. Use with computer
signals other than those listed may cause some of the functions not to
work.
Connecting an IBM-PC or a Macintosh computer
(Slide the 15 pin/BNC switch on the rear terminals to the 15
pin position.)
Plug one end of the supplied computer cable into the INPUT
1 or 2 port on the projector and the other end into the Monitor
output port on the computer, and secure the plugs by
tightening the thumb screws.
When connecting this projector to a computer, select
“Computer/RGB” for “Signal Type” on the GUI menu. (See
page 40.)
• A Macintosh adaptor may be required for use with some Macintosh
computers. Contact your nearest Authorized Sharp Industrial LCD
Products Dealer or Service Center.


