E-12
Setup & Connections
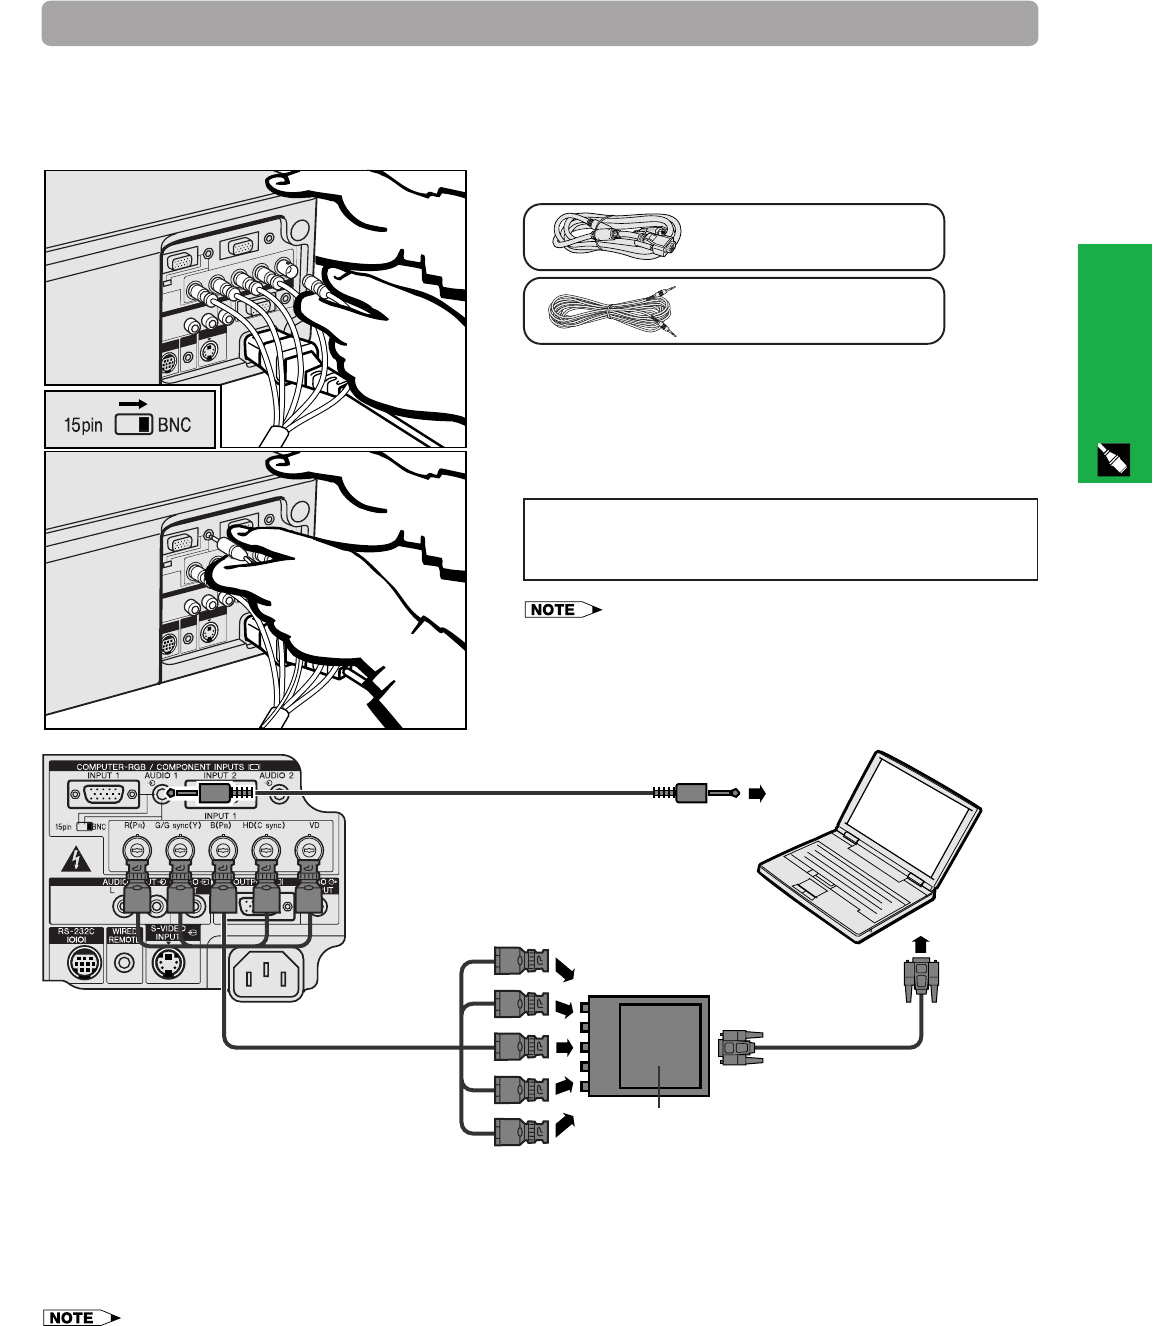
2. Connecting the Projector Continued
• This projector uses a 5 BNC computer input to prevent a deterioration of image quality.
• Connect the R (PR), G/G sync (Y), B (PB), HD (C sync) and VD cables to the correct input terminals on the
projector and an RGB switcher (sold separately) connected to the computer, or connect a 5 BNC-VGA cable
(sold separately) directly from the input terminals on the projector to the computer.
Connecting other compatible computers
Computer audio cable
QCNW-4870CEZZ
Computer cable
QCNW-5304CEZZ
(Slide the 15 pin/BNC switch on the rear terminals to the
BNC position.)
When connecting the projector to a compatible computer
other than an IBM-PC (VGA/SVGA/XGA/SXGA/UXGA) or
Macintosh (i.e. Workstation), a separate cable may be
needed. Please contact your dealer for more information.
When connecting this projector to a computer, select
“Computer/RGB” for “Signal Type” on the GUI menu. (See
page 40.)
• Connecting computers other than the recommended types may result
in damage to the projector, the computer, or both.
• AUDIO INPUT 1 or 2 accepts INPUT 1 or 2 port input.
To audio output
terminal
“Plug and Play” function (when connecting to a 15 pin terminal)
• This projector is compatible with VESA-standard DDC 1/DDC 2B. The projector and a VESA DDC compatible
computer will communicate their setting requirements, allowing for quick and easy setup.
• Before using the “Plug and Play” function, be sure to turn on the projector first and the connected computer last.
• The DDC, Plug and Play function of this projector operates only when used in conjunction with a VESA DDC compatible computer.
Computer audio cable
To R (PR), G/G sync (Y), B (PB),
HD (C sync) and VD output terminals
To RGB Switcher
RGB Switcher
(sold separately)
Computer cable
5 BNC-VGA cable
(sold separately)


